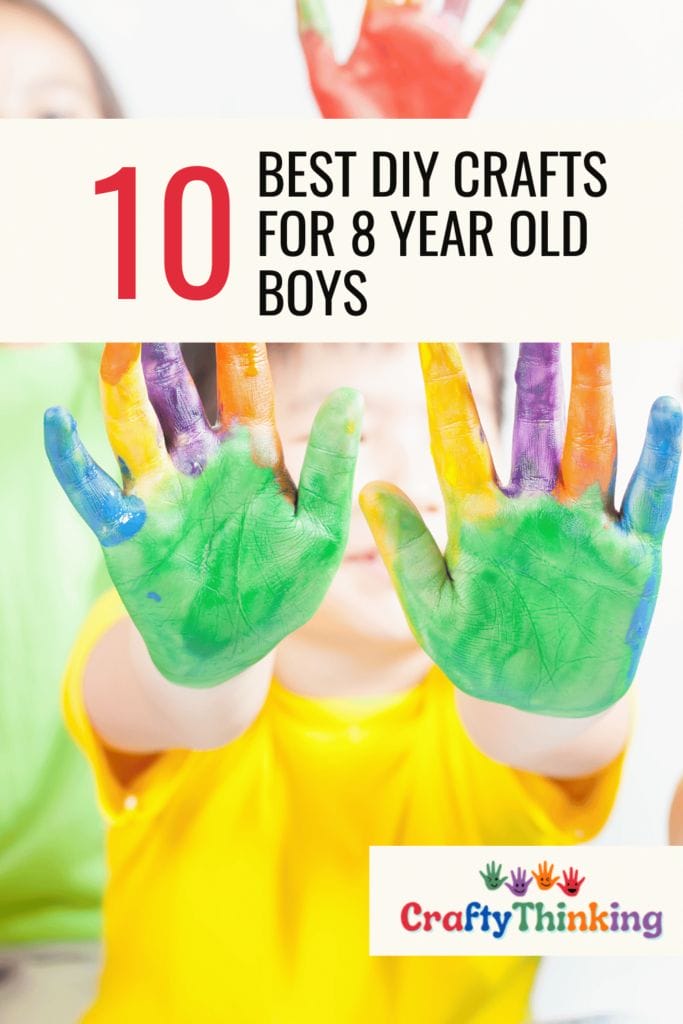
20 Best DIY Craft Ideas For 8 Year Old Boy: Discover the Magic Inside!
Are you looking for fun and creative Craft Ideas For 8 Year Old Boys?
Crafting is not only a great way to spend quality time together, but it also helps develop important skills such as fine motor coordination, problem-solving, and creativity.
From DIY projects to using everyday materials, there are endless possibilities for crafting with your little one.
One of the best ways to get started is by choosing a project that your child is interested in.
Whether it’s superheroes or animals, finding a theme that excites them will make the process more enjoyable and engaging.
With these craft ideas for 8 year old boys, you’ll have plenty of options to choose from that are both easy and fun. So grab some supplies and get ready to unleash your creativity!
You might also like:
- Craft Ideas for 2 Year Old Boys
- Craft Ideas for 3 Year Old Boys
- Craft Ideas for 4 Year Old Boys
- Craft Ideas for 5 Year Old Boys
- Craft Ideas for 6 Year Old Boys
- Craft Ideas for 7 Year Old Boys
What are Craft Ideas for 8 Year Old Boys?
A: Craft ideas for 8-year-old boys can range from DIY spider web art and LEGO building projects to creating cardboard puppet theaters and bead bracelets.
Other ideas include pool noodle crafts, making birdhouses, creating comic books, and designing homemade board games, all tailored to match their interests and abilities.
10 Best DIY Craft Ideas For 8 Year Old Boy
You’re probably wondering what kind of cool stuff you can make with your hands that will keep you entertained and creative.
Luckily, there are plenty of craft ideas for 8 year old boys that will tickle your fancy! From easy crafts to more complex projects, there’s something for everyone.
Crafts for boys don’t have to be boring or uncool. In fact, many craft ideas are designed specifically with kids in mind.
One idea is creating your own superhero mask using felt and elastic. Another is building a cardboard castle complete with drawbridge and towers.
These fun and easy projects are perfect for rainy days or afternoons when you’re looking for something to do.
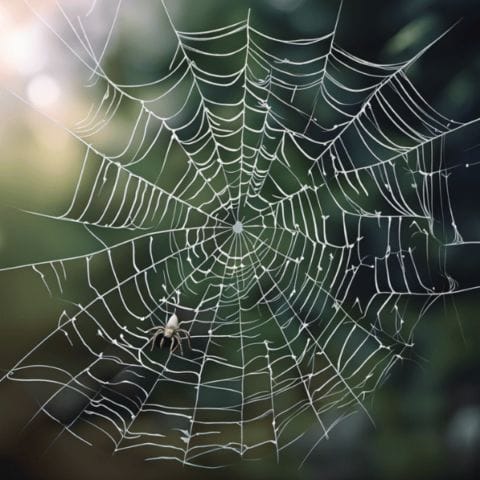
One project that kids love is the DIY spider web art project.
It’s an easy and fun craft that requires only a few materials such as black paint, white paper, and a plastic spider ring.
Not only is it simple to make, but it also allows kids to explore their creativity by coming up with different designs and patterns.
So why not give it a try? You might just discover a new hobby!


DIY Spider Web Art Project: Easy and Fun Craft for Boys
This quick and enjoyable project will have your young man spinning webs of creativity.
The DIY spider web art project is an easy and fun craft idea that boys will absolutely love.
All you need are a few simple materials such as glue, black paper, and a white gel pen to create beautiful spider webs that can be used to decorate notebooks, folders, or even turned into a bracelet.
- To get started on this fun craft, follow this tutorial:
- First, cut out circles from the black paper in various sizes.
- Then draw lines across the circles with the white gel pen to create the spider web effect.
- Next, use your fingers to carefully fold up the edges of the circle to give it dimension.
- Finally, use glue to attach your spider web creation onto whatever surface you choose.
Not only is this one of many easy crafts for boys that they’ll love doing on their own time but it also encourages them to develop their fine motor skills while being creative!
After completing this project with your little guy, why not move onto something else?
How to Make a DIY Spider Web Art Project
Materials
- Black construction paper
- White yarn
Tools
- Scissors
- Hole punch
Instructions
Step 1: Gather Your Materials
Step 2: Cut Out a Spider Web Shape
Cut a circle or a spider web shape out of the black construction paper.
Step 3: Punch Holes
Punch holes around the edges of the shape.
Step 4: Thread the Yarn
Thread the white yarn through the holes to create a spider web pattern.
Step 5: Secure the Ends
Tie off the ends of the yarn to secure your web.
Step 6: Display Your Spider Web Art
Once you've finished threading, your spider web art is ready to display!
Notes
Did you create this craft? If so, we would love to hear from you! Please feel free to leave a comment on the blog or share a photo of your creation on Pinterest.
Recommended Products
Thank you for supporting our family-owned business!
Balloon crafts are another great way for boys (and girls) alike to turn simple materials into cool crafts that they can enjoy making and playing with.
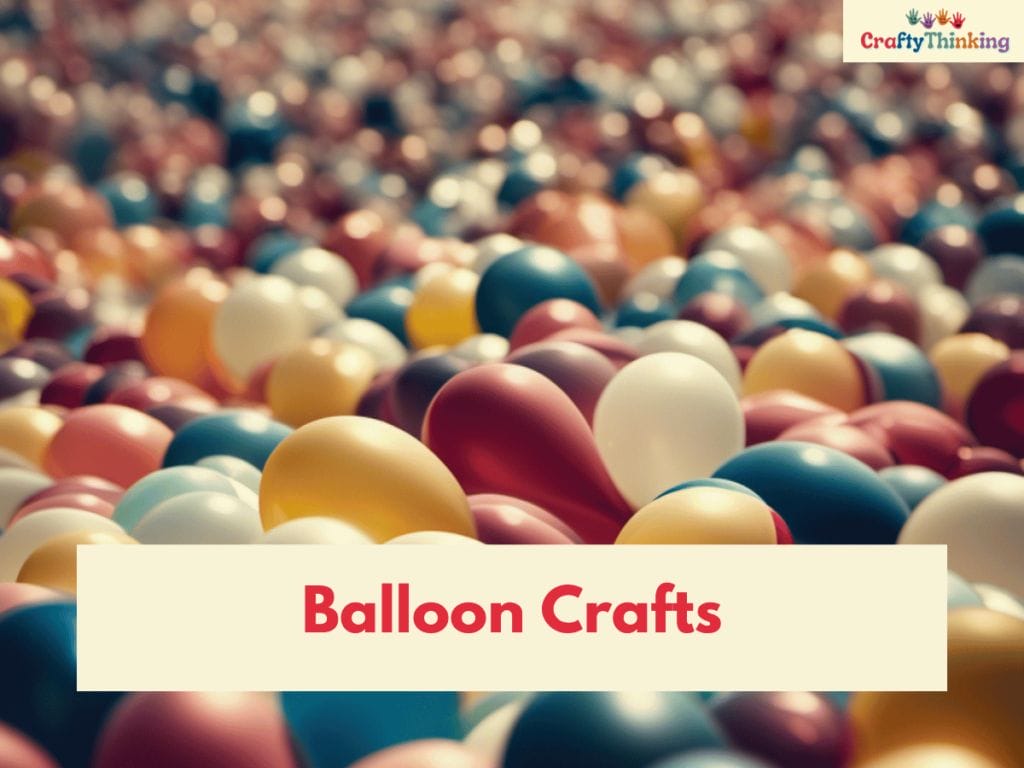
Balloon Crafts: Turning Simple Materials into Cool Crafts
Get ready to have a blast with these awesome balloon crafts that boys will love! Balloon crafts are simple to make and require materials that can be easily found at home.
These fun craft ideas are perfect for those rainy days when you’re stuck indoors.
Balloon rocket
- One of the easiest balloon crafts to make is the balloon rocket.
- All you need is a piece of string, two straws, some tape, and a balloon.
- This tutorial will guide you through step-by-step instructions on how to assemble the rocket.
- Once completed, your child can race their friends and siblings to see whose rocket goes the furthest!
Animal balloons
- Another great idea for a balloon craft is making animal balloons.
- This activity requires some creativity as your child can let their imagination run wild while creating different animals such as dogs, giraffes or even unicorns!
- Using this tutorial, your little one can learn how to twist balloons into animal shapes like a pro!
These two simple yet exciting balloon crafts are sure to keep your 8-year-old boy entertained for hours!

How to Make Balloon Crafts
Materials
- Balloons
- Craft glue
- Colorful tissue paper
Tools
- String
Instructions
Step 1: Inflate the Balloons
Blow up the balloons to the desired size.
Step 2: Apply Glue and Tissue Paper
Cover the balloon with craft glue and stick pieces of colorful tissue paper all over it. Allow it to dry.
Step 3: Pop the Balloon
Once the glue is dry, pop the balloon. You'll be left with a colorful tissue paper shell.
Step 4: Attach the String
Attach a piece of string to the top of your tissue paper shell to hang it up.
Notes
Did you create this craft? If so, we would love to hear from you! Please feel free to leave a comment on the blog or share a photo of your creation on Pinterest.
Recommended Products
Thank you for supporting our family-owned business!
When they’re done with these projects, they’ll be eager to try out more creative DIY activities like making bead bracelets: a fun and easy diy project for tweens.
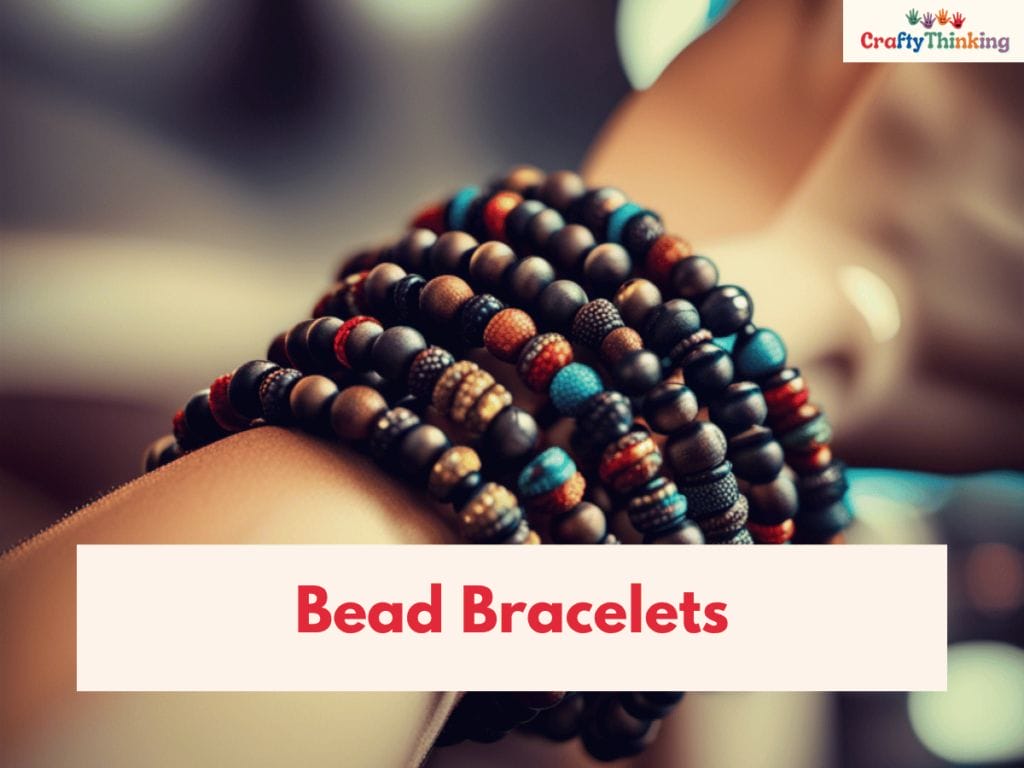
Bead Bracelets: A Fun and Easy DIY Project for Tweens
Let’s dive into the world of DIY jewelry with these bead bracelets that are as easy as pie and perfect for tweens to decorate and get crafty.
Bracelets have always been a popular accessory among young girls, but boys can also rock them in their own unique way.
This DIY project is not only fun, but it also encourages creativity, patience, and concentration.
- Making bead bracelets is a great way to spend quality time with your eight-year-old boy while unleashing his creativity.
- With plenty of different types of beads available at craft stores or online shops, you can choose from colorful plastic beads, natural wood beads, or even alphabet beads to spell out his name or favorite words.
- Your child will enjoy selecting the right combination of colors and patterns to create a unique bracelet that reflects his personality.
- Crafts for tweens should be engaging and entertaining enough to hold their interest while also being simple enough for them to complete without much help.
- Bead bracelets tick all those boxes and more!
- They’re an affordable DIY project that doesn’t require any fancy tools or equipment other than some elastic cord.
Plus, they make great gifts for friends and family members too! So why not get creative with your little one today?
With these bead bracelets under your belt, you’ve learned how easy it is to turn simple materials into cool crafts for tweens.

How to Make a Bracelet
Materials
- String or cord
- Beads
Tools
- Scissors
Instructions
Step 1: Cut the Cord
Cut a piece of cord long enough to fit around your wrist when tied.
Step 2: Thread the Beads
Thread the beads onto the cord in your desired pattern.
Step 3: Tie the Ends
Once you've added all your beads, tie the ends of the cord together to form a bracelet.
Notes
Did you create this craft? If so, we would love to hear from you! Please feel free to leave a comment on the blog or share a photo of your creation on Pinterest.
Recommended Products
Thank you for supporting our family-owned business!
But don’t stop there! Unleash your creativity with Lego – more than just building blocks – in our next section.
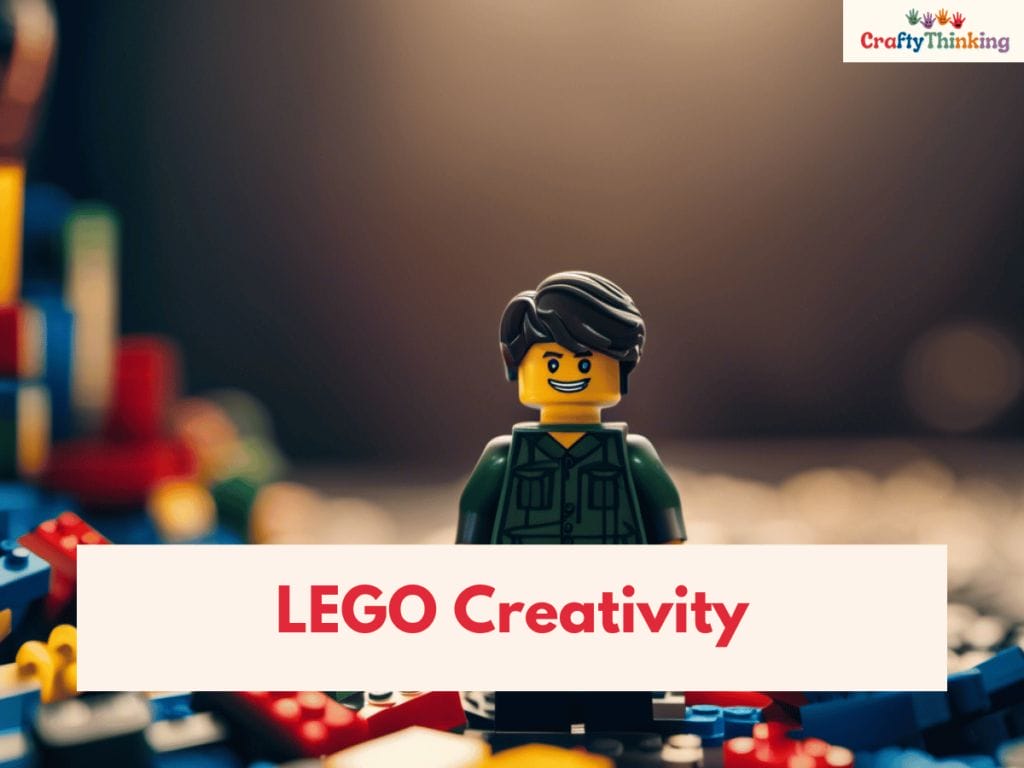
Unleashing Creativity with LEGO: More Than Just Building Blocks
You’re about to discover the limitless possibilities of LEGO, a world of creativity and imagination that will inspire and excite you like never before.
- LEGO is more than just building blocks; it’s a tool for unleashing your inner artist.
- You can create anything you want with LEGO, whether it’s a spaceship, a castle or even your favorite superhero.
- One of the best things about LEGO is that it’s an indoor activity, perfect for rainy days or when you just don’t feel like going outside.
- Plus, there are endless craft projects you can make with LEGO that are easy to make and require only basic materials like glue and paper.
- With step-by-step instructions available online, older kids can tackle more complex builds while younger ones can start with simpler designs.
Whether you’re looking for a fun way to spend an afternoon or hoping to nurture your child’s creative talents, LEGO is the ultimate craft idea for boys.
How to Build a Lego World
Materials
- A variety of Lego bricks
- Lego baseplates
Instructions
Step 1: Plan Your World
Decide what you want to include in your Lego world. This could be buildings, roads, parks, or anything else you can imagine.
Step 2: Start Building
Begin building your world on the baseplates. You can start with the largest structures and then fill in the smaller details.
Step 3: Expand Your World
As you get more Lego bricks, you can continue to expand and modify your world.
Notes
Did you create this craft? If so, we would love to hear from you! Please feel free to leave a comment on the blog or share a photo of your creation on Pinterest.
Recommended Products
Thank you for supporting our family-owned business!
So grab some bricks and let your imagination run wild! Next up: cardboard puppet theater – an exciting craft idea for boys that will take their storytelling skills to the next level.
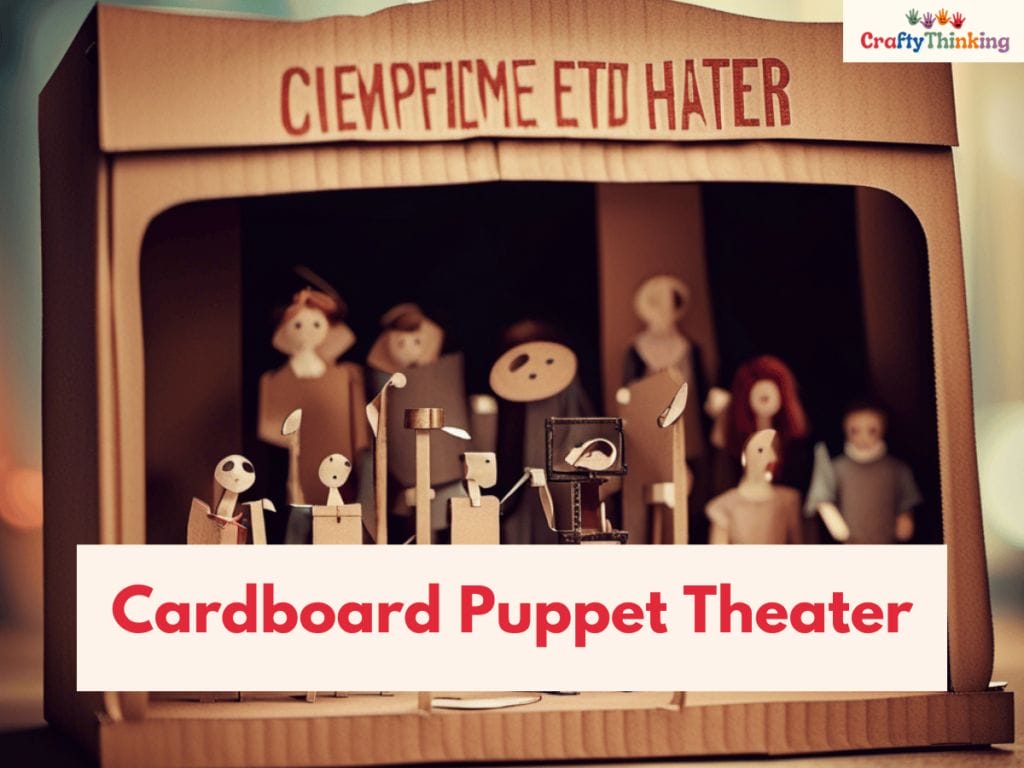
Cardboard Puppet Theater: An Exciting Craft Idea for Boys
Looking for more engaging craft project ideas for your 8-year-old boy? Look no further than the cardboard puppet theater!
This fun art activity will let your child unleash their creativity and bring their imagination to life.
With step-by-step instructions, this craft idea is easy to follow and promises hours of fun.
- First off, gather all the materials you need: a large piece of cardboard, scissors, glue, paint or markers, popsicle sticks or straws, and other decorations like fabric scraps or glitter.
- Start by cutting out a rectangular piece from the cardboard that’ll serve as the base of your puppet theater.
- Cut out two smaller rectangles on top of it to create windows where the puppets can perform.
- Then comes the fun part – decorating!
- Paint or color in your cardboard with fun designs or images that match your child’s favorite themes.
- Add popsicle sticks or straws to create puppet holders, and use fabric scraps or glitter to add some sparkle.
- With its limitless possibilities for storytelling and creativity, building a cardboard puppet theater is an exciting craft idea that any kid would love.
- So why not try it out today?

How to Make Finger Puppets
Materials
- Felt or colored paper
- Craft glue
- Decorative items (googly eyes, yarn for hair, etc.)
Tools
- Scissors
Instructions
Step 1: Cut Out the Puppet Shape
Cut out a rectangle from the felt or paper. This will form the body of the puppet.
Step 2: Glue the Edges
Fold the rectangle into a tube shape and glue the edges together. This will form the body of the puppet.
Step 3: Add Decorations
Use craft glue to add decorations to your puppet, such as googly eyes, yarn for hair, etc.
Step 4: Let it Dry
Allow your puppet to dry completely before playing with it.
Notes
Did you create this craft? If so, we would love to hear from you! Please feel free to leave a comment on the blog or share a photo of your creation on Pinterest.
Recommended Products
Thank you for supporting our family-owned business!
And if you’re looking for even more fun art activities for your child’s age group, stay tuned for our next section on Playdough Extravaganza!
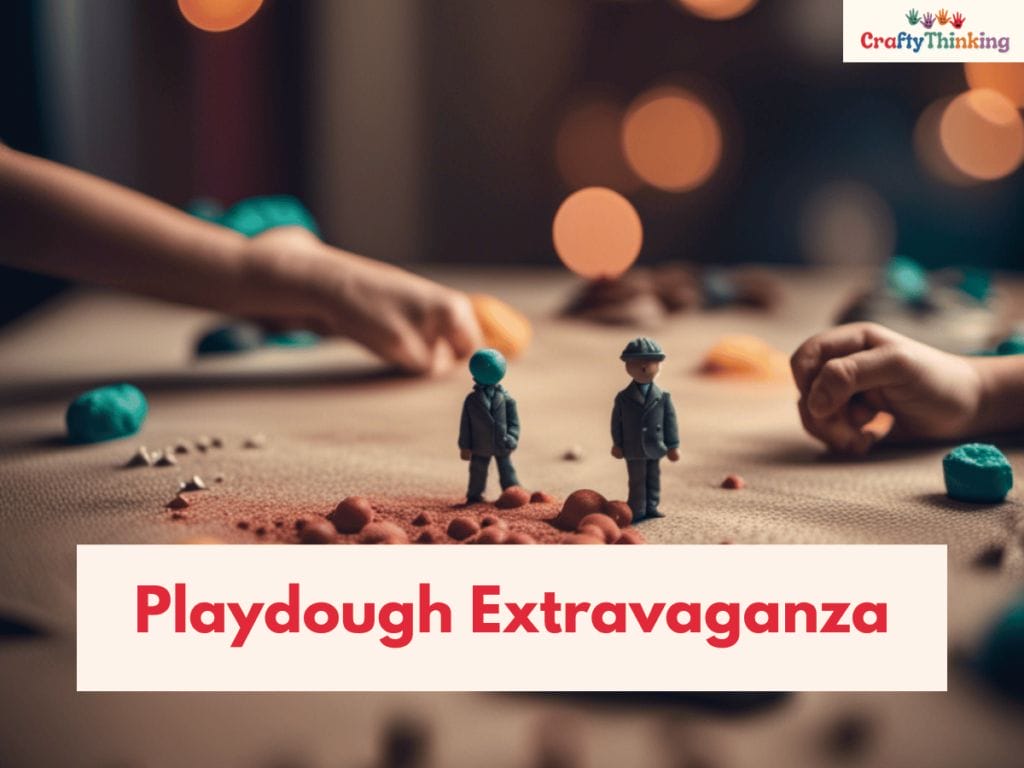
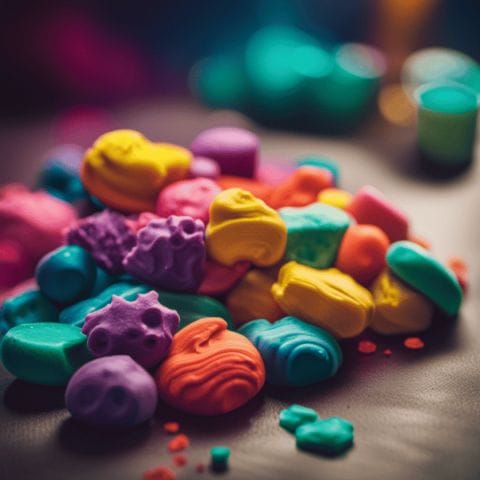
Playdough Extravaganza: A Fun Art Activity for the 8-12 Age Group
If you’re looking for a hands-on art activity that’ll keep your 8-12 year old entertained, Playdough Extravaganza is the perfect choice!
This simple craft project lets kids unleash their creativity and imagination while having fun with playdough.
The best part? It’s easy to set up and requires only a few basic materials.
- To get started, all you need is some store-bought or homemade playdough, cookie cutters, rolling pins, and other small tools like plastic knives or forks.
- Kids will love getting their little hands messy as they mold and shape the dough into different objects and figures.
- They can even mix colors to create new shades!
- Crafts are perfect for fostering creativity and imagination in children, and this Playdough Extravaganza activity is no exception.
- Your 8-12 year old will have a blast creating all sorts of things out of playdough – from animals to vehicles to imaginary creatures.
This activity is also great for improving fine motor skills, hand-eye coordination, and concentration.
Incorporating fun activities like these into your child’s day can be an excellent way to encourage learning while keeping them entertained.
How to Make Playdough Creations
Materials
- Playdough (store-bought or homemade)
Tools
- Rolling pin
- Playdough tools
Instructions
Step 1: Decide What to Make
Decide what you want to create with your playdough.
This could be anything from animals to buildings to abstract shapes.
Step 2: Shape the Playdough
Use your hands and playdough tools to shape the playdough into your desired creation.
Step 3: Display Your Creation
Once you're happy with your creation, display it proudly!
Notes
Did you create this craft? If so, we would love to hear from you! Please feel free to leave a comment on the blog or share a photo of your creation on Pinterest.
Recommended Products
Thank you for supporting our family-owned business!
And if you’re looking for more ideas on how to engage your child creatively at home, check out our upcoming section about pool noodle crafts: transforming summer fun into art!
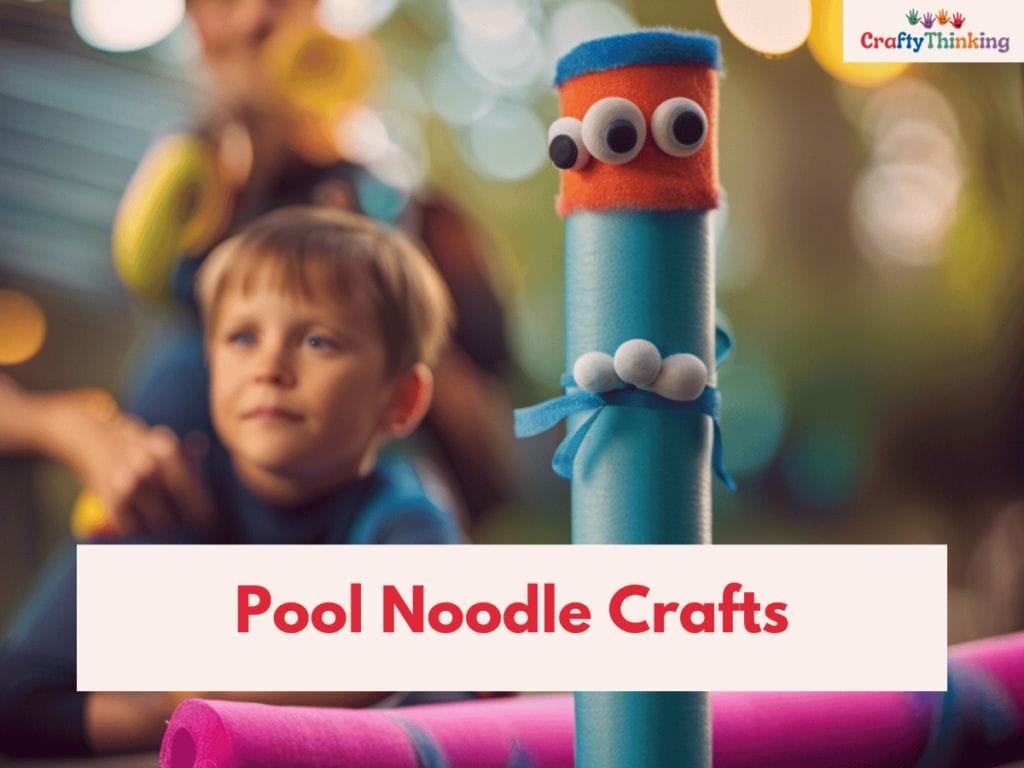
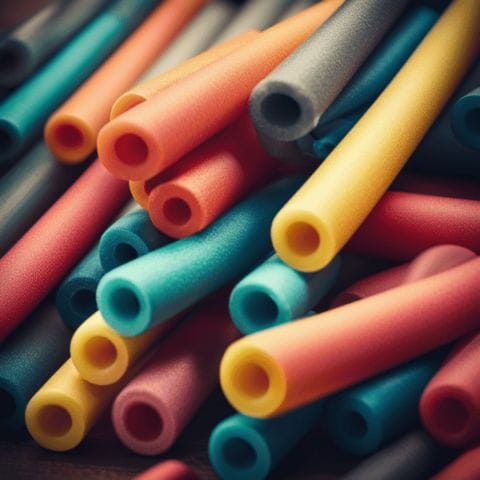
Pool Noodle Crafts: Transforming Summer Fun into Art
Get ready to turn your summer pool fun into colorful and creative art with these awesome pool noodle crafts!
Kids love to spend hours playing in the water during summer, but why not take it up a notch by creating something unique out of those brightly colored pool noodles?
These easy DIY crafts will help your 8-year-old boy channel his creativity while having fun under the hot sun.
Here are four exciting ideas that you can do at home:
Pool Noodle Rockets
- Cut a pool noodle into small pieces and attach them together with rubber bands or tape.
- Decorate them with stickers and markers to make them look like rockets.
Pool Noodle Boats
- Cut a pool noodle in half lengthwise and use it as the base for a sailboat.
- Add paper sails, toothpick flags, and plastic figurines to complete this cute craft.
Pool Noodle Sprinkler
- Poke holes all over a long piece of pool noodle using an awl or sharp object.
- Attach one end to a garden hose and let the kids run through the cool spray.
Pool Noodle Obstacle Course
- Create an obstacle course using cut-up pieces of different colored noodles.
- Use string or rope to create tunnels, weave noodles between chairs, and balance on top of floating noodles.
These crafts are not only perfect for summertime activities but also provide ample opportunities for your child’s imagination to flourish while they learn new skills.
How to Make a Pool Noodle Bubble Gun
Materials
- Pool noodle
- Plastic container
- Bubble solution
Tools
- Scissors
Instructions
Step 1: Cut the Pool Noodle
Cut a small section of the pool noodle. This will be the handle of your bubble gun.
Step 2: Make a Hole in the Container
Cut a hole in the bottom of the plastic container. The hole should be the same size as the pool noodle.
Step 3: Attach the Pool Noodle to the Container
Insert the pool noodle into the hole in the container. It should fit snugly.
Step 4: Dip the Pool Noodle in Bubble Solution
Fill the container with bubble solution and dip the pool noodle into it.
Step 5: Blow Bubbles
Blow through the other end of the pool noodle to create bubbles.
Notes
Did you create this craft? If so, we would love to hear from you! Please feel free to leave a comment on the blog or share a photo of your creation on Pinterest.
Recommended Products
Thank you for supporting our family-owned business!
As Christmas is fast approaching, why not continue fostering your child’s creativity by making DIY ornaments?
Here’s another idea that might interest him – DIY Christmas Ornaments: A Fun Craft Idea For Boys…
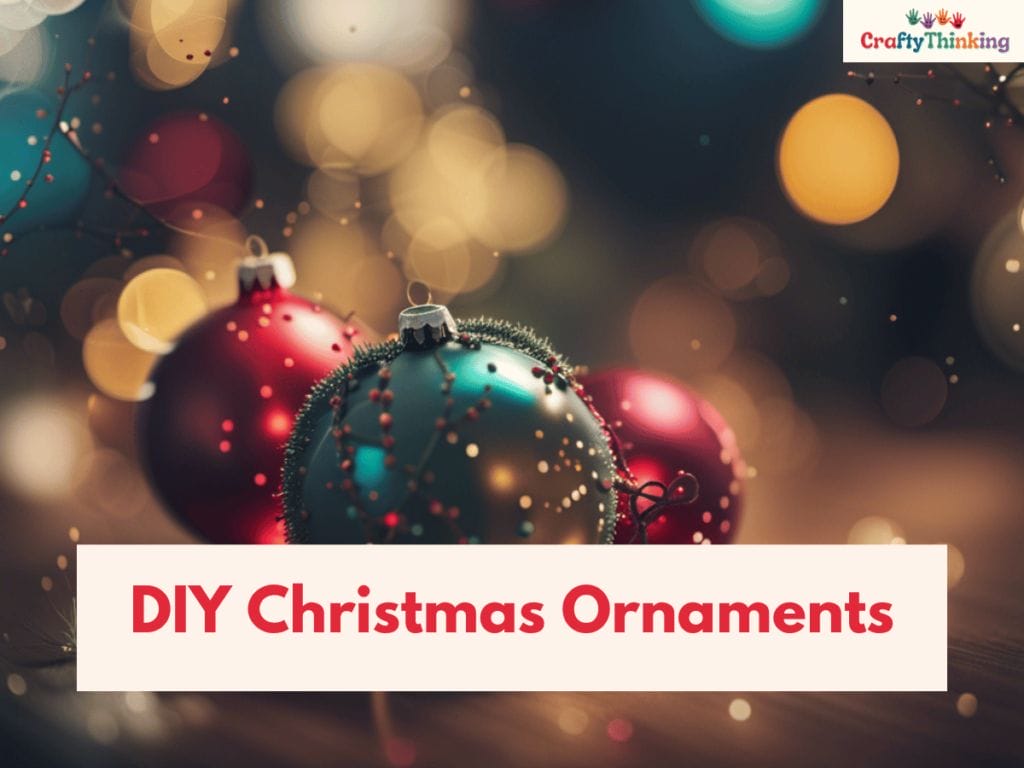
DIY Christmas Ornaments: A Fun Craft Idea for Boys
Who says Christmas ornament-making is just for girls? Boys can get in on the fun too with this DIY craft idea!
Make your own unique ornaments to hang on the tree or give as gifts during the holiday season.
You’ll need some basic supplies like popsicle sticks, glitter, a hot glue gun, cardboard tubes, and a little bit of creativity.
Here’s a table to help you get started:
| Supplies | Ideas | Tips |
|---|---|---|
| Popsicle Sticks | Dinosaur Ornaments | Paint them green and add spikes made from toothpicks or pipe cleaners. |
| Glitter | Snowflake Ornaments | Mix white and silver glitter together for a sparkly effect. |
| Hot Glue Gun | Santa Hat Ornaments | Use red felt for the hat and cotton balls for the trim. |
| Cardboard Tubes | Reindeer Ornaments | Cut out antlers from brown construction paper and glue them onto the tube. |
Hosting a birthday party during winter? This craft idea could be an exciting activity to keep kids engaged while also creating something special they can take home with them.
Turn up some holiday tunes and let their imagination run wild as they design their own ornaments.
Incorporating these fun winter crafts into your routine is not only enjoyable but also helps cultivate creativity in young children.

How to Make a DIY Christmas Ornament
Materials
- Clear glass or plastic ornaments
- Glitter, sequins, or small beads
- Ribbon or ornament hooks
- Funnel (optional)
Tools
Instructions
Step 1: Gather Your Materials
Step 2: Remove the Top of the Ornament
Carefully remove the metal top of the ornament. Be careful not to break the ornament.
Step 3: Add Glitter or Beads
Using a funnel, if necessary, pour glitter, sequins, or small beads into the ornament.
You can use one color or mix different colors for a fun effect.
Step 4: Replace the Top
Once you've added as much glitter or beads as you want, carefully replace the metal top of the ornament.
Step 5: Add Ribbon or Hook
Thread a piece of ribbon through the loop on the top of the ornament and tie it in a bow, or attach an ornament hook.
Step 6: Hang Your Ornament
Your DIY Christmas ornament is now ready to hang on your tree!
Notes
Did you create this craft? If so, we would love to hear from you! Please feel free to leave a comment on the blog or share a photo of your creation on Pinterest.
Recommended Products
Thank you for supporting our family-owned business!
Next up, we’ll explore ninja crafts that encourage boys to embrace their inner warrior through cool crafting activities!
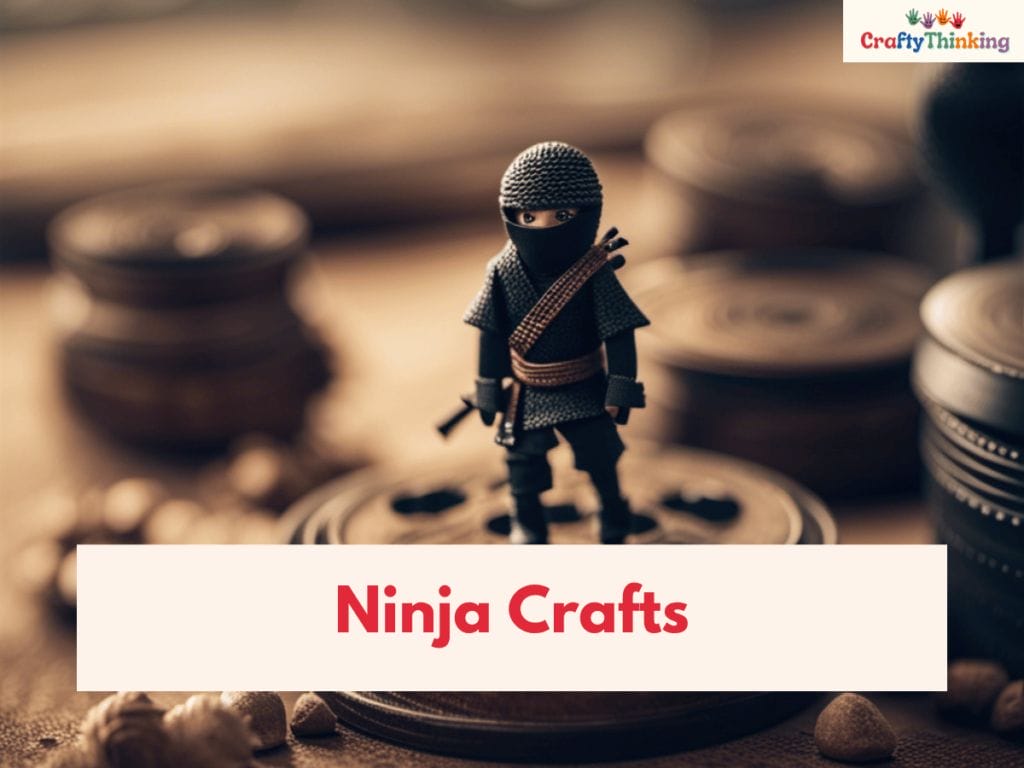
Ninja Crafts: Embrace the Warrior Within with Cool Crafts
Embracing the warrior within can be a fun and exciting way for young boys to channel their creative energy, as seen in these ninja-inspired DIY projects.
If you’re looking for a great craft idea for your 8-year-old boy, why not try making some cool crafts with a ninja theme?
Here are some ideas to get you started:
DIY bubble wrap ninja stars
- Cut out star shapes from bubble wrap and paint them black.
- Attach string or ribbon to make them easy to hang.
Clothespin ninjas
- Paint clothespins black and add googly eyes.
- Use colorful pipe cleaners to create arms and legs that can be bent into different poses.
Ninja finger puppets
- Use felt or construction paper to make small finger puppets shaped like ninjas.
- Add details like belts or weapons using markers or glue-on pieces.
Paper stars
- Fold origami-style paper stars using black paper.
- These can be used as decorations on walls or strung up on strings.
These crafts are all easy and affordable, many of the materials can even be found at dollar stores! Plus, they allow kids to use their imaginations while also learning about different cultures and traditions.
Incorporating a ninja theme into crafting is a great way to engage young boys who may not typically enjoy more traditional arts and crafts activities.
Not only will they have fun creating their own DIY projects, but they’ll also learn about martial arts culture and history in the process.
How to Make a Ninja Crafts: DIY Ninja Mask
Materials
- Black construction paper
- String or elastic
Tools
- Scissors
- Hole punch
Instructions
Step 1: Gather Your Materials
Step 2: Cut Out the Mask Shape
Cut a rectangle out of the black construction paper.
Then cut out two eye holes in the rectangle.
Step 3: Punch Holes on the Sides
Use the hole punch to make a hole on each side of the mask, near the edges.
Step 4: Attach the String or Elastic
Cut a length of string or elastic long enough to go around your head.
Thread one end through each hole in the mask and tie a knot to secure it.
Step 5: Wear Your Ninja Mask
Your DIY ninja mask is now ready to wear!
Notes
Did you create this craft? If so, we would love to hear from you! Please feel free to leave a comment on the blog or share a photo of your creation on Pinterest.
Recommended Products
Thank you for supporting our family-owned business!
Next up, why not try making your own bowls?
This fun and easy art project is perfect for young kids who love getting their hands dirty with clay!
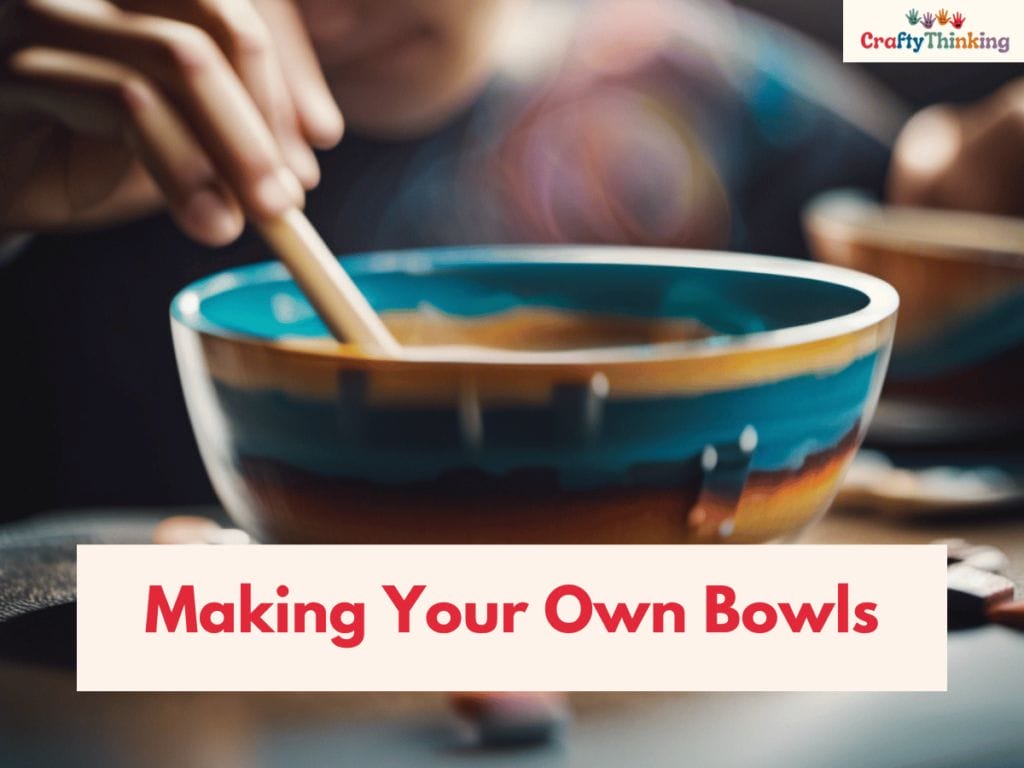
Making Your Own Bowls: A Fun and Easy Art Project
Making your own bowls is a simple and enjoyable art project that any 8-year-old boy can do.
It’s a great way for kids to use their imagination and create something that looks great.
- With just a few basic materials, such as air-dry clay or oven-bake clay, your child can make his very own customized bowl.
- This craft idea is not only fun but also an easy art project that will allow your child to develop his fine motor skills.
- They’ll learn how to shape the clay and mold it into the desired shape of the bowl.
- Plus, they’ll have the opportunity to choose from different colors and designs which adds another layer of creativity.
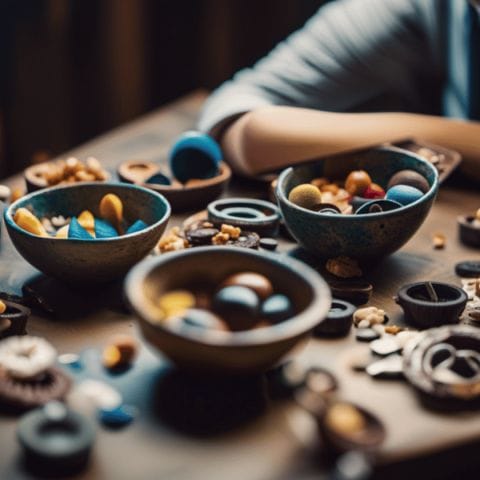
- Once completed, these bowls are perfect for storing small items like jewelry or coins.
And best of all, this craft activity is one that you can do with your child!
It’s a perfect bonding activity while allowing them to express their creativity in their unique way.
How to Make DIY Bowls
Materials
- Air-dry clay
- Rolling pin
- Bowl or round object to use as a mold
- Pain
- Sealant (optional)
Tools
- Brushes
Instructions
Step 1: Gather Your Materials
Step 2: Roll Out the Clay
Use the rolling pin to roll out the clay to about a quarter-inch thickness.
Step 3: Shape the Clay
Lay the clay over your bowl or round object and gently press it into shape.
Trim off any excess clay.
Step 4: Let it Dry
Allow the clay to dry completely.
This could take 24-48 hours depending on the thickness of the clay and the humidity in your area.
Step 5: Paint Your Bowl
Once the clay is dry, you can paint your bowl.
Let the paint dry completely.
Step 6: Seal the Bowl
If you want your bowl to be water-resistant, you can seal it with a clear sealant.
Follow the instructions on the sealant's packaging.
Step 7: Let it Dry
Allow the sealant to dry completely before you use the bowl.
Notes
Did you create this craft? If so, we would love to hear from you! Please feel free to leave a comment on the blog or share a photo of your creation on Pinterest.
Recommended Products
Thank you for supporting our family-owned business!
Up next, caterpillar bookmarks: a super cute craft idea for boys!
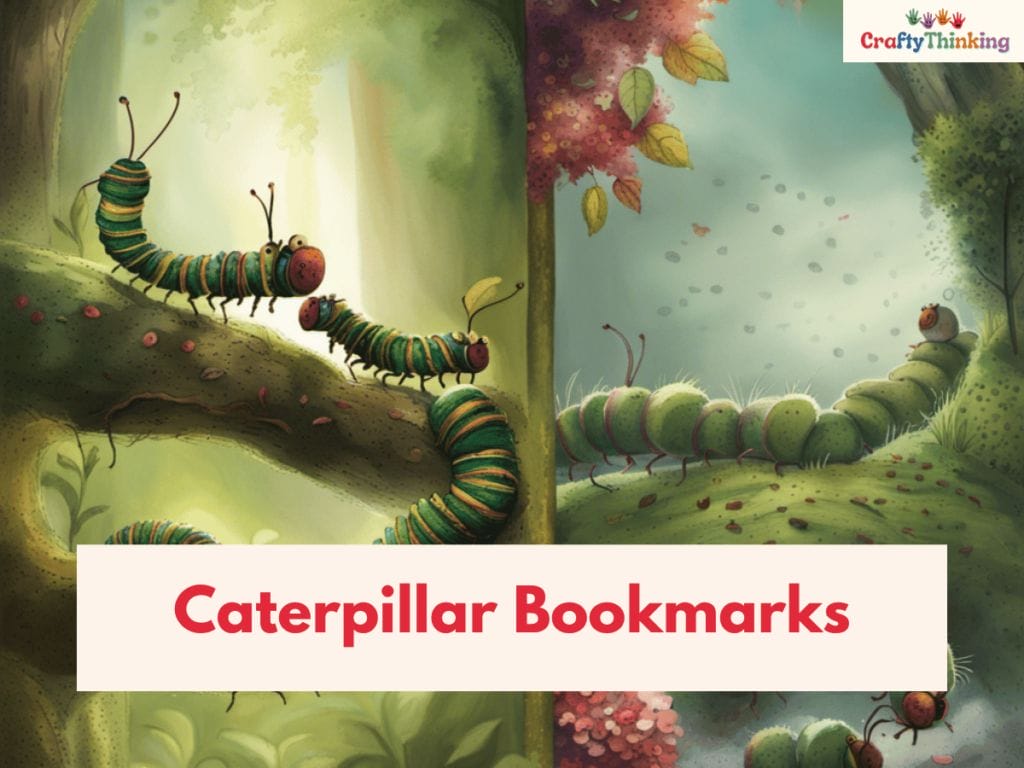
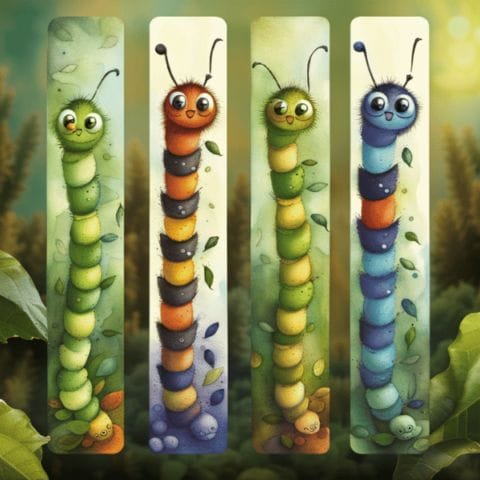
Caterpillar Bookmarks: A Super Cute Craft Idea for Boys
The Caterpillar Bookmarks are a super cute and easy project that boys will love creating with their own hands.
All they need is some easy paper scraps in their favorite colors and a bit of creativity.
Here’s a quick guide to making the perfect caterpillar bookmarks:
- Cut several strips of paper in different lengths.
- Fold each strip accordion-style.
- Glue the strips together, adding eyes and antennae to complete the look.
Now your child can use their new bookmarks to mark pages in their favorite books!
This craft idea is perfect for an 8-year-old boy who loves to read or just wants to add a touch of cuteness to his reading experience.
You can find more inspiration for this project on Pinterest, where you’ll see how other people have made this adorable craft.
Crafting isn’t just about making something pretty – it’s also about spending time with your child, teaching them new skills, and giving them the confidence to create things on their own.
So why not try making these caterpillar bookmarks today?
How to Make Caterpillar Bookmarks
Materials
- Colored construction paper
- Glue
- Googly eyes (optional)
Tools
- Scissors
- Marker
Instructions
Step 1: Gather Your Materials
Step 2: Cut Out the Caterpillar Body
- Cut out a long strip from the construction paper for the bookmark.
- Then cut out several small circles for the caterpillar's body.
Step 3: Glue the Caterpillar Body
- Glue the circles onto the strip of paper to form the caterpillar's body.
Step 4: Add the Caterpillar's Face
- Draw or glue on the caterpillar's eyes and mouth at one end of the strip.
Step 5: Let it Dry
- Allow the glue to dry completely before using your bookmark.
Notes
Did you create this craft? If so, we would love to hear from you! Please feel free to leave a comment on the blog or share a photo of your creation on Pinterest.
Recommended Products
Thank you for supporting our family-owned business!
And if you’re looking for more DIY projects for tweens, check out our next section – we’ve got a fun and easy wreath project that’s perfect for kids who love nature!
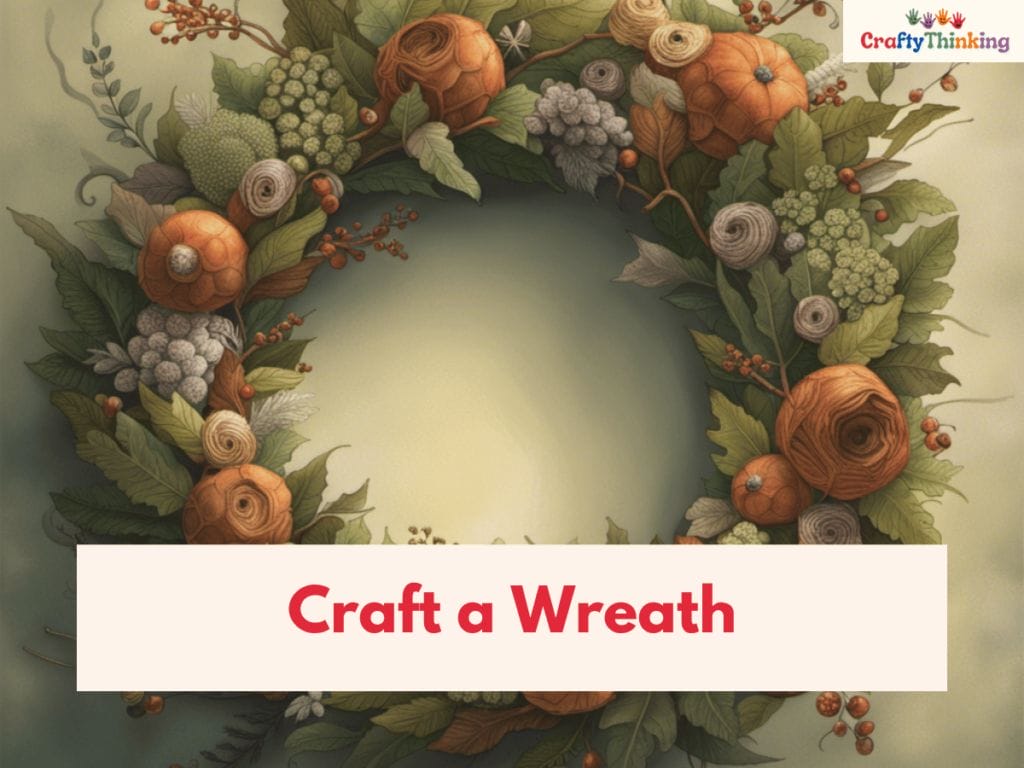
Craft a Wreath: A Fun and Easy DIY Project for Tweens
Creating a wreath is a fun and easy DIY project that tweens will love, perfect for adding a touch of nature to their room.
- This craft idea for 8 year old boys requires only a few materials such as floral wire, scissors, and scrap fabric or ribbon.
- First, gather some branches from the yard or park that can be bent into a circle shape.
- Then, attach the branches together with floral wire and wrap it in fabric or ribbon.
- Once you have the base of your wreath ready, decorate it with flowers or leaves made from colorful paper or felt.
- You could also add small trinkets like feathers or beads to give it an extra touch of personality.
- The possibilities are endless!
- Your little one could even use their favorite superhero theme to create something unique and super cute.
This craft project is not only an excellent way for kids to explore their creativity but also helps them develop new skills such as hand-eye coordination and patience.
Once they finish making their wreath, they’ll feel accomplished and proud of themselves.

How to Make a DIY Wreath
Materials
- A wreath form (you can buy these at a craft store or make your own from cardboard)
- Decorative items (ribbon, ornaments, pinecones, etc.)
Tools
- Hot glue gun
Instructions
Step 1: Arrange Your Decorations
Before you start gluing, arrange your decorations on the wreath form to decide where you want everything to go.
Step 2: Glue the Decorations
Use the hot glue gun to attach your decorations to the wreath form.
Step 3: Let it Dry
Allow the glue to dry completely before hanging your wreath.
Notes
Did you create this craft? If so, we would love to hear from you! Please feel free to leave a comment on the blog or share a photo of your creation on Pinterest.
Recommended Products
Thank you for supporting our family-owned business!
Next up on our list is bracelet making: a craft tutorial for 8 year old boys!
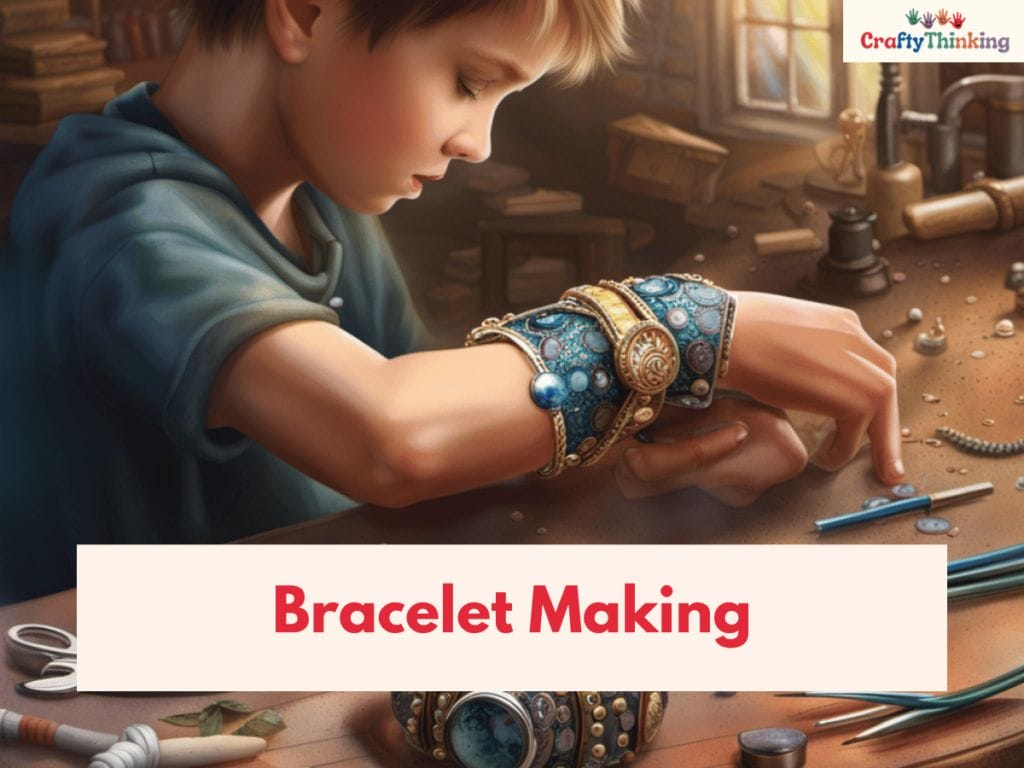
Bracelet Making: A Craft Tutorial for 8 Year Old Boys
Let’s dive into bracelet making, a fun and hands-on DIY project perfect for young boys to unleash their inner creativity.
Bracelet making is one of the easiest crafts that kids can make on their own with just a few simple materials, such as embroidery floss or paracord.
Here are some ideas to get started:
- Choose your colors: Boys love color too! Use food coloring to dye white string or pick out different shades of colored string for a multi-colored bracelet.
- Pick your pattern: There are several easy-to-follow patterns for friendship bracelets available online. Start with a basic pattern and work up to more intricate ones as you gain confidence.
- Decorate your bracelet: Add stickers or beads to give your bracelet some added flair.
Once you have completed your bracelets, store them in a bowl on your dresser or backpack to show off all the cool designs you’ve created.
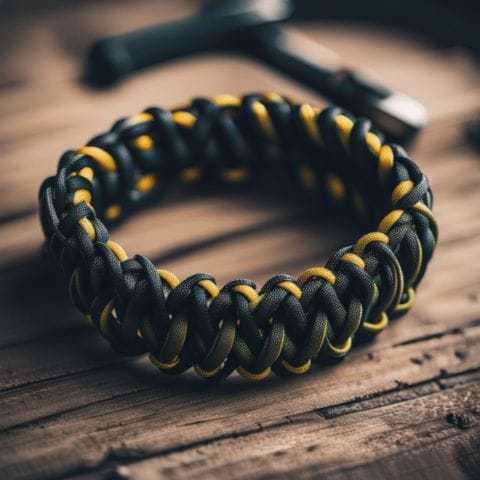
How to Make Paracord Bracelets
Materials
- Paracord
- A paracord buckle
- A lighter
Tools
- Scissors
Instructions
Step 1: Gather Your Materials
Step 2: Measure and Cut the Paracord
Measure your wrist and cut a piece of paracord that is about one foot longer than your wrist measurement.
Step 3: Thread the Paracord Through the Buckle
Thread one end of the paracord through one half of the buckle, then tie a knot to secure it.
Step 4: Weave the Paracord
Weave the paracord into your desired pattern. There are many tutorials available online for different paracord bracelet weaves.
Step 5: Attach the Other Half of the Buckle
Once you've finished weaving, thread the ends of the paracord through the other half of the buckle and tie a knot to secure them.
Step 6: Trim and Seal the Ends
Use the scissors to trim any excess paracord, then use the lighter to melt the ends to prevent fraying.
Notes
Did you create this craft? If so, we would love to hear from you! Please feel free to leave a comment on the blog or share a photo of your creation on Pinterest.
Recommended Products
Thank you for supporting our family-owned business!
Speaking of backpacks… Get ready for another craft idea!
After you have made some stylish bracelets, it’s time to decorate your own backpack.
Personalize it with stickers and paint markers, creating unique designs that showcase your style.
With these two craft ideas, there’s no limit to what an 8-year-old boy can create!
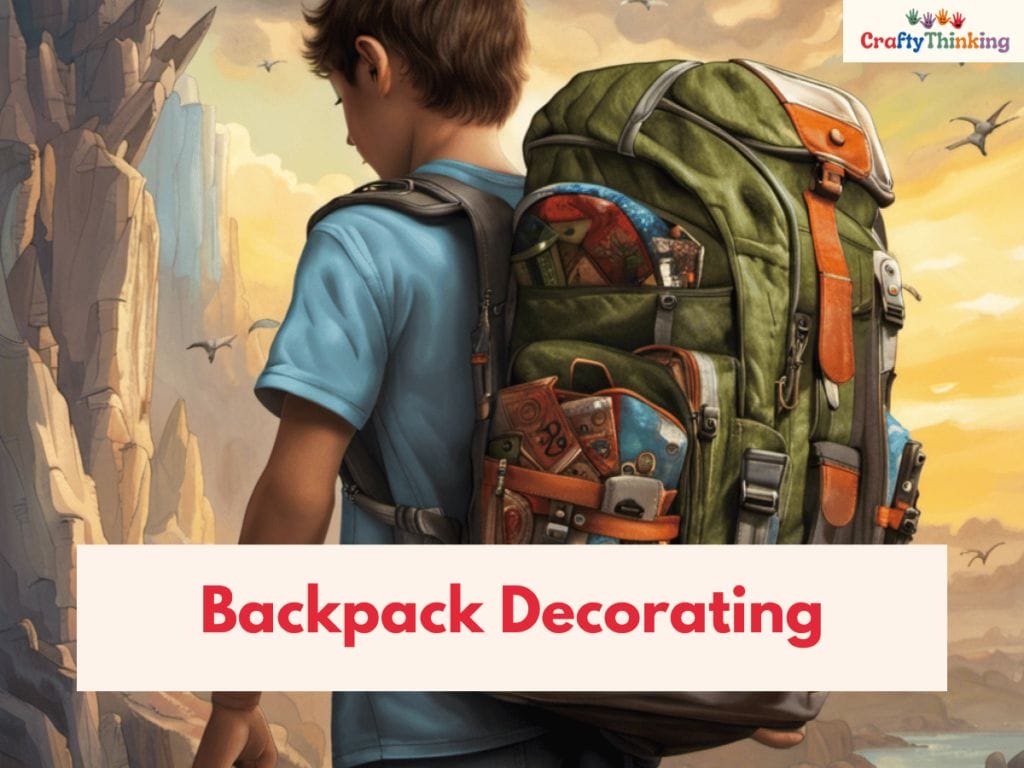
Decorate Your Own Backpack: A Fun Craft Idea for Boys
Get ready to unleash your creativity and showcase your personal style with this fun DIY project – decorating your own backpack.
It’s a great way to personalize your gear while also expressing yourself through art.
- You’ll need some basic supplies like fabric markers, stickers, and iron-on patches
- As well as a blank canvas backpack that you can find at any craft store or online.
- To get started on this fun craft idea for 8 year old boys, gather all of your supplies together and clear a workspace where you can spread out and work comfortably.
- Next, decide on a theme or design for your backpack.
- Do you want to create something spooky for Halloween?
- Maybe you want to showcase your love of spiders by adding spider webs or jar designs?
- Or perhaps you just want to use all of your favorite colors in a cool pattern or wreath design?
Use the following table for inspiration:
| Theme/Design | Supplies Needed |
|---|---|
| Spooky/Halloween | Fabric markers, spider web stickers, spooky iron-on patches |
| Spider/Jar Designs | Easy paper cutouts (for jars), black fabric marker (for spiders) |
| Favorite Colors/Patterns | Iron-on patches in favorite colors/patterns, decorative buttons |
Once you have everything planned out, start creating! Remember that there are no wrong answers when it comes to art – just let your imagination run wild and have fun with it. And who knows?
You may end up with a one-of-a-kind backpack that will make all of your friends jealous.

How to Personalize Your Backpack
Materials
- A backpack
- Fabric paint or markers
- Optional: patches, buttons, or other decorative items
Tools
Instructions
Step 1: Gather Your Materials
Step 2: Plan Your Design
Decide what you want to add to your backpack. This could be a picture, a pattern, your name, etc.
Step 3: Paint or Draw Your Design
Use fabric paint or markers to add your design to your backpack. Allow the paint to dry.
Step 4: Add Decorations
If you want to add patches, buttons, or other items, you can sew or glue them onto your backpack.
Step 5: Let it Dry
Allow any glue to dry completely before using your backpack.
Notes
Did you create this craft? If so, we would love to hear from you! Please feel free to leave a comment on the blog or share a photo of your creation on Pinterest.
Recommended Products
Thank you for supporting our family-owned business!
Now that you’ve decorated your own backpack with unique designs and themes, it’s time to take on another creative challenge: transforming an egg carton into cool crafts for tweens!
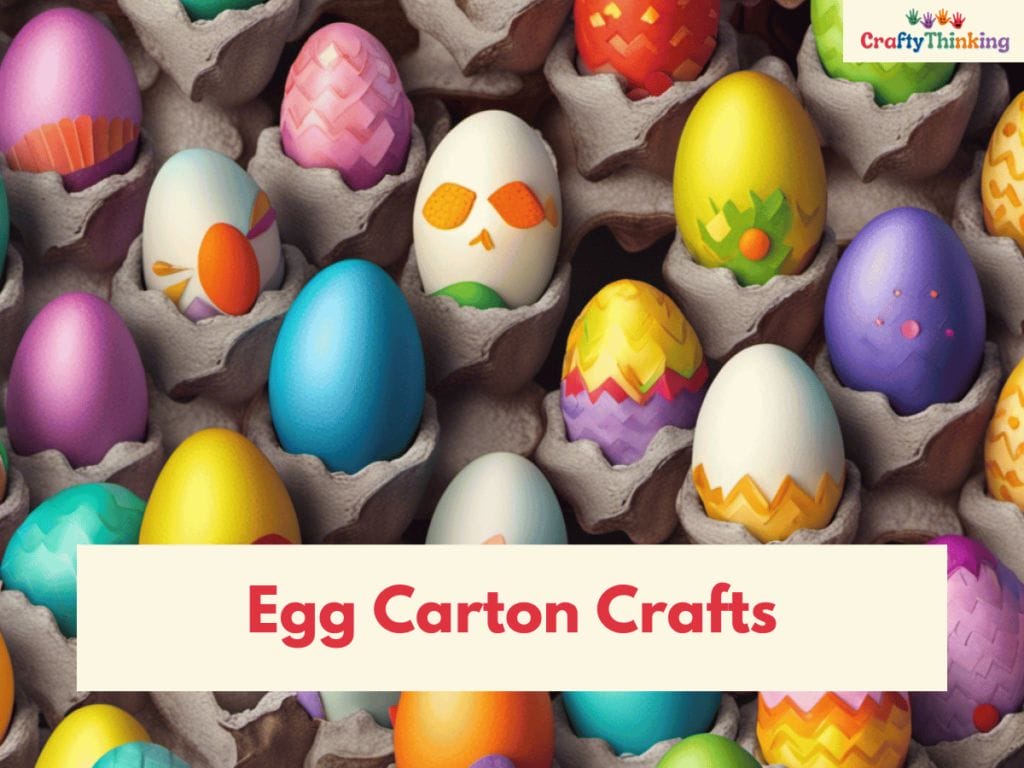
Transforming an Egg Carton: Cool Crafts for Tweens
You’re in for a treat with these awesome ways to transform an egg carton into cool crafts for tweens.
Not only is it a great way to spend time with your 8-year-old boy, but it’s also a fun and creative activity that will keep them entertained for hours.
With just a few simple materials that you can find around your home, kids can get crafty and make these super unique creations.
Egg carton cute animals
- One of the easiest crafts you can make from an egg carton are cute little animals!
- Cut out individual sections of the carton and use paint or markers to add features like eyes, ears, and legs.
- You can even glue on some fuzzy pipe cleaners to make antennas or whiskers.
- Your 8-year-old boy will love bringing their favorite animals to life in this fun way!
Mini planters
- Another great idea is making mini planters out of the egg carton cups.
- Simply cut off the lid of the carton, paint it any color you like, and fill each cup with soil and seeds.
- Before long, you’ll have your very own herb garden growing right in your window sill!
- Your tween will be amazed at how easy it is to create something so beautiful from something as simple as an egg carton.
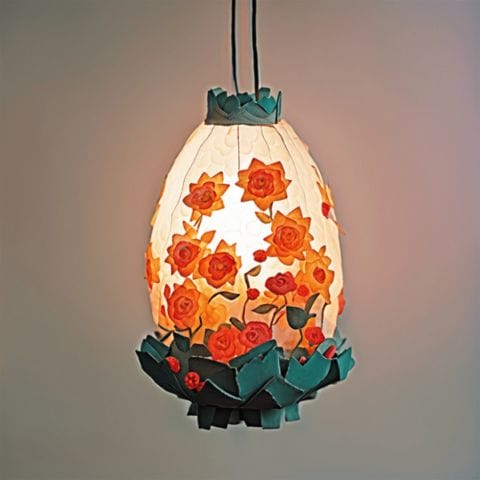
How to Make DIY Egg Carton Lantern
Materials
- An egg carton
- Paint
- A small candle or LED light
Tools
- Scissors
- Paintbrushes
Instructions
Step 1: Cut the Egg Carton
Cut out one of the cups from the egg carton.
Step 2: Paint the Egg Carton Cup
Paint the outside of the egg carton cup in your desired color or design. Let the paint dry completely.
Step 3: Add the Light
Place a small candle or LED light inside the egg carton cup. If you're using a candle, make sure to keep an eye on it while it's burning to prevent any fire hazards.
Notes
Did you create this craft? If so, we would love to hear from you! Please feel free to leave a comment on the blog or share a photo of your creation on Pinterest.
Recommended Products
Thank you for supporting our family-owned business!
Now that you’ve mastered transforming egg cartons into cool crafts for tweens, let’s move on to another fun activity – tie and dye: easy paper crafts for the artistic tween!
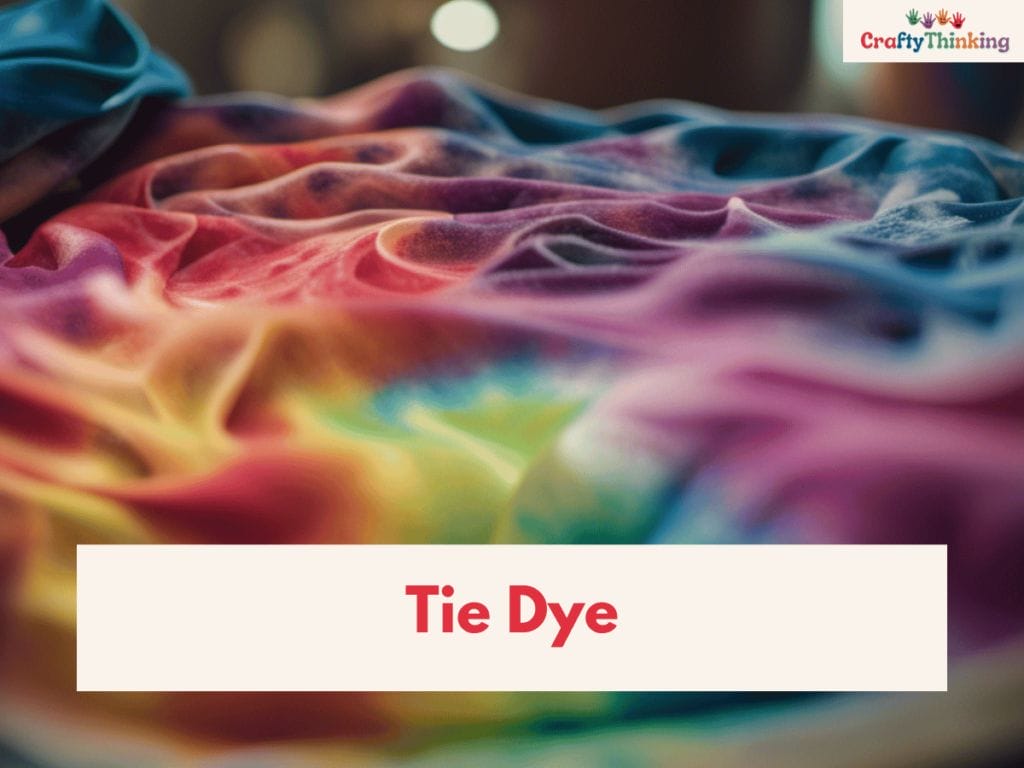
Tie and Dye: Easy Paper Crafts for the Artistic Tween
As an artistic tween, you’ll enjoy exploring the world of tie and dye paper crafts.
This craft idea is perfect for 8 year old boys who love to experiment with colors and patterns.
Tie and dye involves using fabric dyes to create unique designs on paper.
The process is simple, fun, and can be done with easily accessible materials. Here are three easy paper crafts that you can try out:
Tie-dye bookmarks
- Cut strips of white cardstock or watercolor paper into bookmark size pieces.
- Use rubber bands to secure the paper in a pattern of your choice, then dip it into a cup filled with your favorite color of dye.
Rainbow wall art
- Create a vibrant piece of art by folding a large sheet of white paper like an accordion.
- Dip each fold into different colored dyes and let dry before unfolding.
Marbleized notecards
- Fill a shallow dish with shaving cream,
- add drops of food coloring or liquid watercolors,
- swirl with a toothpick or skewer,
- then press cardstock onto the surface to create unique marbled patterns.
These easy-to-follow steps will have you creating beautiful works of art in no time!

How to Make Tie and Dye
Materials
- A white t-shirt
- Fabric dye in your chosen colors
- Rubber bands
- Plastic squeeze bottles
- Plastic bags
- Rubber gloves
Instructions
Step 1: Prepare the T-Shirt
Wet the t-shirt and wring out any excess water. Lay the t-shirt flat.
Step 2: Bind the T-Shirt
Choose a tie-dye technique and bind the t-shirt with rubber bands according to the technique's instructions.
Step 3: Mix the Dye
Follow the instructions on your fabric dye to mix the dye and water in your squeeze bottles.
Step 4: Apply the Dye
Wearing your rubber gloves, apply the dye to the t-shirt. Make sure to saturate all areas of the t-shirt.
Step 5: Let the Dye Set
Place the dyed t-shirt in a plastic bag and let it sit for 6-8 hours or overnight to allow the dye to set.
Step 6: Rinse and Wash
Rinse the t-shirt under cold water to remove excess dye, then remove the rubber bands. Wash and dry the t-shirt according to the fabric dye's instructions.
Notes
Did you create this craft? If so, we would love to hear from you! Please feel free to leave a comment on the blog or share a photo of your creation on Pinterest.
Recommended Products
Thank you for supporting our family-owned business!
Up next – cardboard tube sail boats: a Pinterest-worthy craft idea that will inspire creativity and imagination in young minds.

Cardboard Tube Sail Boats: A Pinterest-Worthy Craft Idea
If you’re looking for a fun and creative craft idea for your 8 year old boy that will have them sailing the high seas of their imagination, try making these Pinterest-worthy cardboard tube sail boats.
These little guys are easy to make and can be created with just a few simple materials that you can easily find around your home.
Not only will this activity keep your child entertained for hours, but it will also help develop their hand-eye coordination and fine motor skills.
- To get started on this craft project, all you need are some cardboard tubes (toilet paper or paper towel rolls work great), colored construction paper, scissors, glue, and paint.
- Begin by cutting out a triangle shape from the construction paper to create the sail.
- Then use the paint to decorate the outside of the cardboard tube in any way your child desires.
- Once dry, attach the sail to the tube using glue and let it set.
- Once complete, your child can test out their new sailboat design by placing it in water such as a bathtub or swimming pool.
- This is a great opportunity for them to experiment with different designs and see how well their boat sails through choppy waters.
So why not give this craft idea a try? Your little sailor is sure to have endless hours of fun while developing important skills at the same time.

How to Make Cardboard Tube Sail Boats
Materials
- A cardboard tube (like a toilet paper roll)
- Construction paper
- Glue
- A wooden skewer or straw
- Clay or playdough
Tools
- Scissors
- A wooden skewer or straw
Instructions
Step 1: Gather Your Materials
Step 2: Create the Boat
Cut the cardboard tube in half lengthwise to create the boat.
Step 3: Make the Sail
Cut a triangle from the construction paper for the sail.
Make a small hole at the top and bottom of the sail.
Step 4: Attach the Sail
Thread the skewer or straw through the holes in the sail.
Step 5: Attach the Mast to the Boat
Use the clay or playdough to secure the bottom of the skewer or straw inside the cardboard tube.
Step 6: Let it Dry
Allow any glue to dry completely before playing with your sailboat.
Notes
Did you create this craft? If so, we would love to hear from you! Please feel free to leave a comment on the blog or share a photo of your creation on Pinterest.
Recommended Products
Thank you for supporting our family-owned business!
Now that you’ve completed creating these cardboard tube sail boats with your child, it’s time to move on to another fun craft idea: creating paper stars!
This activity is perfect for boys who love working with their hands and enjoy making things from scratch.
So let’s dive into this exciting new project together!
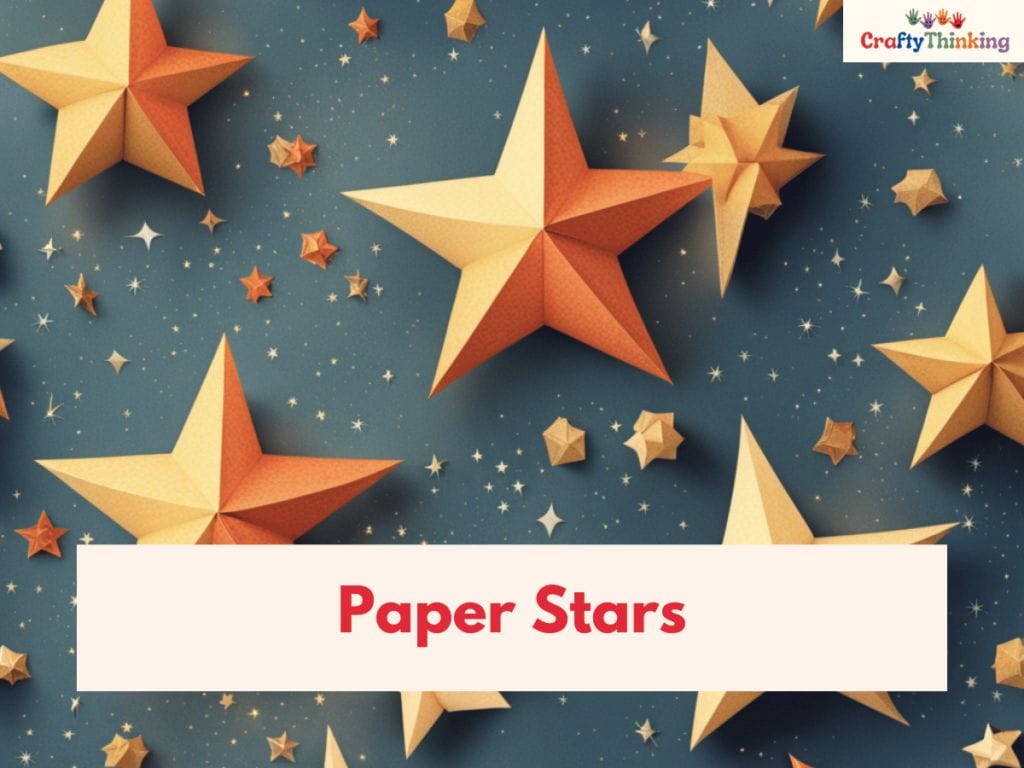
Creating Paper Stars: Fun Crafts for Boys
Get ready to unleash your creativity and make some dazzling paper stars that will sparkle like the night sky!
If you’re looking for a craft that’ll get an 8-year-old boy excited, this is definitely the one.
Paper Stars
- They’ll love making these stars, and they’ll be so proud of their creations when they’re done.
- All you need are some strips of colorful construction paper and a bit of glue.
- You can use any color combination you like, but it’s fun to make a whole bunch in different colors so you can hang them up together.
- Just fold each strip in half, then fold the ends over to form a point.
- Glue the ends together and repeat until you have enough points to form a star.
- When your child says “I’m bored,” pull out this craft idea!
- Making paper stars is not only fun, but it’s also great for developing fine motor skills and hand-eye coordination.
- Plus, it’s an activity that doesn’t require screens or technology – just good old-fashioned creativity!
If your little one gets tired of making stars, try making other things with construction paper like a caterpillar or even bubble solution that’s edible!

How to Make Paper Stars
Materials
- A strip of paper (about 11 inches long and half an inch wide)
Tools
Instructions
Step 1: Gather Your Materials
Step 2: Make a Knot
Make a loop at one end of the strip to form a knot. Flatten the knot and you should have a pentagon shape with a short strip at the top and a long strip at the side.
Step 3: Fold the Paper
Fold the short strip down and tuck it into the pentagon. Then, fold the long strip around the edges of the pentagon, following its shape.
Step 4: Tuck in the Excess
When you reach the end of the strip, tuck the excess paper into the pentagon.
Step 5: Form the Star
To form the star, gently pinch the edges of the pentagon.
Notes
Did you create this craft? If so, we would love to hear from you! Please feel free to leave a comment on the blog or share a photo of your creation on Pinterest.
Recommended Products
Thank you for supporting our family-owned business!
Now that you’ve made some beautiful paper stars, why not bring them to life with finger puppets?
Finger puppets are another fun art project that brings stories to life.
Your child can create characters from their favorite books or come up with their own unique designs.
This is a great way to encourage imaginative play while also fostering storytelling skills.
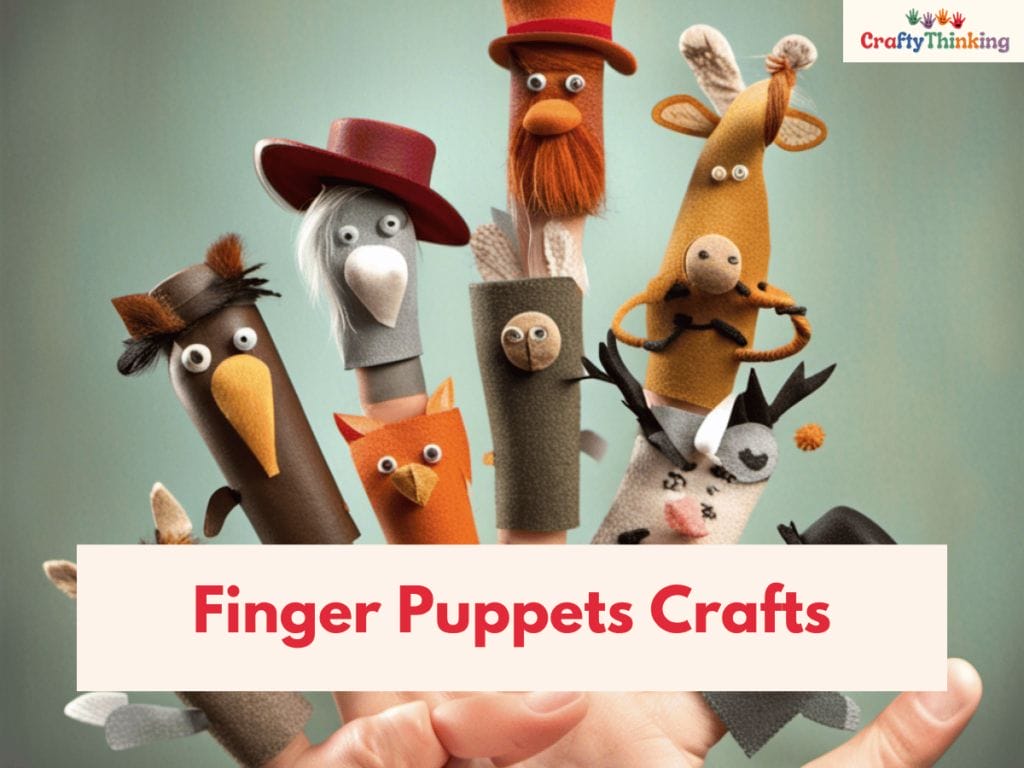
Finger Puppets Fun: An Art Project That Brings Stories to Life
Ready to bring your child’s favorite stories to life?
Finger puppets are a fun and easy way to create characters and spark imaginative play.
Finger Puppets
- All you need is some felt, scissors, glue, and a bit of creativity!
- Start by drawing the shape of your puppet on the felt and cutting it out.
- Then, add details like eyes, nose, mouth or even clothes with different colors of felt.
- Once you’ve created your finger puppets, it’s time for some storytelling!
- Encourage your child to use their imagination and come up with their own stories or act out scenes from their favorite books.
- You can also make a DIY puppet theater using an old cardboard box or simply use your hands as the stage.
- This activity not only helps develop fine motor skills but also promotes social skills such as communication and collaboration.
Finger puppets are not only a great craft idea for boys but also for girls too!
How to Make Finger Puppets
Materials
- Felt or colored paper
- Glue
- Optional: googly eyes, yarn for hair, etc.
Tools
- Scissors
Instructions
Step 1: Gather Your Materials
Step 2: Cut Out the Puppet Shape
Cut out a rectangle from the felt or paper. This will be the body of your puppet.
Step 3: Glue the Edges
Fold the rectangle into a tube and glue the edges together. This will form the body of the puppet.
Step 4: Add Decorations
Use glue to add decorations to your puppet, such as eyes, hair, or clothes.
Step 5: Let it Dry
Allow the glue to dry completely before using your puppet.
Notes
Did you create this craft? If so, we would love to hear from you! Please feel free to leave a comment on the blog or share a photo of your creation on Pinterest.
Recommended Products
Thank you for supporting our family-owned business!
And if you’re looking for more fun crafts to do with your child, why not try making DIY bubble wands next?
With just a few materials like pipe cleaners and straws, you can make unique bubble wands that will provide hours of outdoor entertainment.
Let’s get crafting!
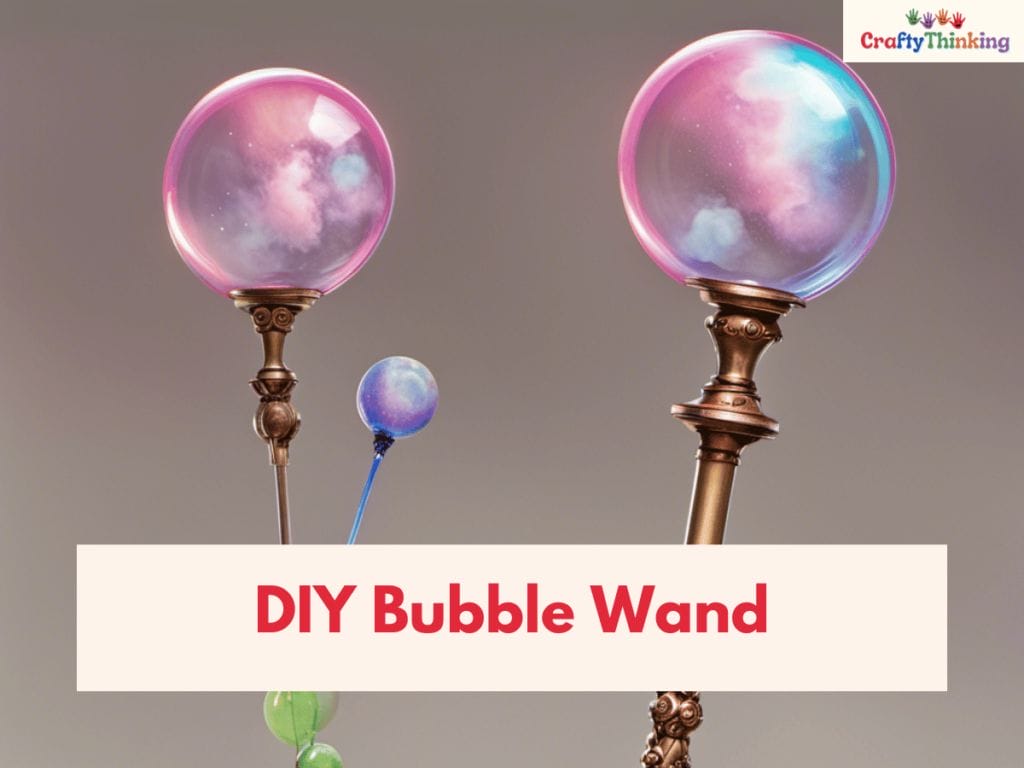
DIY Bubble Wand: A Great Craft Idea for Boys
Let’s add some bubbly fun to your son’s day with this easy-peasy DIY bubble wand that’ll blow his mind away!
This craft activity is perfect for a sunny afternoon spent outdoors.
Not only is it an entertaining project, but it also encourages creativity and imagination.
- To start off, gather some materials such as pipe cleaners, straws, and string.
- Bend the pipe cleaner into a circular shape and twist both ends together to create the handle.
- Then, thread the string through the straw and wrap it around the circle of the pipe cleaner.
- Finally, dip the wand into a soapy solution and blow to create bubbles!
- This DIY bubble wand is a great way to get boys interested in crafting while providing them with endless hours of entertainment.
- The best part? It doesn’t require any special skills or tools!
So why not spend some quality time with your little one by making this fun project together?
Who knows what creative ideas might spark from there!

How to Make DIY Bubble Wand
Materials
- A wire hanger or thick craft wire
- Beads (optional)
Tools
- Wire cutters
- Pliers
Instructions
Step 1: Gather Your Materials
Step 2: Shape the Wire
Use the wire cutters to cut a length of wire.
Use the pliers to shape the wire into a circle, square, or any other shape you like. Leave a long end to serve as the handle.
Step 3: Create the Handle
If you're using beads, thread them onto the handle end of the wire.
Then, use the pliers to bend the end of the wire to secure the beads.
Step 4: Make Bubble Solution
Mix dish soap and water to create a bubble solution.
Step 5: Blow Bubbles
Dip the wire shape into the bubble solution, then gently blow or wave the wand to create bubbles.
Notes
Did you create this craft? If so, we would love to hear from you! Please feel free to leave a comment on the blog or share a photo of your creation on Pinterest.
Recommended Products
Thank you for supporting our family-owned business!
Encouraging continued creativity with craft ideas for 8-year-old boys is essential for their growth and development.
In addition to stimulating their imaginations, crafting provides an outlet for self-expression and improves fine motor skills.
So don’t be afraid to try out new projects with your child – you never know what hidden talents they might have!
Keep exploring different craft ideas that inspire joy and excitement in your little boy’s heart.
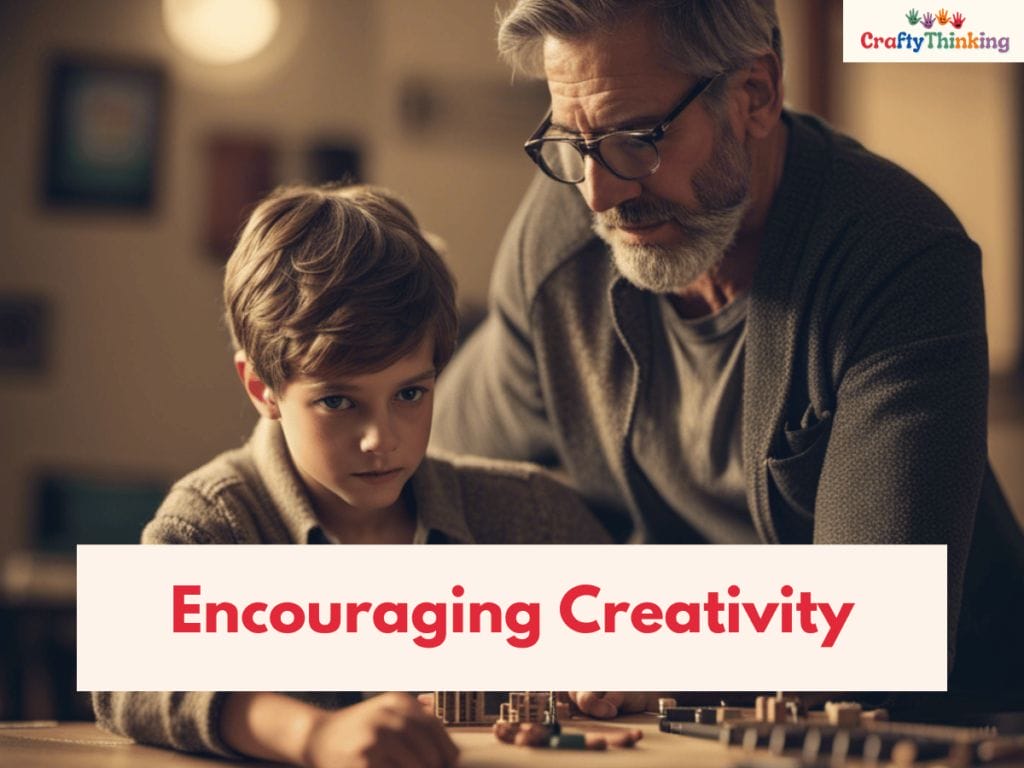
Encouraging Creativity with Craft Ideas for 8 Year Old Boys
Encouraging your son’s creativity through fun and engaging activities is essential for his growth and development, so keep exploring new ways to inspire his imagination!
There are many craft ideas that can be perfect for 8-year-old boys, allowing them to explore their artistic side while also developing important skills such as patience, focus, and problem-solving.
Here are some ideas to get you started:
Nature Collage
- Take a walk with your son and collect leaves, sticks, stones, flowers, or any other items of natural interest.
- Then use glue or tape to create a beautiful collage on paper or cardboard.
- This activity can help children develop an appreciation for nature while also honing their artistic skills.
DIY Instruments
- Boys love music! Encourage your child’s musical interests by helping them make simple instruments at home.
- For example, you can make a guitar using an empty tissue box and rubber bands or create drums out of plastic containers and balloons.
- This activity will teach kids about sound waves while providing hours of creative playtime.
Recycled Robot
- Collect old boxes, cans, bottle caps, and other recyclable materials to create a robot together with your child.
- Use glue or tape to assemble the pieces into an imaginative creature that can inspire storytelling and pretend play.
Creativity is not limited by age or gender; anyone can enjoy the benefits of crafting.

Nurture Creativity with Craft Ideas
Materials
- paper
- glue
- paint
- beads
- fabric
- yarn
Tools
- Scissors
Instructions
Step 1: Provide a Variety of Materials
Gather a variety of craft materials such as paper, scissors, glue, paint, beads, fabric, yarn, and more.
The more diverse the materials, the more opportunities there are for creativity.
Step 2: Create a Craft Space
Designate a specific area in your home for crafting.
This could be a corner of a room, a dedicated craft table, or even a portable craft box.
Make sure it's a space where it's okay to make a mess.
Step 3: Encourage Exploration
Allow children to explore the materials on their own.
Resist the urge to direct their projects. Instead, let them decide what they want to create.
Step 4: Provide Inspiration
While it's important to let children create freely, it can also be helpful to provide some inspiration.
This could be craft books, images of different crafts online, or even taking a walk in nature to inspire craft ideas.
Step 5: Celebrate the Process, Not Just the End Product
Make sure to celebrate the creative process as much as the end product.
Show interest in what they're doing and ask them to tell you about their creation.
Step 6: Display Their Crafts
Show that you value their creativity by displaying their crafts.
This could be on the fridge, in a frame, or in a special craft showcase area in your home.
Step 7: Regularly Refresh Craft Supplies
Keep the craft area interesting and inspiring by regularly adding new craft materials.
This could be seasonal items like leaves in the fall or flowers in the spring, or other interesting items you come across.
Remember, the goal is to nurture creativity, not to produce perfect crafts.
Encourage risk-taking, experimentation, and most of all, fun!
Notes
Did you create this craft? If so, we would love to hear from you! Please feel free to leave a comment on the blog or share a photo of your creation on Pinterest.
Recommended Products
Thank you for supporting our family-owned business!
By encouraging your 8-year-old boy’s creativity today with fun and engaging activities like these ones mentioned above.
He will grow up developing important skills needed in life such as patience, focus, problem-solving skills.
But most importantly, he will learn how to express himself creatively in different forms, which may come in handy in his later years!
Frequently Asked Questions
Find the best craft ideas for 8 year old boys! From easy arts and crafts projects to more complex activities, this page is sure to have something fun for your little one.
-
What are some craft ideas for 8 year old boys that involve nature or outdoor elements?
Craft ideas that involve nature could include making leaf rubbings, creating bird feeders from pine cones, or building a terrarium.
They could also paint rocks, make a nature collage from found objects, or create a map of their backyard.
-
Are there any craft ideas for 8 year old boys that involve science or STEM concepts?
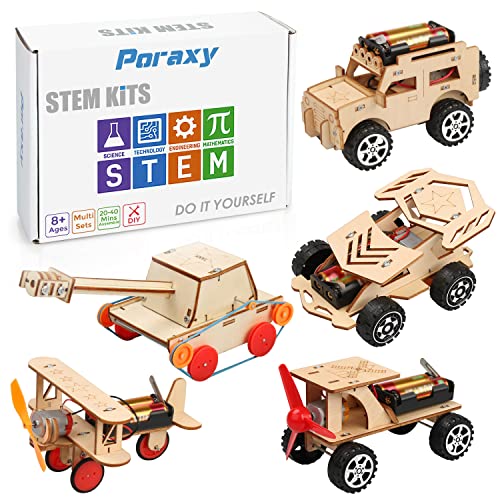
Yes, crafts like building a homemade volcano, constructing a simple robot with a DIY kit, creating a solar system model, or designing and building a birdhouse can incorporate science and STEM concepts.
Making homemade slime or a DIY lava lamp can also be a fun way to explore chemistry.
-
How can parents encourage their 8 year old boys to continue exploring their creativity beyond the suggested craft ideas?
Parents can encourage their boys to continue exploring creativity by providing a variety of materials for free play, appreciating and displaying their creations, and involving them in creative tasks around the house.
They can also encourage them to think creatively by asking open-ended questions and proposing problem-solving scenarios.
-
Are there any craft ideas for 8 year old boys that involve using recycled materials?
Absolutely, crafts involving recycled materials can include making a robot from an old cardboard box, creating musical instruments from empty containers, crafting a collage from old magazines, or building a birdhouse from scrap wood.
-
What are some craft ideas for 8 year old boys that can be done with a group of friends or as a party activity?
Group-friendly craft ideas might include tie-dyeing t-shirts, creating homemade slime, decorating cupcakes, making bead bracelets, or building a fort out of cardboard boxes.
A DIY photo booth with handmade props can also be a fun party activity.
-
What crafts do 8 year olds like?
Eight-year-olds often enjoy crafts that allow them to express their creativity and individuality, such as creating their own comic books, making bead jewelry, building structures with LEGO, or designing and creating their own board games.
-
What crafts do boys enjoy?
Boys often enjoy crafts that involve building or creating something they can play with afterward, like LEGO constructions, cardboard puppet theaters, DIY toy cars, or homemade board games.
They also might enjoy crafts related to their interests, such as making superhero masks or creating art with sports themes.
-
What are some fun craft ideas for kids?
Fun craft ideas for kids can include making homemade slime, creating tie-dye shirts, crafting bead bracelets, painting flower pots, making paper airplanes, or creating DIY bird feeders.
-
What are fun crafts for kids with disabilities?
The type of craft suitable for a child with disabilities will depend on the nature of their disability.
However, some universally enjoyable crafts might include sensory play dough, simple weaving projects, painting by numbers, or creating collages with cut-out pictures.
-
What can a 8 year old do when bored at home?
When bored at home, an 8-year-old can engage in crafts, build a fort, put on a puppet show, create a homemade board game, or even start a DIY project like a birdhouse or comic book.
They could also read, draw, or play educational games online.
-
What interests 8 year olds?
Eight-year-olds are usually interested in activities that allow them to explore, create, and learn.
This might include reading, drawing, playing sports, engaging with science experiments, playing with dolls or action figures, or building with blocks or LEGO.
-
How do I keep my 8 year old entertained?
To keep an 8-year-old entertained, provide a variety of activities that cater to their interests, such as crafts, books, puzzles, outdoor games, and interactive educational activities.
You can also involve them in simple household tasks turned into games, like cooking or gardening.
-
What easy crafts to do when bored?
Easy crafts to do when bored might include making homemade play dough, crafting paper airplanes, creating bead jewelry, designing bookmarks, painting rocks, or making collages from old magazines.
Wrapping Up Craft Ideas For 8 Year Old Boy
Well done, you’ve successfully completed several craft projects with your 8-year-old boy!
Who would’ve thought that something as simple as balloons and beads could turn into cool crafts? And who knew that finger puppets could bring stories to life?
You may have started these projects thinking it was just a way to keep your child entertained for a bit, but little did you know that it would unleash their creativity.
It’s ironic how something so small can lead to such big ideas. So, continue encouraging your child’s imagination and let them explore more DIY projects in the future. Who knows what they might come up with next!
If you enjoyed this article about the Best DIY Craft Ideas for 8 Year Old Boys and would like to learn more, please leave a comment below.