

How to Draw a Baby Chick Step by Step (Drawing Guide)
How to Draw a Baby Chick has never been easier, thanks to this beginner-friendly tutorial!
Whether you’re an aspiring artist or simply looking for a fun activity, this guide is designed to help you create an adorable baby chick drawing in no time.
From the perfect hairdo to the cutest little beak, we’ve got all the steps covered.
Keep reading to find out How to Draw a Baby Chick Step by Step.
You might also like:
- How to Draw for Kids
- Creative Drawing Ideas
- Fun Facts About Baby Chicks
- What is a Baby Chick Called?
- List of Art Supplies for Beginner’s
- Art Supplies for Toddlers List
- Art Supplies List for Preschool
- Art Supplies List for Elementary School
- Art Supplies List for Middle School
- Art Supplies List for High School
- List of Art Supplies for Artists
- List of Art Supplies for Painting
How to Draw a Baby Chick?
To draw a baby chick, start by sketching a small, curved upturn to form the chick’s hairdo, followed by an ellipse shape for the head.
To draw a chick eyes add two small circles for the eyes and draw an upturned.
Next incomplete letter ‘C’ for the beak.
Finish by drawing a circular shape for the body, adding wings on both sides, and sketching two straight lines with three lines emerging from the bottom to complete the feet.
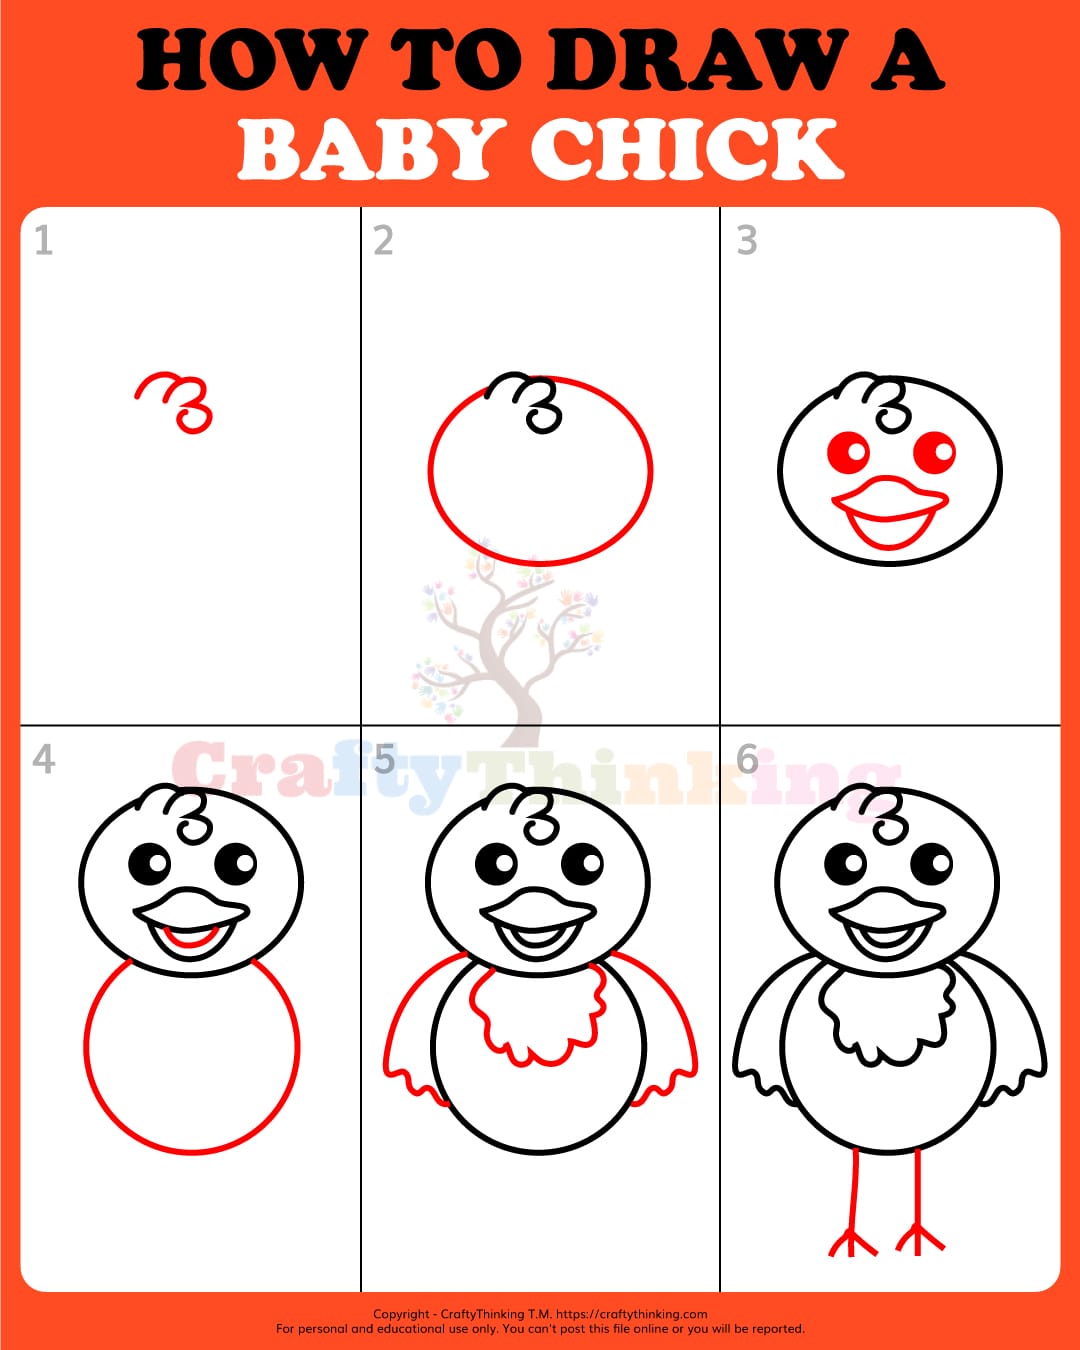
How To Draw A Baby Chick Step By Step
Ready to learn how to draw a baby chick step by step easy?
This tutorial is perfect for beginners and those who want to draw a cute cartoon baby chick. Let’s get started!
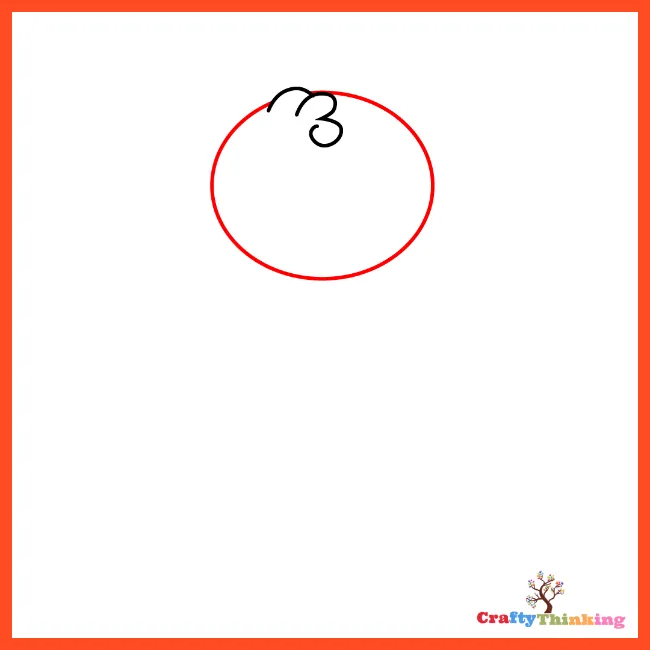
Step 1: The Hairstyle
- The first step in this easy baby chick drawing tutorial is to create the chick’s unique hairstyle.
- Sketch a small curved upturn, resembling a ‘U’ shape.
- Then, add a shape that looks like the number 3 and attach it to the previous curve.
- This completes your chick’s adorable hairdo!

Step 2: Draw the Head
- Now it’s time to draw the chick’s head.
- Create an ellipse shape that is large enough to accommodate the hairdo.
- Feel free to make the face shape slightly boxy; after all, creativity is encouraged here.
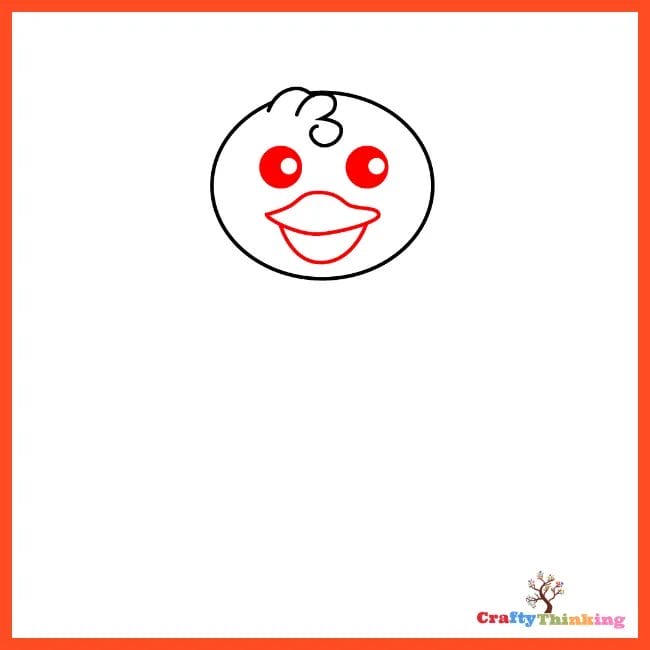
Step 3: Facial Features
- In this step, you’ll learn how to draw the baby chick’s eyes and beak.
- Start by drawing two small, filled-in circles for the eyes.
- Next, draw the beak with an upturned, incomplete letter ‘C’ for the lower lip and a similar shape for the upper lip, but with a raised portion in the middle.
- This part is crucial, so pay close attention.
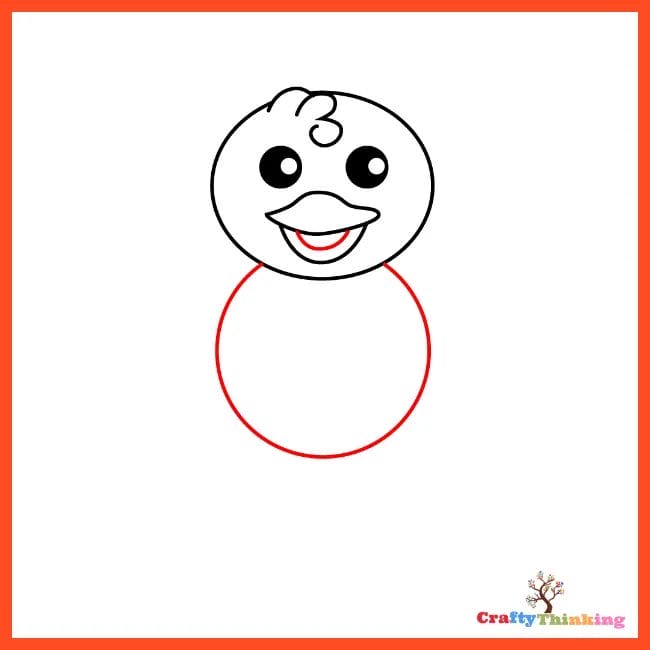
Step 4: Sketch the Body
- Draw a circular shape at the bottom, starting from the sides of the egg-like face to represent the chick’s body.
- Make sure the body size is proportional to the head.
- You can further define the lower lip by adding a curved line inside it.
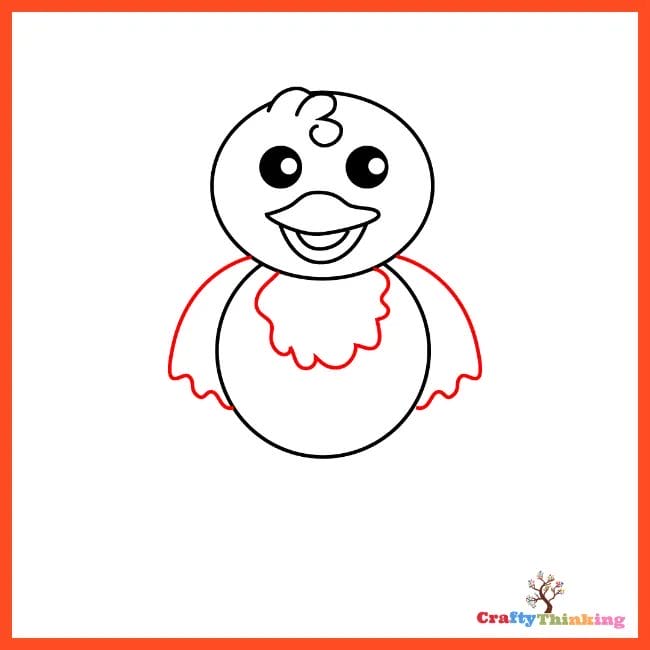
Step 5: Add the Wings
- Time to draw the wings!
- Sketch them starting from the left and right sides of the head, extending down towards the side of the body.
- Add some wave-like details at the bottom of the wings for extra flair.
- You can also add extra feather details under the head.
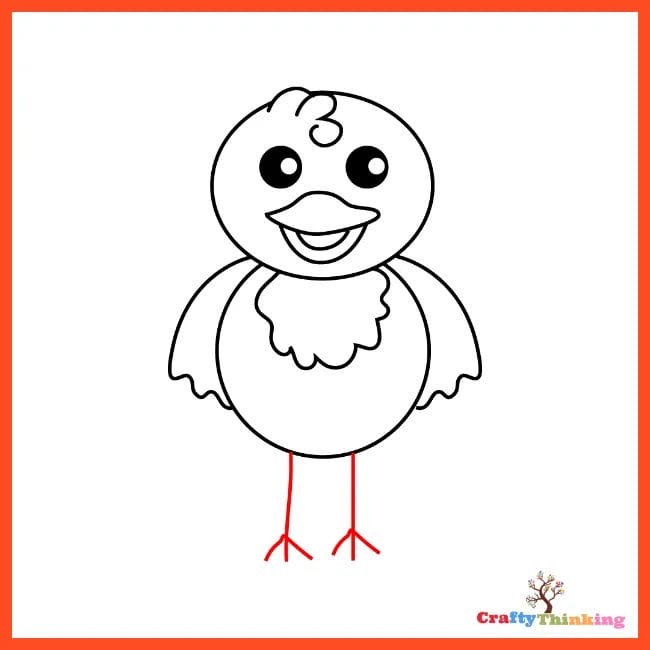
Step 6: Draw the Feet
- Drawing the feet is straightforward.
- Sketch two straight lines starting from the bottom left and right sides of the body.
- Add three lines emerging from the bottom of these lines to complete the feet.
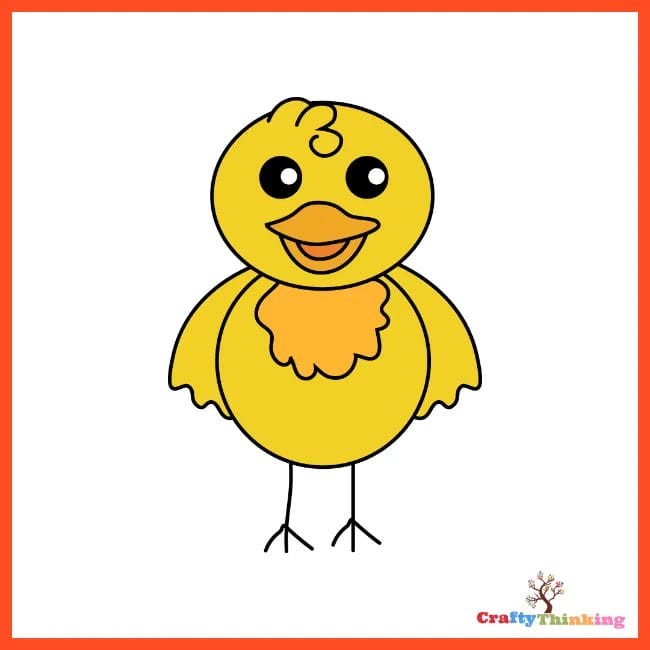
Step 7: Final Touches
- Congratulations, you’ve learned how to draw a realistic baby chick!
- Now you can color your drawing.
- We chose yellow for the body and orange for the beak, but feel free to use your imagination.
Congratulations
- You’ve successfully completed this How to Draw a Baby Chick tutorial.
- You’re now an expert at drawing a cartoon chick, and this guide is a valuable addition to our collection of step-by-step drawing tutorials.
How to Make a Baby Chick Drawing Realistic
Creating a realistic baby chick drawing can be a rewarding experience, especially when you see your artwork come to life with intricate details.
Whether you're an aspiring artist or someone who enjoys drawing as a hobby, this step-by-step guide will walk you through the process of making your baby chick drawing look as realistic as possible.
Materials
- High-quality drawing paper
- Graphite pencils (ranging from 2H to 8B)
- Eraser
- Blending stumps or Q-tips
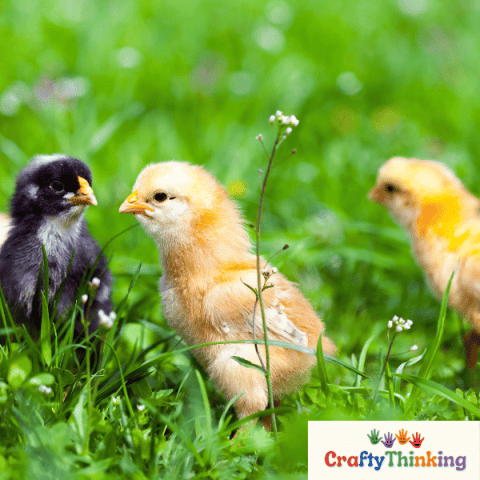
- Reference photo of a baby chick
Instructions
Step 1: Sketch the Basic Outline
- Begin by lightly sketching the basic outline of the baby chick using a 2H pencil.
- This will serve as the foundation for your drawing. Make sure to keep your lines light so they can be easily erased later.
Step 2: Add Facial Features
- Using your reference photo, carefully draw the eyes, beak, and other facial features.
- Pay close attention to the proportions and placement of these elements.
- Use a 4B pencil for darker lines and details.
Step 3: Draw the Feathers
- Feathers can be tricky, but they're essential for a realistic look. Use short, curved lines to mimic the texture of the feathers.
- Vary the pressure on your pencil to create different shades and depths.
Step 4: Add Shading
- Shading is crucial for realism. Use your blending stumps or Q-tips to blend the pencil marks, creating a smooth transition between light and dark areas.
- Focus on the underbelly and around the eyes and beak, where shadows are generally darker.
Step 5: Work on the Legs and Feet
- Use a 6B pencil to draw the legs and feet.
- Pay attention to the tiny details like claws and joints.
- Add some shading to give them a three-dimensional look.
Step 6: Final Touches
- Go over your drawing and add any last-minute details. This could include additional feather textures, more shading, or even tiny specks of dirt on the chick's body for added realism.
Step 7: Review and Adjust
- Take a step back and look at your drawing.
- Make any necessary adjustments to improve its realism.
- Use your eraser to lighten areas that are too dark and add more pencil strokes to areas that need more detail.
Step 8: Add Highlights
- Use an eraser or a white pencil to add highlights to your drawing.
- Focus on areas where light naturally hits, such as the top of the head and back.
Step 9: Final Review
- Once you're satisfied with your drawing, give it a final review.
- Make sure all elements are as realistic as possible and that you've achieved a good balance of light and shadow.
Step 10: Sign Your Work
- The last step is to sign your artwork.
- This not only marks it as your creation but also adds a professional touch to the finished piece.
By following these steps, you'll be well on your way to creating a realistic baby chick drawing that you can be proud of.
Whether you're drawing for fun or looking to improve your artistic skills, the key is to practice and pay attention to the details.
Notes
Did you create this craft? If so, we would love to hear from you! Please feel free to leave a comment on the blog or share a photo of your creation on Pinterest.
Recommended Products
Thank you for supporting our family-owned business!

Frequently Asked Questions
Here are some frequently asked questions about How to Draw a Baby Chick. Get some quick answers to everything you need to know.
-
How to draw a baby chick easy?
Drawing a baby chick in easy steps involves sketching a simple oval for the body, adding a circle for the head, and drawing basic shapes for the eyes, beak, and feet.
You can add some fluffy-like feathers to make it look more adorable.
This is a great easter drawing project that kids love.
-
How to draw a baby chick for kids?
For kids, you can simplify the process by providing an outline or a printable drawing of a baby chick.
They can then color it in, perhaps using a bright yellow color for the body and an orange color for the beak.
This makes it a fun and engaging craft activity.
-
How to draw a baby chick hatching?
To draw a baby chick hatching, start by drawing an oval for the chick’s body and a circle for its head.
Then, draw broken eggshell pieces at the bottom to show it’s hatching.
Add eyes, a beak, and feet to complete the drawing.
You can color the chick in no time with a yellow color for the body and orange for the beak.
-
What art supplies would you recommend for kids who want to follow this easy baby chick drawing tutorial?
For this drawing tutorial, basic art supplies like pencils, erasers, and colored pencils or markers would be sufficient.
If you want to make it a craft project, you could also use yellow and orange construction paper for added texture.
-
Are there any fun facts about baby chicks that could add an educational element to this drawing tutorial?
Yes, you can tell kids that baby chicks can walk within a few hours of hatching, or that they peep to communicate with their mothers and other chicks. T
hese fun facts can make the drawing tutorial more educational and engaging.
-
How can parents make this baby chick drawing activity more engaging for kids, perhaps by incorporating color or craft elements?
Parents can make this activity more engaging by providing different colors for kids to choose from, or even adding craft elements like feathers or googly eyes.
You can also turn it into an Easter drawing project by adding a bunny or other farm animals to the scene.
-
Do you have any similar posts or Pinterest boards that feature step-by-step tutorials for drawing cute cartoon chickens or other animals?
Yes, we have similar posts and Pinterest boards that feature a variety of animal drawings, including cute cartoon chickens, bunnies, and other farm animals.
You’ll find step-by-step tutorials that show you how to draw each one as a part of your growing artwork collection.
Wrapping Up How to Draw a Baby Chick
How to Draw a Baby Chick is a skill you’ve now mastered, thanks to this comprehensive guide.
From the initial sketch to the final splash of color, you’ve journeyed through each step to create your own adorable masterpiece.
Whether you’re drawing for fun or honing your artistic skills, this drawing guide tutorial has hopefully made the process enjoyable and educational.
I hope you gain value from How to Draw a Baby Chick Step by Step.
If you like this article about How to Draw A Baby Chick and would like to know more, please comment below.


One Comment