

How to Draw a Bee: Step by Step Cute Bee Tutorial
How to Draw a Bee is a delightful skill that many art enthusiasts aspire to master.
From the intricate details of its wings to the adorable roundness of its body, capturing the essence of this buzzing creature can be both fun and rewarding.
Whether you’re a budding artist or someone looking for a new creative outlet, this guide is designed to make the process simple and enjoyable.
Keep reading to find out How to Draw a Bee: A Step by Step Cute Bee Tutorial.
You might also like:
- How to Draw for Kids
- Creative Drawing Ideas
- List of Art Supplies for Beginner’s
- Art Supplies for Toddlers List
- Art Supplies List for Preschool
- Art Supplies List for Elementary School
- Art Supplies List for Middle School
- Art Supplies List for High School
- List of Art Supplies for Artists
- List of Art Supplies for Painting
How to Draw a Bee?
Drawing a bee involves sketching out the basic shapes first, such as the head, thorax, and abdomen, followed by adding details like wings, legs, and facial features.
Once the outline is complete, you can refine the drawing and add color or shading for a more realistic look.
How to Draw a Bee Step by Step Tutorial
Ever wondered how to draw a bee step by step easy?
Or perhaps you’re searching for a fun activity for your kids and stumbled upon the question, “How do you draw a bee for kids?” Well, you’re in the right place!
This tutorial will show you how to draw a bee, whether it’s a cartoon bee, a realistic bee, or even a cute bee. Let’s dive into this step-by-step drawing guide!
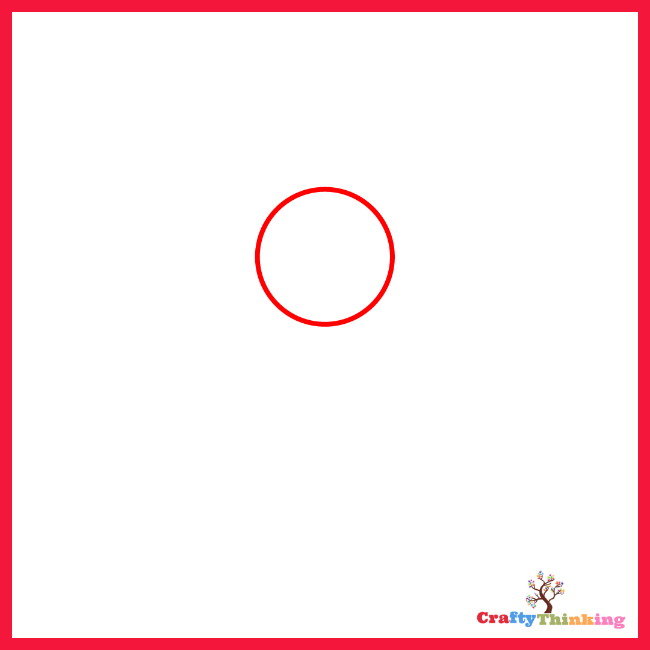
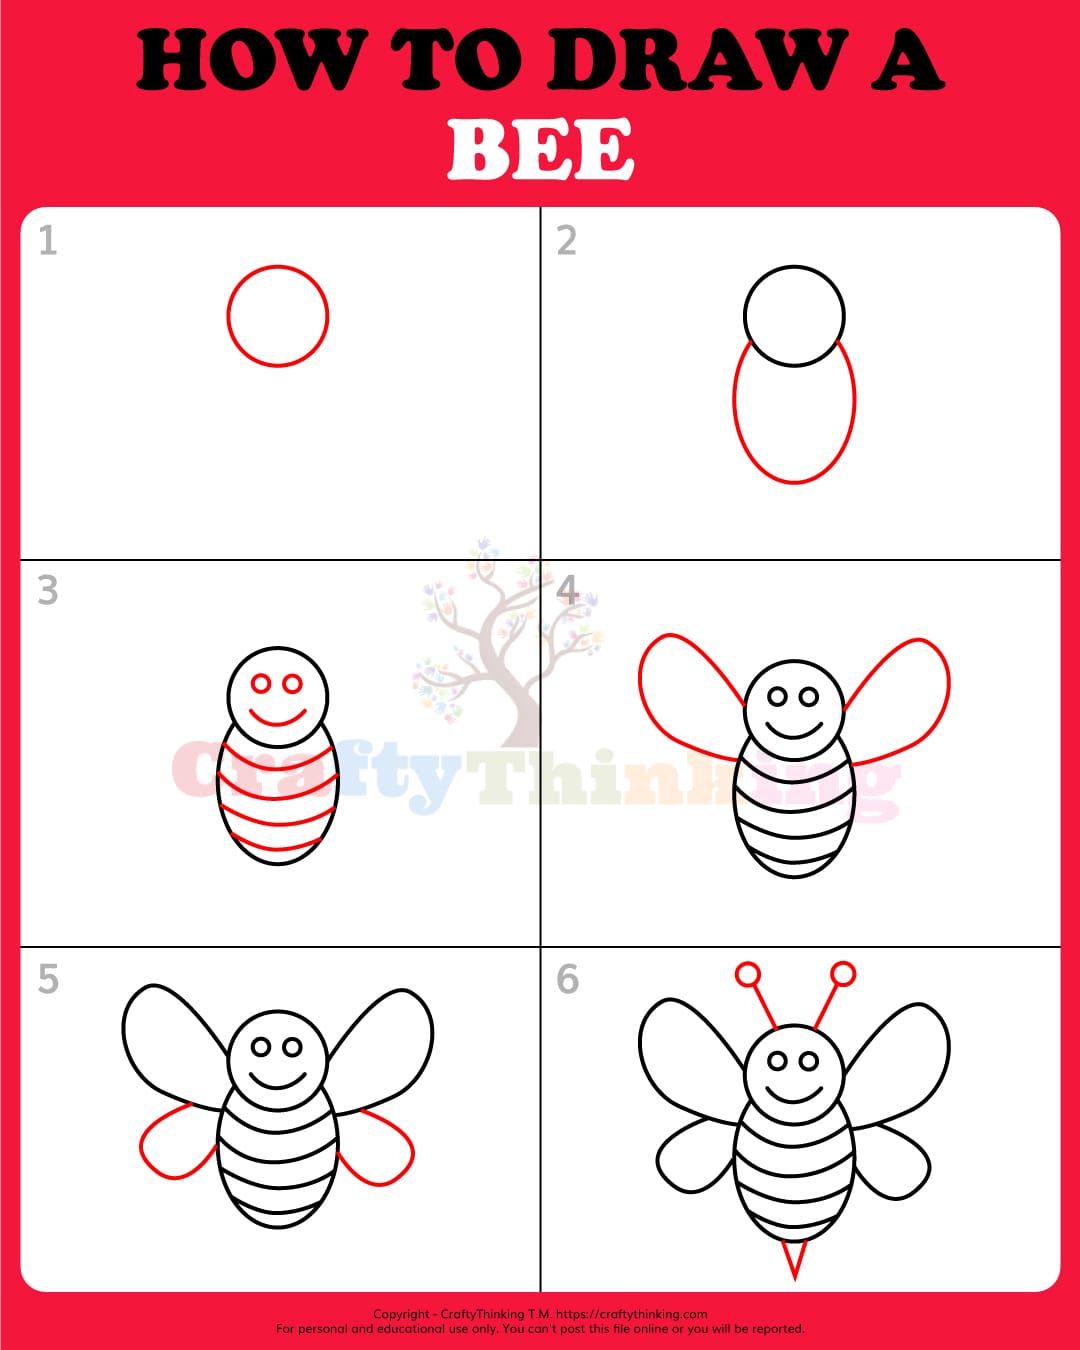
Step 1: Start with the Basics
- Begin your bee drawing with the head. Sketch a circle – it doesn’t have to be perfect; a slightly oval shape works too.
- This is the foundation of how to draw a simple bee.
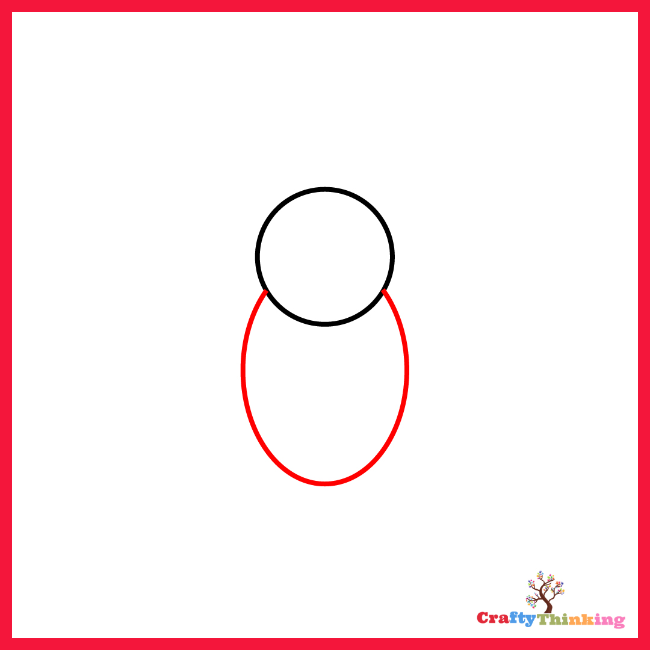
Step 2: Body of the Bee
- Below the head, sketch an oval shape slightly larger than the head.
- This forms the body of our bee, setting the stage for those who wonder, “How do you draw a bumble bee?”
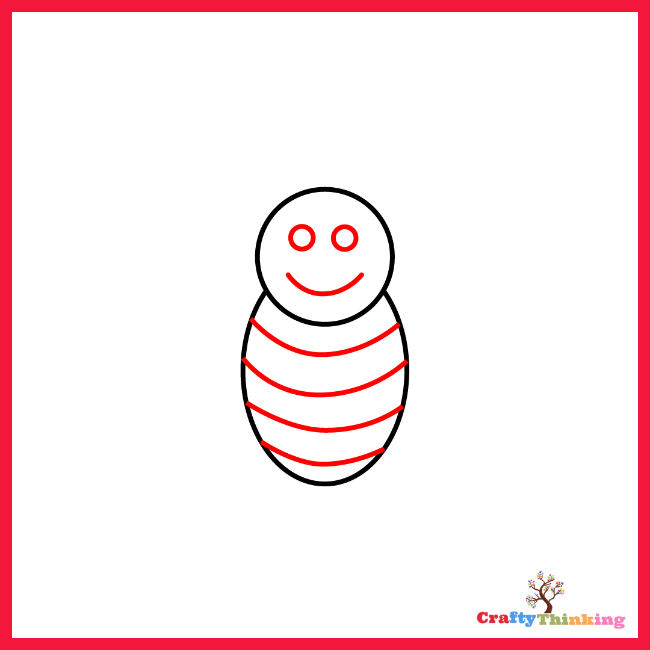
Step 3: Add Details to the Body
- Work on the body by adding a few stripes.
- These slightly curved lines can arc upwards or downwards.
- Add two small circles on the face for the eyes and fill them in.
- Complete the face with an upward-pointing curve for the mouth, giving our bee a cheerful smile.
Step 4: Wings in Flight
- Now, let’s focus on the wings.
- Draw the first pair starting from the center of the head, extending to the upper part of the body.
- This is essential for those looking to learn how to draw a bee flying.
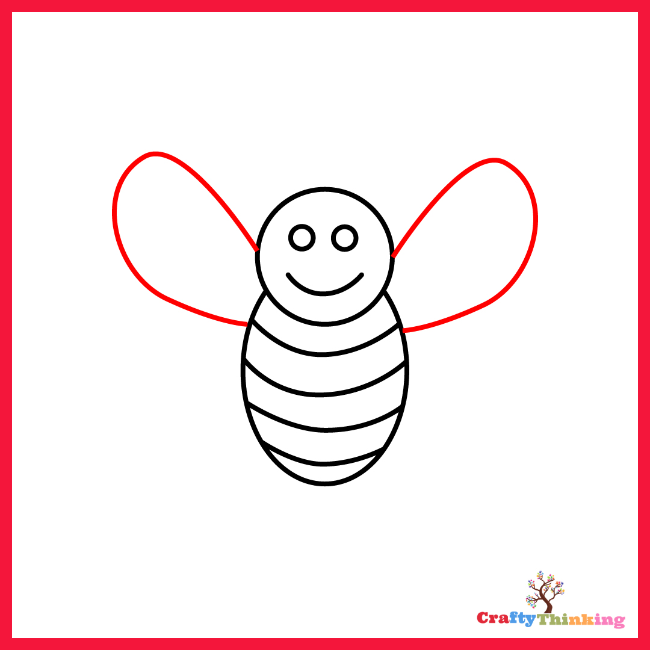
Step 5: Secondary Wings
- Below the first set, sketch another pair of wings.
- Start from the lower portion of the upper wings and extend to the middle of the body.
- These wings, represented with curves, add depth to our bee drawing.

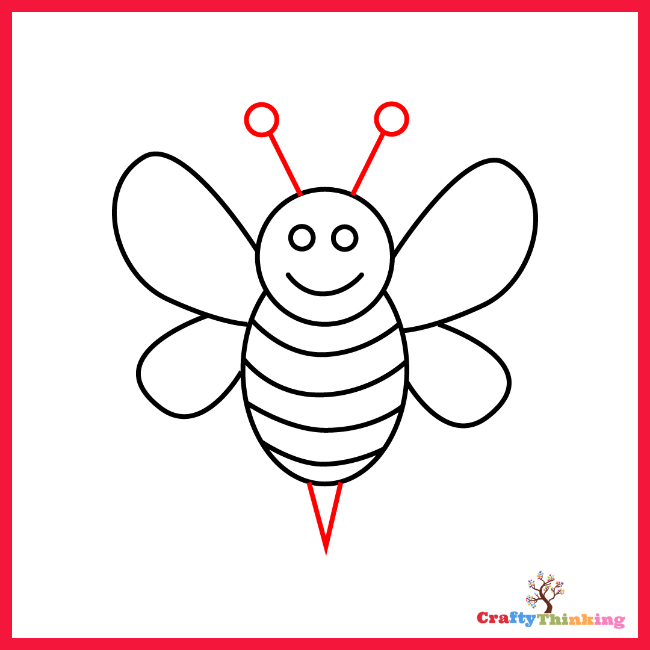
Step 6: Final Touches
- Sketch the sting, a sharp triangle at the base of the body.
- Then, draw the antennae: two straight lines from the top of the head, one shorter and one longer, each topped with a medium-sized circle.
- For added flair, draw a curvy line with loops below the sting, giving the effect of a bee in flight.
- Optionally, sketch a beautiful flower beside the bee for added context.
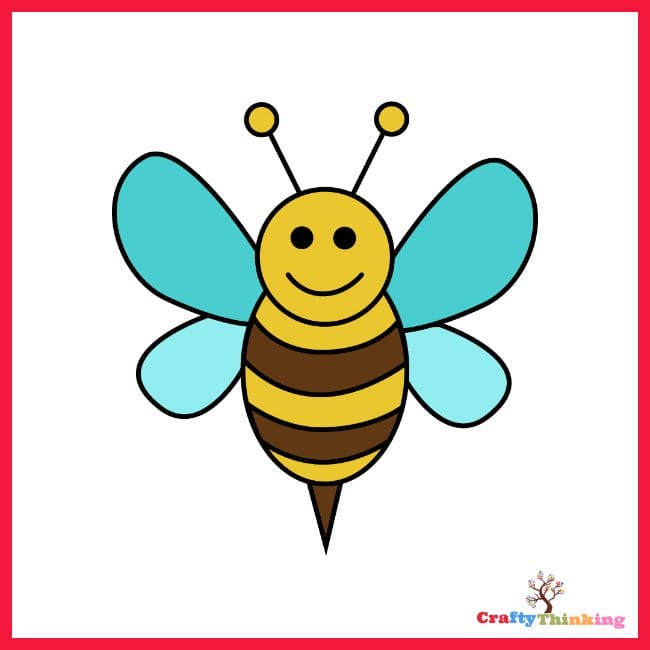
Step 7: Bring Your Bee to Life with Color
- The final step in our bee drawing tutorial is coloring.
- While you can use your creativity, we’ve colored our bee in classic black and yellow, with blue wings.
- For a more realistic look, shade the outer parts darker than the inner areas.
Congrats
Congratulations on completing this tutorial on how to draw a bee step by step!
Whether you were aiming for a cartoon bumble bee or a realistic honey bee, we hope you found this guide helpful.
For those interested in more art adventures, perhaps exploring how to draw a bee hive or diving into the world of pinterest bee artworks, keep an eye out for similar posts and tutorials.
Remember, every drawing journey starts with a single line, so keep buzzing and exploring the world of art!
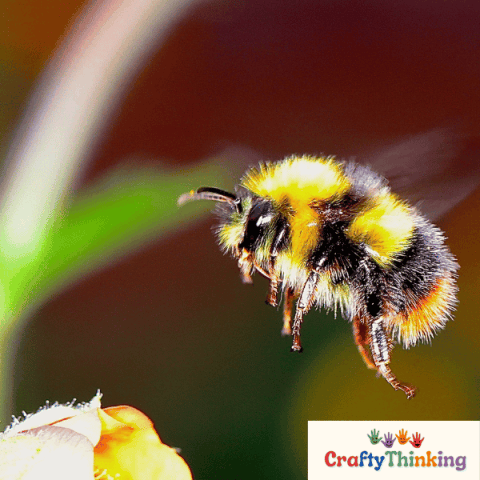
How To Draw a Realistic Bee
Bees are fascinating creatures, not just for their role in pollination and honey production, but also for their intricate anatomy and distinct appearance.
Drawing a realistic bee requires attention to detail and a bit of patience.
In this tutorial, we'll guide you through the process of drawing a realistic bee, capturing its delicate wings, fuzzy body, and distinctive stripes.
Let's dive into the world of bees and bring one to life on paper!
Materials
- Drawing paper or sketchbook
- Pencil (HB or 2B recommended)
- Eraser
- Fine-tip black pen or marker
- Colored pencils or watercolor (optional for coloring)
Instructions
Start with the Head and Thorax:
- Begin by drawing a small oval for the bee's head.
- Right below the head, draw a slightly larger oval for the thorax, the bee's middle section.
Sketch the Abdomen:
- Draw a longer oval attached to the thorax, ensuring it tapers slightly at the end.
- This forms the bee's abdomen, where its distinctive stripes will be.
Detail the Wings:
- Draw two long oval shapes on each side of the thorax for the bee's wings.
- The top wing should be slightly larger than the bottom one.
Draw the Legs:
- Bees have six legs. Start by drawing three thin, segmented legs on each side of the thorax.
- The front legs are shorter, while the back legs are longer and thicker,
- Especially in honey bees, which use them to collect pollen.
Add Facial Features:
- On the bee's head, draw two small, compound eyes on either side.
- Sketch the antennae, which are segmented and slightly curved, emerging from the top of the head.
Incorporate the Stripes:
- On the bee's abdomen, draw the iconic black and yellow stripes.
- Remember, the pattern can vary depending on the bee species.
Detail the Wings:
- Add a few curved lines within each wing to represent the wing's veins.
- This detail adds realism to your bee drawing.
Finalize with Fine Details:
- Using a fine-tip pen or marker, go over your pencil lines to make your bee drawing stand out.
- Erase any unnecessary pencil marks.
Color Your Bee (Optional):
- If you wish to add color, use yellow for the bee's body, black for the stripes, eyes, and legs, and a light blue or gray for the wings.
Congratulations! You've now learned how to draw a realistic bee.
With practice, you'll be able to capture the beauty and intricacy of these essential pollinators.
Notes
Did you create this craft? If so, we would love to hear from you! Please feel free to leave a comment on the blog or share a photo of your creation on Pinterest.
Recommended Products
Thank you for supporting our family-owned business!

Looking for an easy bee drawing tutorial?
Absolutely! Our easy step-by-step tutorial is perfect for those who love drawing and want to create a beautiful bee.
We start by drawing the basic shape of the bee, focusing on the head of the bee and thorax.
By following our printable drawing guide, even kids of all ages can make a buzzing bee come to life on their drawing paper.
How can you draw a bee easy using just a few simple steps?
Drawing a bee is a breeze with our easy bee drawing step by step guide. Begin with the head and thorax using two simple shapes.
The next step is to draw the wings of your bee, followed by the bee’s body.
Add details like the front leg, pollen, and a thin line to make your bee look realistic.
By the end, you’ll have a finished drawing that’s both fun and easy to create!
Interested in a bee printable to practice your drawing step by step?
Of course! Our printable tutorial is designed to make drawing fun and accessible.
It breaks down the process into easy steps, from drawing the head to adding the final touches to your bee sketch.
With this guide, even beginners can draw a beautiful bee in a few simple steps.
And once you’ve finished your bee, there’s ample opportunity for drawing and coloring to make it uniquely yours.
What drawing supplies do you recommend for a realistic bee drawing?
For a realistic bee drawing, I’d suggest starting with a good quality pencil to sketch the basic shape of the bee.
This allows for detailed work on parts of the bee like the head, thorax, and front leg.
A set of colored pencils or watercolors can bring vibrancy to your bee, especially when highlighting features like pollen.
And don’t forget a fine-tip pen or marker to outline and make your bee drawing easy to distinguish.
With the right supplies, your bee may just look like it’s about to buzz off the page!
Frequently Asked Questions
Here are some frequently asked questions about How to Draw a Bee. Get some quick answers to everything you need to know.
-
How do you draw a simple bee?
For a simple bee, start with an oval for the body and a smaller circle for the head.
Add two wings on either side of the body, draw two antennae on the head, and finish with stripes on the body.
-
How do you draw a bee step by step for kids?
To draw a bee for kids, begin with a large circle for the body and a smaller one for the head.
Add two big eyes, a smiley mouth, and two curved antennae.
Draw two wings on the sides and add simple lines for legs. Finish with a few stripes on the body.
-
How do you draw a queen bee easy?
For an easy queen bee, start with the basic bee shape but elongate the body slightly.
Add a small crown on her head, larger wings, and more pronounced stripes.
Don’t forget her distinctive pointed stinger at the end of her abdomen.
-
How do you draw a wasp easy?
To draw an easy wasp, begin with a slender oval for the body and a circle for the head.
Add two wings on each side, two antennae, and six thin legs.
Wasps have a more tapered abdomen compared to bees, so ensure the body narrows towards the end.
-
How to draw a bee with pencil?
Using a pencil allows for more detailed shading and precision.
Start by lightly sketching the basic shapes of the bee.
Once satisfied with the outline, press harder to define the lines, add details like the wings’ veins, and use shading to give the bee depth and dimension.
-
How to draw a bumble bee?
Bumble bees are more robust and fuzzy compared to other bees.
Begin with a round body and a smaller round head.
Add two large wings, short antennae, and six legs.
Finish by drawing the bee’s distinctive thick black and yellow stripes, and remember to give it a fuzzy texture.
Wrapping Up How to Draw a Bee
How to Draw a Bee has been a delightful journey from the first sketch to the final touches.
With each step, we’ve unraveled the beauty and simplicity of this buzzing marvel.
As you continue to hone your artistic skills, remember that practice makes perfect, and every drawing brings you closer to mastery.
I hope you gain value from How to Draw a Bee: A Step by Step Cute Bee Tutorial.
If you like this article about How to Draw A Bee and would like to know more, please comment below.


