

How to Draw a Butterfly Step by Step Guide
How to Draw a Butterfly begins with simple shapes and builds up to the intricate patterns that make these creatures a favorite for artists of all levels.
Whether you’re looking to capture the delicate symmetry of their wings or the vibrant patterns that set each species apart, this guide is designed to walk you through each stage with clarity and ease.
Keep reading to find out How to Draw a Butterfly with this Step by Step Guide.
You might also like:
- How to Draw for Kids
- Creative Drawing Ideas
- List of Art Supplies for Beginner’s
- Art Supplies for Toddlers List
- Art Supplies List for Preschool
- Art Supplies List for Elementary School
- Art Supplies List for Middle School
- Art Supplies List for High School
- List of Art Supplies for Artists
- List of Art Supplies for Painting
How to Draw a Butterfly?
To draw a butterfly, start by sketching the body in the center of your paper, add a small circle for the head, and draw two larger ovals on each side for the wings.
Detail the wings with patterns like circles or stripes, and finish with two antennae on the head.
Use light strokes to make adjustments easier as you refine your drawing.
How to Draw a Butterfly Step by Step Tutorial
Drawing a butterfly can be a fun and rewarding experience, especially when you have the right guide to assist you.
Whether you’re aiming to draw a realistic butterfly or a simple one, this step-by-step tutorial is designed to help you achieve that.
Let’s dive into the easy steps to create a beautiful butterfly drawing.
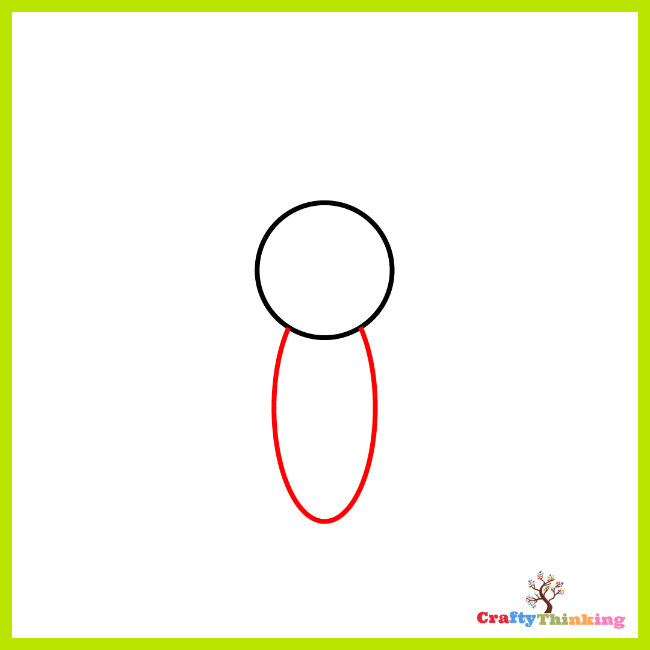
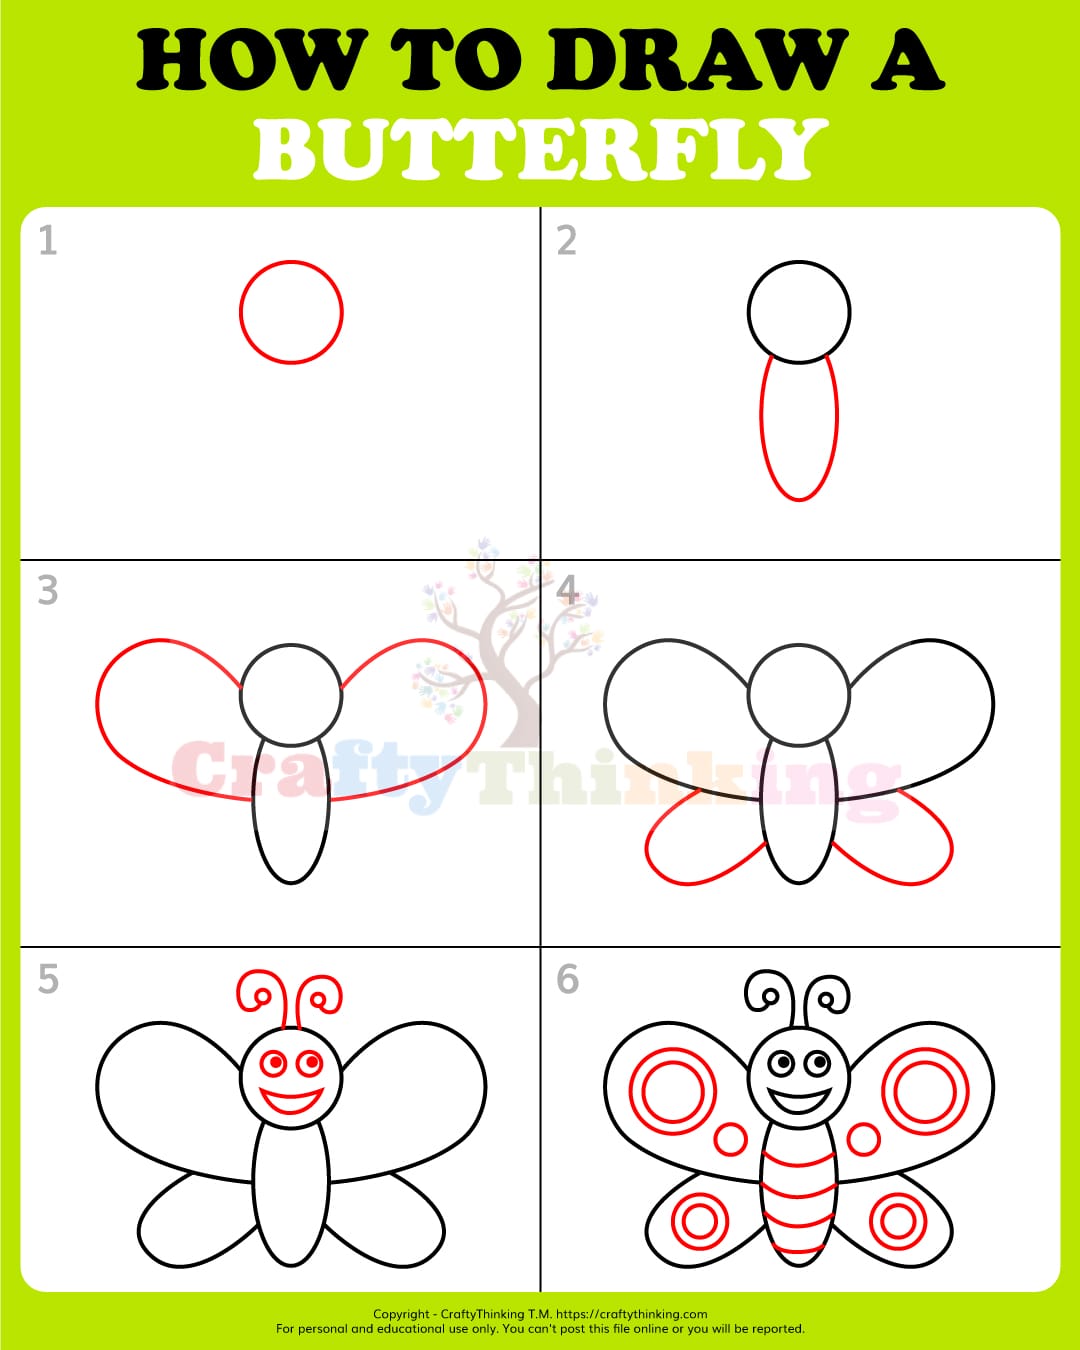
Step 1: Start with the Basics
- Begin by drawing a small circle in the center of your page, representing the head of the butterfly.
- Fun fact: Butterflies can only feed on liquids, typically nectar.

Step 2: Shape the Body
- Draw an oval shape right below the circle, which will serve as the butterfly’s body.
- This can have a slightly pointed end, resembling the body of many butterfly species.
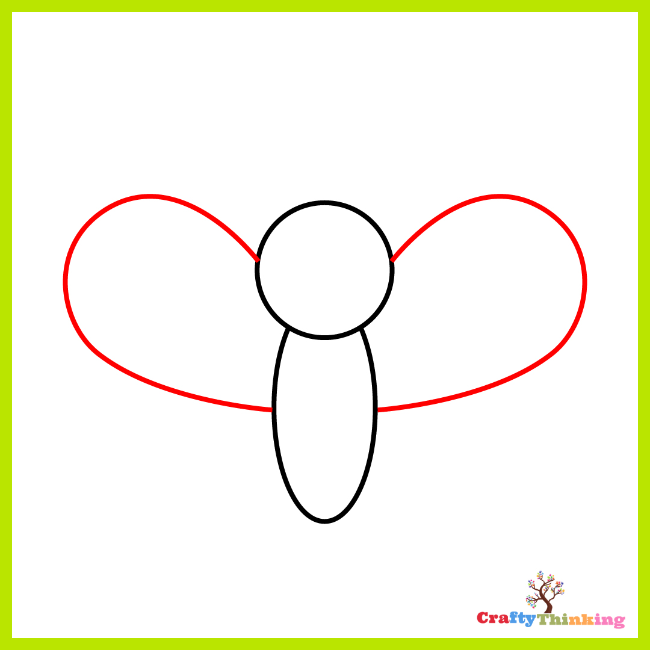
Step 3: Craft the Forewings
- The wings are the butterfly’s most captivating feature.
- Start drawing the first pair of wings, originating from the head and connecting to the body.
- These wings, known as forewings, should be round in the middle and resemble a wide oval shape.
- They should be symmetrical on both sides.
- Remember, forewings are generally closer to the butterfly’s head.
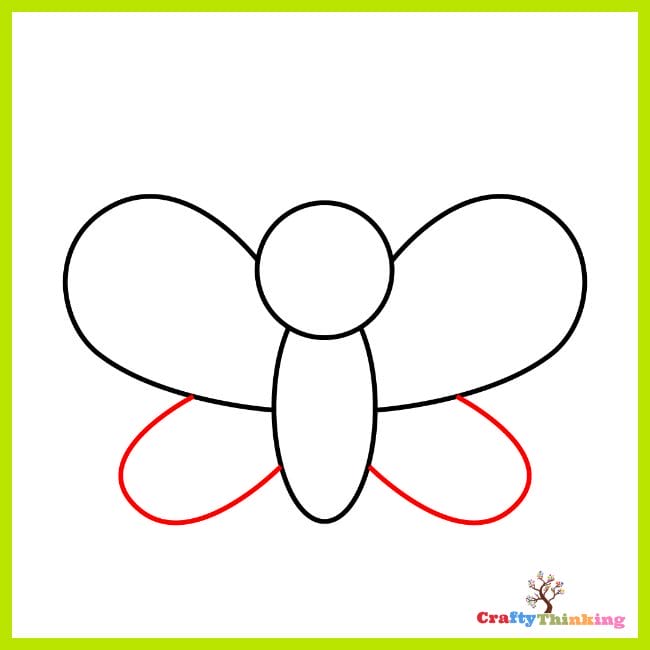
Step 4: Design the Hindwings
- Now, sketch the second pair of wings, termed as hind-wings.
- These are typically smaller than the forewings but can vary based on the butterfly species.
- Ensure these hind-wings are closer to the butterfly’s body or tail.
Step 5: Add Facial Features and Antennae
- Time to bring your butterfly to life!
- Sketch two circles for the eyes and add pupils.
- A smiling face always adds charm, so draw a cheerful mouth.
- Don’t forget to sketch a pair of antennae emerging from the head, ending each with a tiny bean-like structure.
- Interesting tidbit: Butterflies can perceive colors beyond human capability!
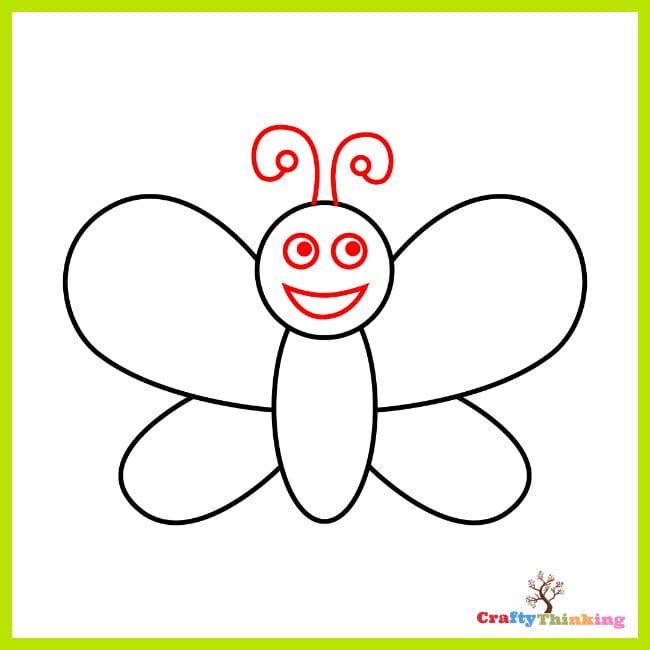
Step 6: Embellish the Wings
- The beauty of a butterfly often lies in the intricate patterns on its wings.
- For simplicity, create a circle with a smaller circle inside on each wing.
- You can also incorporate small arches on the body.
- Remember, the design on the wings can be as intricate or simple as you desire.
- Let your creativity soar!

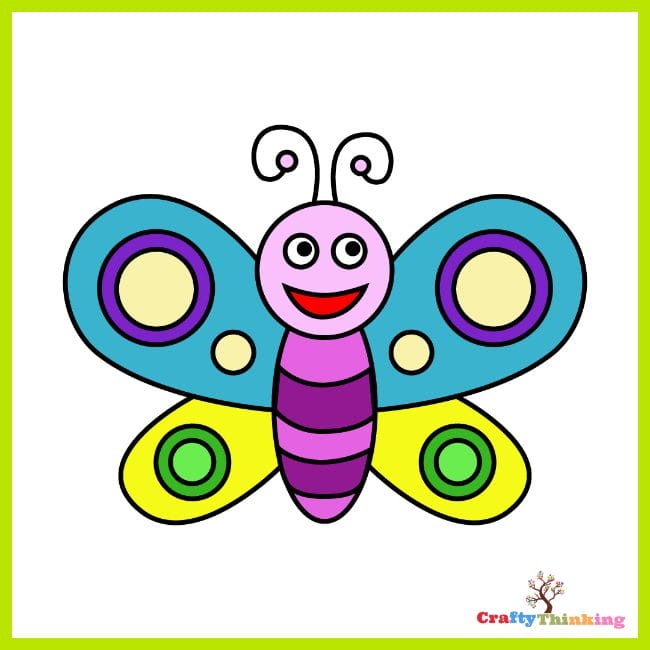
Step 7: Color Your Masterpiece
- The final step is all about adding vibrant colors to your butterfly drawing.
- Butterflies are renowned for their vivid hues, so don’t shy away from using bold colors.
- To add depth, use darker shades around the edges and lighter ones in the center.
Congrats
Congratulations on your achievement! Remember, practice makes perfect, so keep drawing and refining your skills.
And if you enjoyed this butterfly drawing tutorial, don’t forget to explore more of our tutorials designed to help you learn how to draw various subjects.
Happy drawing!
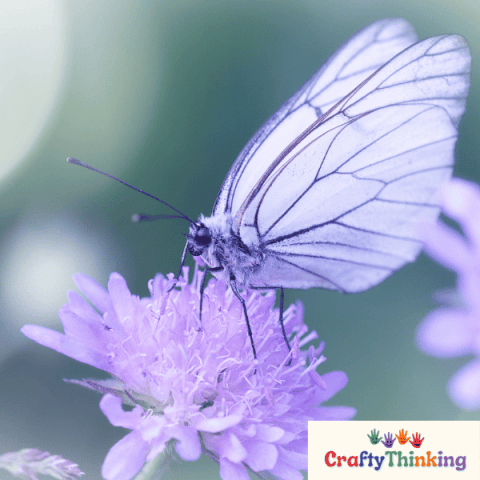
How To Draw a Realistic Butterfly
Creating a realistic butterfly drawing can be a rewarding artistic endeavor, capturing the delicate beauty of one of nature's most fascinating insects.
This guide offers a step-by-step approach, starting with the basic shapes and progressing through detailed patterning, to help you craft a lifelike representation of a butterfly.
You'll begin by sketching the fundamental forms, refining them into the distinct wings and body, and then meticulously adding the intricate patterns that butterflies are known for.
With the right materials like a variety of pencils, fine-tip pens, and quality paper, along with optional colored pencils or watercolors for vibrancy, you'll be equipped to bring your butterfly to life.
Whether you're a seasoned artist or a beginner looking to improve your drawing skills, this guide promises to enhance your technique and understanding of drawing these beautiful creatures.
Materials
- Sketch paper or drawing pad
- Pencils (HB, 2B, 4B, 6B)
- Fine-tip drawing pens
- Eraser (preferably kneaded)
- Colored pencils or watercolor paints
- A reference image of a butterfly
Instructions
Step 1: Outline the Basic Shapes
- Start with light sketches,
- Drawing an oval for the butterfly's body and smaller circles for the head and tail.
- Sketch the basic wing shapes using elongated ovals;
- Remember, most butterflies have two sets of wings.
Step 2: Refine the Wing Shapes
- Define the upper and lower wings with more precise curves,
- Ensuring they are symmetrical.
- Add the wing veins, which provide structure and patterns to the wings.
Step 3: Detail the Body and Head
- Draw the antennae with fine lines and small circles at the tips.
- Detail the head with tiny eyes,
- And use thin lines to suggest the segmented body.
Step 4: Add Patterns to the Wings
- Observe your reference and replicate the unique patterns and spots on the wings.
- Use a combination of curved and straight lines to mimic the intricate designs.
Step 5: Finalize the Drawing with Pencil
- Darken the outlines and patterns, cleaning up any unnecessary sketch lines.
- Add texture to the body and depth to the wings with shading techniques.
Step 6: Apply Color (Optional)
- If using colored pencils, layer colors to build up the butterfly's vibrant hues.
- For watercolor, start with light washes and gradually add darker shades for depth.
Step 7: Finishing Touches
- Use a fine-tip pen to outline the butterfly, giving it a crisp, defined look.
- Erase any remaining pencil marks for a clean presentation.
Final Notes
Remember, the key to a realistic drawing is observation and patience.
Take your time with each step, and don't be afraid to make adjustments as needed.
Enjoy the process, and with practice, your butterfly drawings will take flight with realism and beauty.
Notes
Did you create this craft? If so, we would love to hear from you! Please feel free to leave a comment on the blog or share a photo of your creation on Pinterest.
Recommended Products
Thank you for supporting our family-owned business!


Where can I find a printable step-by-step butterfly drawing tutorial?
You can find a printable step-by-step butterfly drawing tutorial on various educational websites and art blogs that specialize in drawing lessons.
These resources often offer a range of tutorials from basic butterfly shapes to intricate monarch butterfly wings, complete with easy-to-follow instructions and illustrations for each step.
What supplies are needed for an easy butterfly drawing?
For an easy butterfly drawing, you’ll need basic drawing supplies such as a pencil, eraser, drawing paper, and optionally, coloring materials like crayons or colored pencils.
Start with simple steps, like drawing the thorax and abdomen, and use curved lines to sketch the butterfly’s wings.
Is there a simple butterfly drawing tutorial that includes coloring?
Yes, many step-by-step drawing tutorials include both the sketching and coloring stages.
These guides help kids and beginners learn how to draw a butterfly easy, with sections on adding colors and patterns to make the drawing realistic and vibrant, enhancing the fun butterfly art activities.
How can I access a free butterfly drawing guide online?
Free butterfly drawing guides are readily available online.
You can download these from art education platforms, blogs, or community forums.
These guides often include a step tutorial with free printable materials, making it convenient to practice drawing and coloring butterflies with various patterns you drew.
Frequently Asked Questions
Here are some frequently asked questions about How to Draw a Butterfly. Get some quick answers to everything you need to know.
-
How can I draw a realistic butterfly?
Drawing a realistic butterfly involves observing real butterflies or photos for accurate wing shapes and patterns.
Begin with the basic outline of the wings and body, then add detailed vein patterns, symmetrical wing designs, and use shading to give depth and dimension.
A pencil with a fine point can help in adding the intricate details that make the butterfly look lifelike.
-
What are the basic steps to draw a butterfly for beginners?
For beginners, the basic steps to draw a butterfly include drawing a vertical line for symmetry, sketching the body and head, and adding two sets of wings on either side of the body.
Outline the wings with simple shapes, and then add basic patterns like dots or stripes.
Keep the shapes and lines simple, focusing on symmetry to achieve a recognizable butterfly form.
-
Are there any easy drawings of a butterfly for kids?
Yes, there are many easy drawings of butterflies suitable for kids, which often start with basic shapes like circles for the body and ovals for the wings.
These tutorials typically use simple lines and avoid complex patterns, making the process enjoyable and manageable for young artists.
Coloring pages with outlined butterflies are also a great way for kids to practice.
-
How is drawing a butterfly different from drawing other insects?
Drawing a butterfly is different from other insects primarily in the wing structure—butterflies have large, often brightly colored wings with unique patterns.
In contrast, other insects may have smaller or less decorative wings and more segmented bodies.
The emphasis on the wings’ symmetry and patterns is a distinctive aspect of butterfly drawings.
Wrapping Up How to Draw a Butterfly
Drawing a butterfly is not just about creating an image on paper; it’s about capturing the essence of one of nature’s most beautiful creatures.
With this step-by-step guide, you now have the tools to draw a butterfly with ease and precision.
Whether you used a pencil, crayon, or watercolor, the joy of creating a butterfly art piece is unmatched.
If you like this article about How to Draw A Butterfly and would like to know more, please comment below.


