

How to Draw a Caterpillar Step by Step Drawing Tutorial
How to Draw a Caterpillar is a delightful and educational art journey that both beginners and seasoned sketch artists can enjoy.
This guide is designed to unfold the intricate beauty of these creatures, capturing their unique segments and textures with each pencil stroke.
Keep reading to find out How to Draw a Caterpillar in this Step by Step Drawing Tutorial, where we’ll transform simple lines into a lifelike caterpillar ready to crawl off your page.
You might also like:
- How to Draw for Kids
- Creative Drawing Ideas
- List of Art Supplies for Beginner’s
- Art Supplies for Toddlers List
- Art Supplies List for Preschool
- Art Supplies List for Elementary School
- Art Supplies List for Middle School
- Art Supplies List for High School
- List of Art Supplies for Artists
- List of Art Supplies for Painting
How to Draw a Caterpillar?
To draw a caterpillar step by step, start with a series of overlapping circles or ovals to form the body, add a rounded head, then detail with segments, legs, and facial features, finishing with fine lines to suggest texture.
Materials Needed
Before we begin the step-by-step tutorial on how to draw a caterpillar, let’s gather the materials you will need for this activity:
- A pencil
- A sheet of paper
- Colored pencils (optional)
Make sure to have these materials ready before you start drawing.
How to Draw a Caterpillar Step By Step Tutorial
Embark on a delightful journey to learn how to draw a caterpillar step by step easy, perfect for artists of all ages.
This tutorial will guide you through simple and fun steps to create a caterpillar drawing cartoon that’s both cute and realistic.
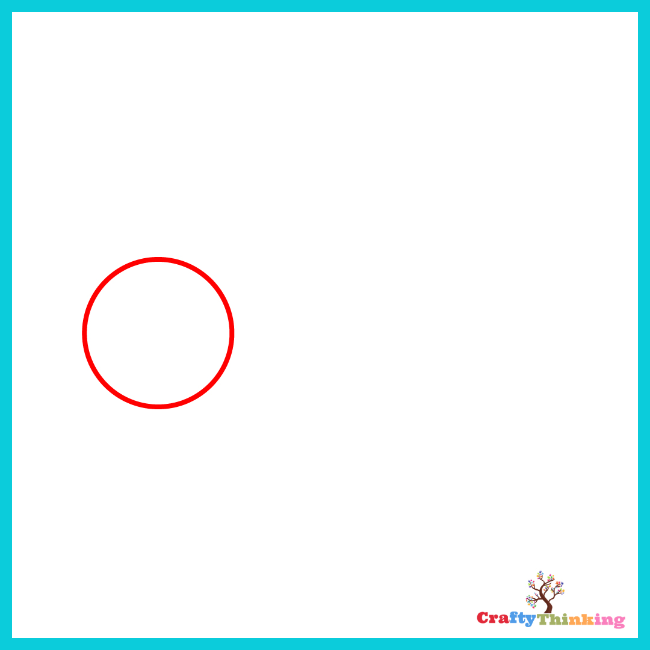
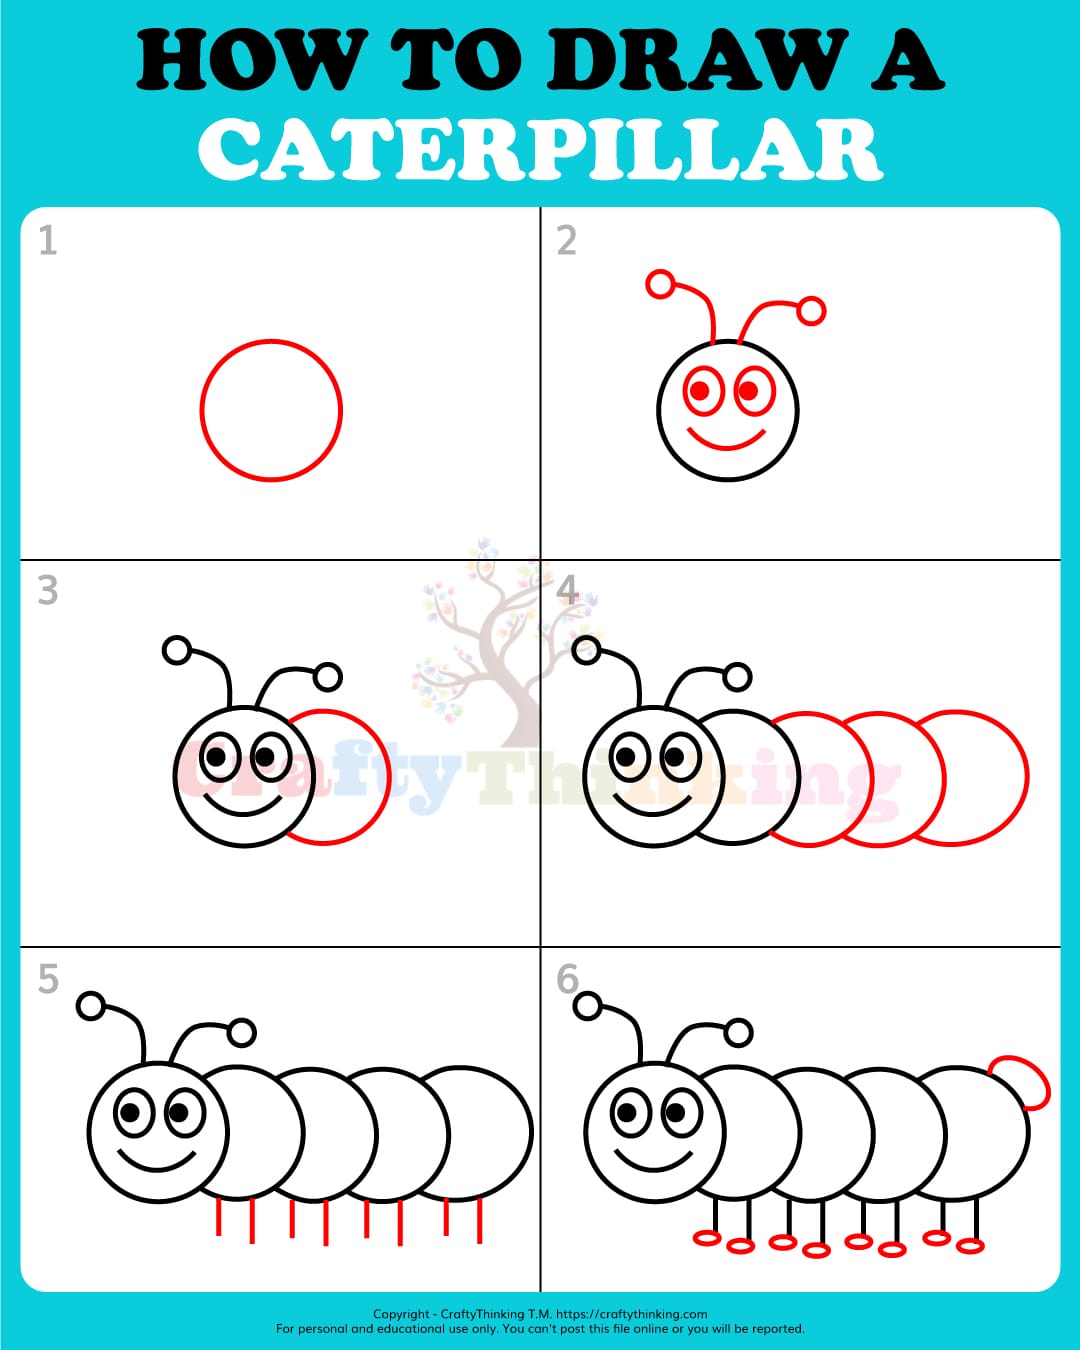
Step 1: The Head
- Begin your caterpillar drawing with color by sketching a circle for the head.
- It’s not just any circle; think of it as the foundation of your caterpillar’s character,
- So feel free to make it slightly oval or oblong for a touch of whimsy.
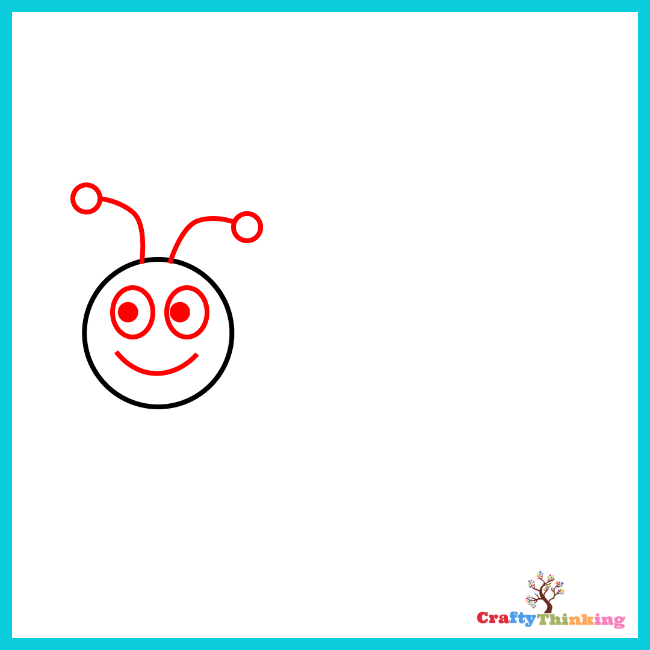
Step 2: Facial Features
- Now, let’s give life to your caterpillar’s face.
- Start with two circles for the eyes and fill them in for depth.
- Then, draw a cheerful smile to bring out the caterpillar’s personality.
- Don’t forget the antennae—two lines with tiny circles atop, one slightly shorter to add perspective.
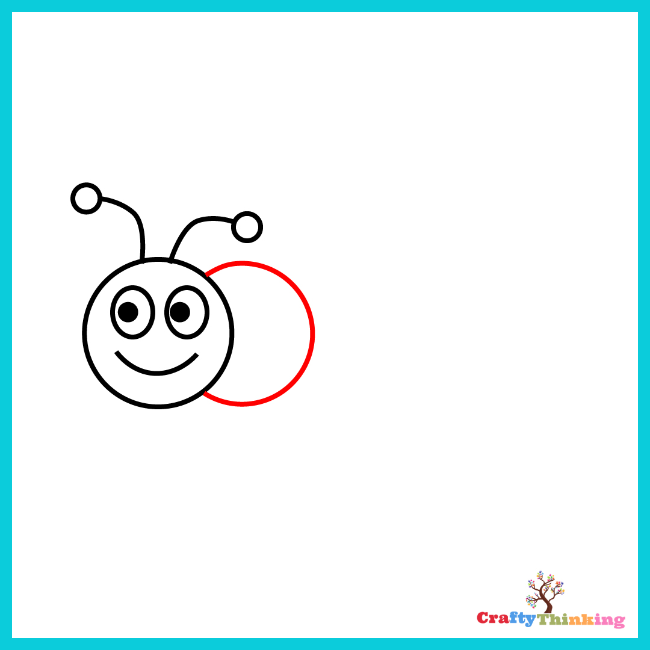
Step 3: Body Segments
- Adjacent to the head, draw another circle or an “opposite C” for the first body segment.
- This step is crucial in learning how to draw a caterpillar realistic, as it sets the tone for the rest of the body.
Step 4: More Segments
- Keep the momentum going! Add more circles or “C” shapes,
- Ensuring they don’t overlap, to extend the caterpillar’s body.
- The number of circles you draw will determine the length of your caterpillar drawing for kids.

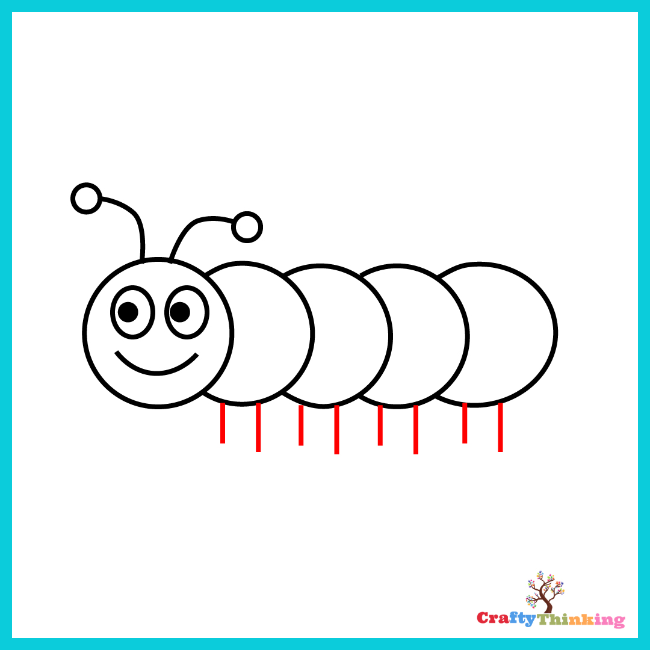
Step 5: The Feet
- It’s time for the feet.
- Draw two lines per segment, varying in length to suggest depth.
- Remember, no feet on the head!
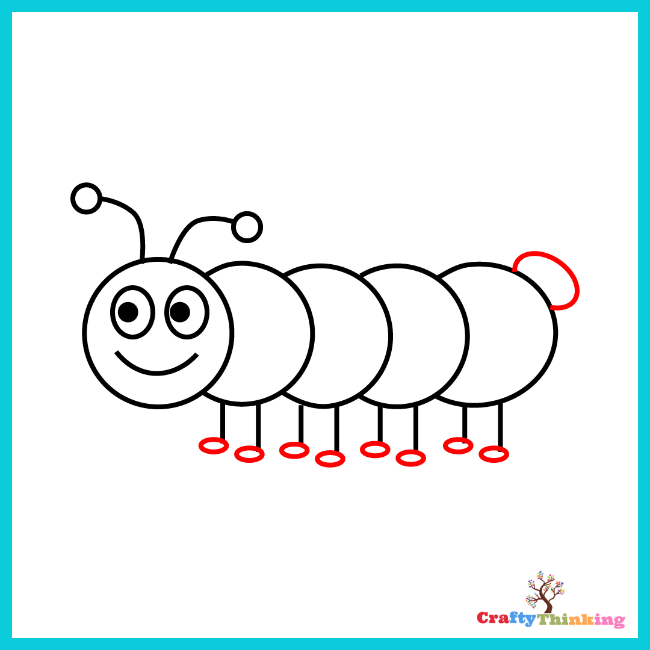
Step 6: Final Touches
- Add tiny dots at the line ends to represent the feet.
- Your caterpillar is now taking shape, looking like a cute caterpillar drawing that’s ready for the next step.
Step 7: Color It In
- Choose your colors—shades of green or brown are common, but feel free to explore.
- We’ve opted for a red face and a green body, adding a playful contrast to your caterpillar drawing with color.

Congratulations!
- You’ve successfully completed the how to draw a caterpillar step by step tutorial.
- Keep practicing and exploring different colors and patterns to make your caterpillar unique.
- Share this guide with friends and check back for more creative tutorials!
How to Draw a Realistic Caterpillar
Drawing a realistic caterpillar involves creating a series of overlapping segments with a light initial sketch, refining the form with detailed textures, and using shading to add volume.
Materials like a range of pencils, blending stumps, and colored pencils are essential for capturing the intricate patterns and hues.
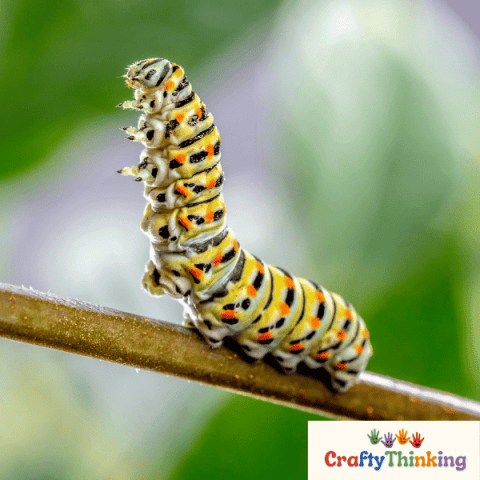
Observing a reference image helps accurately depict the caterpillar's true and prolegs, as well as its unique markings.
The final artwork emerges through careful layering of colors, precise shading, and adding highlights to bring the drawing to life.
Materials
- Pencils: A range of pencils from hard (2H) for light shading to soft (6B) for dark areas.
- Eraser: A kneaded eraser for gentle erasing and a hard eraser for stronger lines.
- Paper: High-quality drawing paper with a slight texture.
- Blending tools: Stumps or tortillons for smooth shading.
- Colored pencils or pastels (optional): For adding color to your caterpillar drawing.
- Reference image: A high-resolution photo of a caterpillar for accuracy.
Instructions
Outline the Body:
- Begin by lightly sketching the segmented body of the caterpillar using elongated ovals.
- Ensure each segment slightly overlaps the previous one to create a realistic 3D effect.
Add Detail to the Head:
- Draw the head at one end of the body with more detail, including the mouthparts, eyes, and antennae.
- Use your reference image to capture the unique features of the caterpillar species you're drawing.
Define the Segments:
- Go over each body segment, adding the necessary texture and patterns.
- Caterpillars often have spines, hairs, or distinct patterns that should be carefully replicated.
Draw the Legs:
- Caterpillars have three pairs of true legs at the front and several prolegs along the body.
- Sketch these in, considering their placement according to the perspective of your drawing.
Shading and Texture:
- Use a range of pencils to shade the caterpillar, creating volume and depth.
- Pay attention to the light source to ensure the shadows and highlights are consistent.
Final Details:
- Add any final details such as the fine hairs or spines, and use a blending tool to smooth out the shading.
- If you're using color, this is the time to layer your colored pencils or pastels.
Background (optional):
- To place your caterpillar in a setting, lightly sketch a leaf or branch that the caterpillar might be on, adding to the realism of your drawing.
Final Notes
- Remember, the key to a realistic drawing is observation and patience.
- Take your time with each step, and don't hesitate to make adjustments as needed.
- Keep referring to your reference image and focus on the unique characteristics of the caterpillar you're drawing.
- With practice, your skills in drawing realistic caterpillars will undoubtedly improve.
Notes
Did you create this craft? If so, we would love to hear from you! Please feel free to leave a comment on the blog or share a photo of your creation on Pinterest.
Recommended Products
Thank you for supporting our family-owned business!


Where can I find similar posts to this easy caterpillar drawing tutorial?
You can find a similar post to an easy caterpillar drawing tutorial on YouTube, titled “How To Draw A Caterpillar” by Art for Kids Hub.
They offer a variety of art supplies and encourage viewers to subscribe to their channel for more tutorials.
Additionally, Art Projects for Kids provides an easy step-by-step tutorial and a coloring page for drawing a caterpillar, with tips on adding shading to create a more three-dimensional look.
Another resource is their guide on how to paint a caterpillar, which gives instructions for achieving a squishy look with the drawing.
What are the easy steps for shading along the body in a caterpillar drawing?
For easy steps in shading along a caterpillar drawing, begin with a light curved line to establish the form.
As you continue drawing, apply darker shades along the curves to create depth.
Especially around the segments of the caterpillar, to give it a more three-dimensional appearance.
Can you recommend a step-by-step tutorial for how to draw an easy caterpillar?
A step-by-step tutorial for how to draw an easy caterpillar can typically be found for free on educational websites, pinterest or art blogs.
Where you can learn to draw with directed drawing printables that guide you through each step, from drawing a small circle for the head to adding the final touches to the caterpillar’s body.
Are there any step-by-step instructions that can help me learn how to draw caterpillars with realistic shading?
For further exploration, you can check out the guide on How to Draw a Caterpillar – Creating a Fun Caterpillar Sketch, which provides comprehensive instructions and tips for drawing a realistic caterpillar.
10 Tips To Make Your Caterpillar Drawings Better
Drawing a caterpillar can be a fun and enjoyable activity, especially when you know a few tips and tricks to make your drawings even better.
Here are 10 tips to help you improve your caterpillar drawings:
- Start with a rough sketch: Before drawing the final lines, start by lightly sketching the basic shapes and proportions of the caterpillar. This will help you get a sense of its overall form.
- Observe real caterpillars: Look at pictures or observe caterpillars in nature to get a better understanding of their shapes, colors, and textures. This will make your drawings more realistic.
- Vary the size of the segments: To add depth and dimension to your caterpillar, remember to make each segment slightly smaller than the previous one. This will give the illusion of overlapping segments.
- Play with different body shapes: While a typical caterpillar has a long and cylindrical body, you can experiment with different shapes to create unique and interesting caterpillar designs.
- Add details to the segments: Use your pencil to lightly sketch small lines or dots across each segment to represent the texture or markings on the caterpillar’s body.
- Use shading to create depth: To make your caterpillar drawing more three-dimensional, add shading to some areas of the body. This will create shadows and highlights, giving it a more realistic look.
- Experiment with colors: While most caterpillars are green, don’t be afraid to experiment with different colors. Get creative and use a variety of hues to make your caterpillar stand out.
- Focus on the head and face: The head and face of the caterpillar are important for conveying its character and expression. Pay attention to the details of the eyes, mouth, and antenna.
- Practice drawing different species: Caterpillars come in many different shapes, colors, and patterns. Challenge yourself by drawing various species to expand your drawing skills.
- Have fun and be patient: Drawing takes practice, so don’t get discouraged if your first attempts are not perfect. Enjoy the process, be patient with yourself, and allow yourself to make mistakes. Remember, the more you practice, the better you will become.
Frequently Asked Questions
Here are some frequently asked questions about How to Draw a Caterpillar. Get some quick answers to everything you need to know.
-
What materials do you need to draw a caterpillar?
The materials you need to draw a caterpillar typically include a pencil, eraser, drawing paper, and optionally, colored pencils or markers for coloring.
-
How can shading enhance your caterpillar drawing?
Shading can enhance your caterpillar drawing by adding depth and dimension, highlighting the roundness of its body segments, and creating a more realistic appearance.
-
Can I use colored pencils to color my caterpillar drawing?
Yes, you can use colored pencils to color your caterpillar drawing, which allows for blending and layering to achieve various textures and a vibrant, lifelike quality.
Wrapping Up How to Draw a Caterpillar
Learning how to draw a caterpillar is a fun and rewarding experience.
By following the step-by-step tutorial and using the necessary materials, you can create a cute and easy drawing of a caterpillar.
To enhance the overall appearance of your caterpillar drawing, you can use colored pencils to add vibrant colors.
This can make your drawing more attractive and engaging. Experiment with different colors and shades to bring your caterpillar to life.
Remember to practice regularly and have fun with your drawings.
The more you practice, the better you will become at drawing caterpillars and other subjects. Happy drawing!
If you like this article about How to Caterpillar A Caterpillar and would like to know more, please comment below.


