

How To Draw a Dog Step by Step Drawing Beginner Tutorial
Welcome to this comprehensive guide on How To Draw a Dog!
Whether you’re an aspiring artist or simply someone who loves dogs and wants to capture their essence on paper, you’ve come to the right place.
This dog drawing tutorial is designed to be beginner-friendly, walking you through each step of the process to ensure that you can create a delightful canine masterpiece.
From the snout to the wagging tail, we’ve got you covered. Keep reading to find out How To Draw a Dog Step by Step.
You might also like:
- How to Draw for Kids
- Creative Drawing Ideas
- List of Art Supplies for Beginner’s
- Art Supplies for Toddlers List
- Art Supplies List for Preschool
- Art Supplies List for Elementary School
- Art Supplies List for Middle School
- Art Supplies List for High School
- List of Art Supplies for Artists
- List of Art Supplies for Painting
How To Draw A Dog?
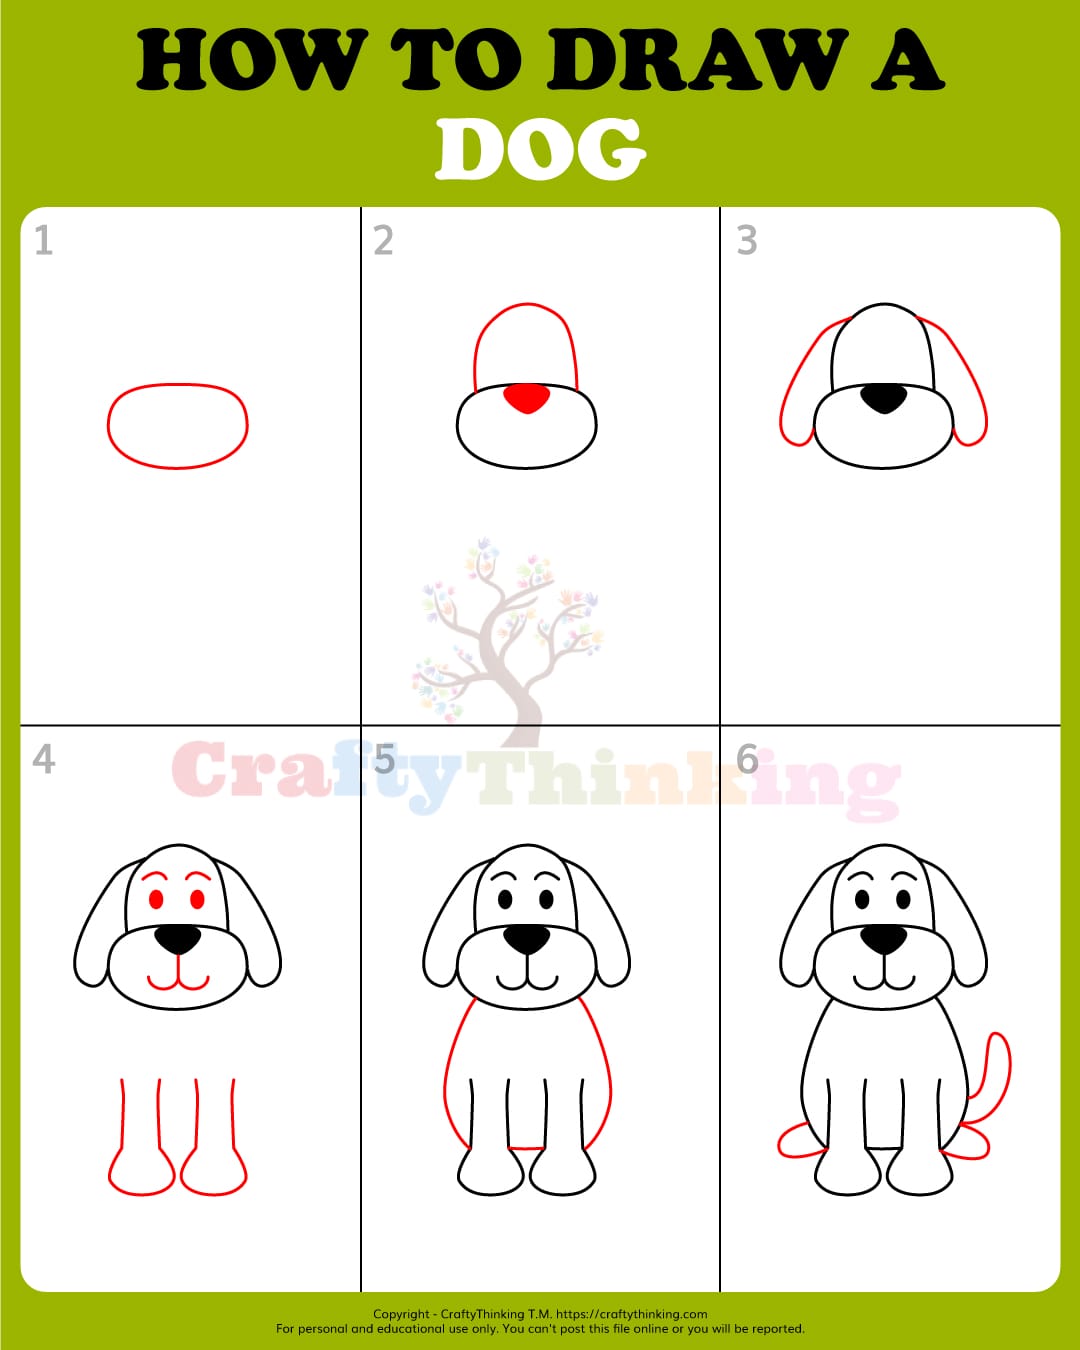
Learning How To Draw a Dog starts with simple shapes, beginning with an oval for the snout and an inverted U-shape for the head.
As you progress, you’ll add essential features like eyes, nose, and ears, followed by the body, legs, and tail.
By following a step-by-step guide, you’ll soon master the art of drawing a dog, capturing both its physical characteristics and unique personality.
How To Draw A Dog Step By Step Tutorial
This step-by-step tutorial is your go-to guide for drawing a dog, perfect for beginners and experienced artists alike.
Learn how to draw a dog easily and effectively with our straightforward instructions.
Dive into the world of drawing dogs for beginners now!
Step 1: Start with the Snout
- The key is to start simple, and the least complex way to begin is to draw an oval shape for the snout.
- This is the foundation of your drawing, and it can be slightly boxy or even round.
- This is your first step in learning how to draw a dog step by step.

Step 2: Draw the Head and Nose
- Continue by drawing an inverted U shape above the snout to act as the head.
- The nose is an essential part of a dog that gives it a powerful sense of smell.
- Add a nose in the oval shape you previously drew.
- It can be round or slightly triangular, depending on your preference.

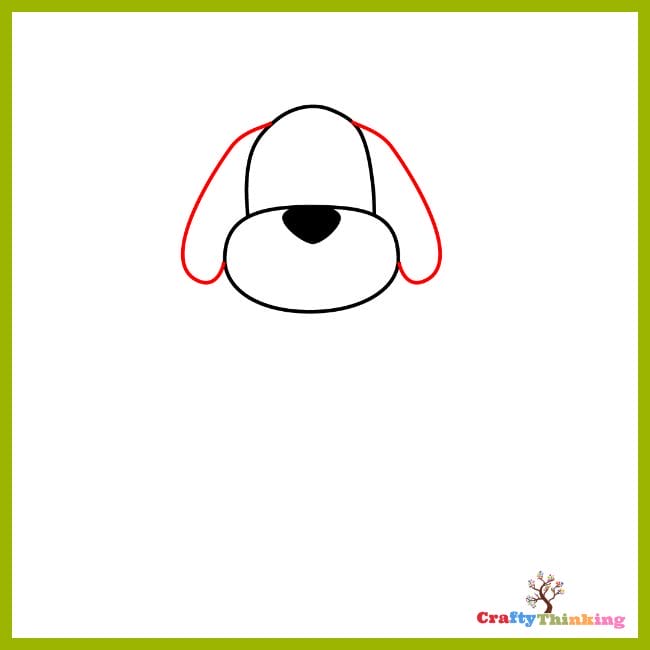
Step 3: Time for the Ears
- Drawing droopy ears is our choice for this tutorial.
- Draw downwards, sloping ears with a curved shape so they look round and elongated.
- This is your beginner easy dog drawing guide to ears.
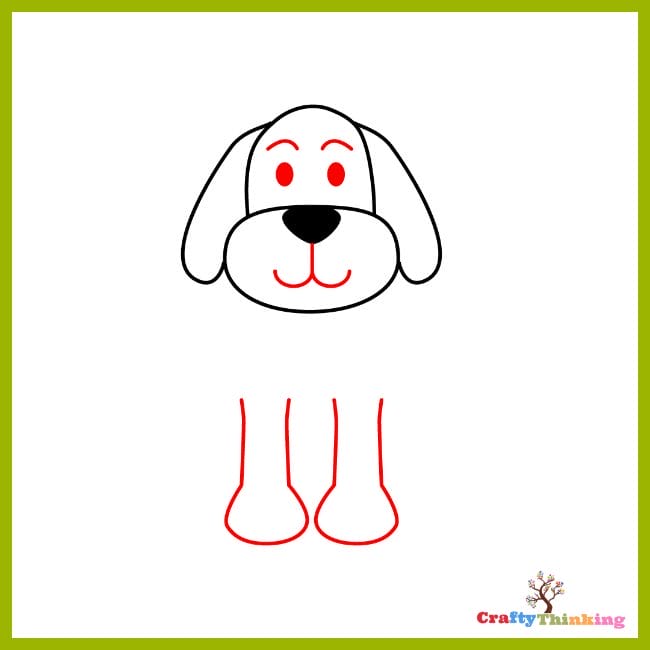
Step 4: Facial Features and Legs
- This step is crucial and requires more attention.
- You’ll learn to draw the eyes, mouth line, and legs of the dog.
- For the eyes, draw two small circles and fill them in.
- Add arches above the eyes for eyebrows.
- Complete the mouth part by drawing a straight line from the nose and adding curves at the end.
- Now, draw the front legs below the dog’s face.
Step 5: Sketch the Body
- Learn how to draw the body of the dog by drawing two curved lines on both sides,
- Starting from the baseline of the face and extending it towards the feet.
- This is your guide to drawing of a dog simple yet effective.

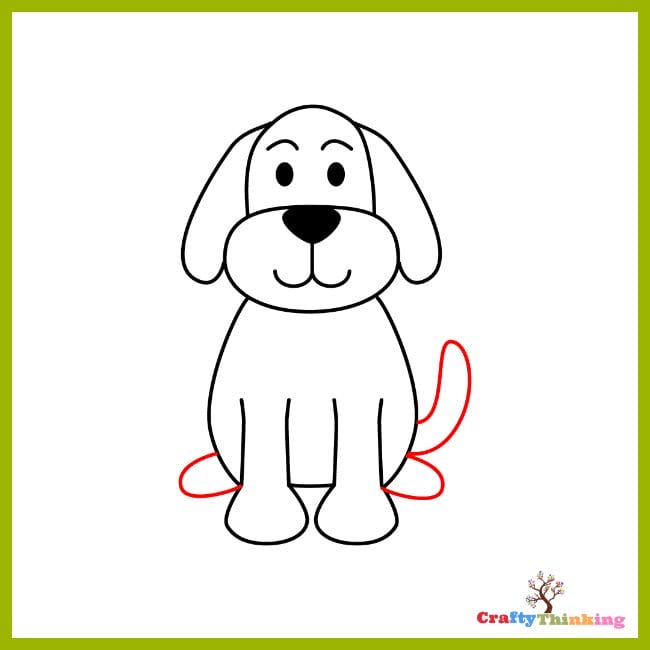
Step 6: Hind Legs and Tail
- Draw the hind legs at the side of the body.
- For the tail, we’ve kept it long and curvy.
- This is your step-by-step drawing dog easy guide to completing your artwork.
Step 7: Add Color
- Art is like our emotions flowing in a river of imagination,
- And coloring highlights it vividly.
- Use dark brown for the ears, yellow in the snout, and light brown for the rest of the body.
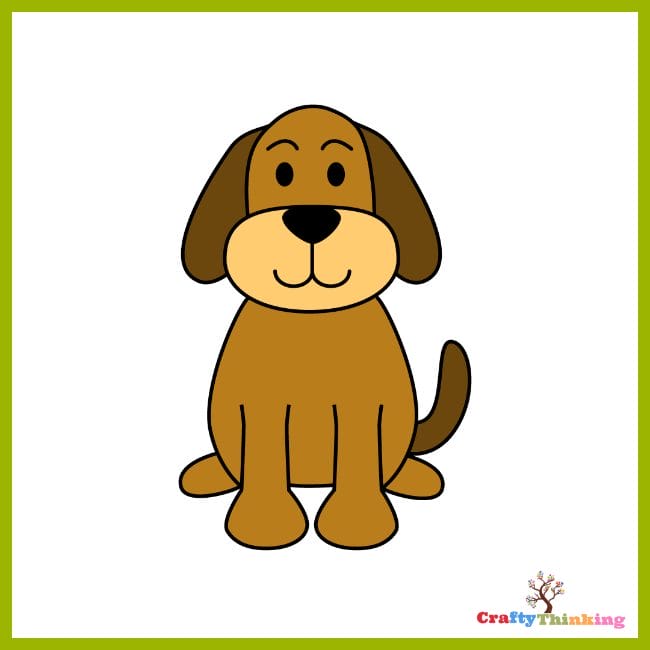
Congratulations!
You’ve just learned how to draw a cartoon dog using this easy drawing tutorial for beginners.
If you’re a dog lover or have a pet dog, we’d love to hear if your drawing resembles your furry friend!

How to Add Lifelike Details to Your Dog Drawing
So, you've mastered the basics of drawing a dog, and now you're ready to elevate your art by adding lifelike details.
This guide will walk you through the steps to make your dog drawing look as realistic as possible.
Whether you're working on a specific breed or a generic dog, these techniques will bring your art to life.
Materials
- Quality drawing paper
- Pencil set with varying hardness (HB, 2B, 4B)
- Eraser
- Blending stumps or Q-tips
- Colored pencils (optional)
Instructions
Step 1: Observe Real Dogs
- Before you start adding details, spend some time observing real dogs or high-quality photographs.
- Pay attention to the texture of the fur, the shine in the eyes, and other small details that make the dog unique.
Step 2: Add Texture to the Fur
- Start by lightly sketching lines in the direction that the fur grows.
- Use a softer pencil like a 2B or 4B for this.
- The lines should vary in length and should not be uniformly spaced to mimic the natural texture of fur.
Step 3: Work on the Eyes
- The eyes are the windows to the soul, even for dogs.
- Use your pencil to darken the pupil and leave a small white circle to act as a reflection.
- This will make the dog's eyes look shiny and alive.
Step 4: Detail the Nose
- The nose is another area where you can add realism.
- Use your pencil to darken the nostrils and add some light shading around the nose to give it a wet look.
Step 5: Add Depth to the Ears
- Ears are often overlooked but are essential for a realistic dog drawing.
- Add some folds and creases to the ears to give them depth.
- Use your blending stump or Q-tip to softly blend these lines.
Step 6: Draw the Dog's Mouth
- For the mouth, add a line to indicate where the lips meet and then add some light shading to form the dog's lower lip.
- This will give the impression that the dog's mouth is slightly open.
Step 7: Add Whisker Dots
- Lightly mark small dots where the whiskers originate on the snout.
- You can add a few light lines to indicate the whiskers, but keep them subtle.
Step 8: Final Shading and Blending
- Now, use your blending stump or Q-tip to blend the fur lines lightly.
- This will make the fur look soft and natural.
- Add some final touches of shading to the dog's body to give it a three-dimensional look.
Step 9: Optional - Add Color
- If you want to go a step further, you can use colored pencils to add color to your drawing.
- Use varying shades to add depth and make your dog look even more lifelike.
Final Notes
Adding lifelike details to your dog drawing is all about observation and technique.
By following these steps, you'll be able to create a dog drawing that not only looks realistic but also captures the essence of the dog you're portraying.
Whether you're drawing a specific breed or a beloved pet, these techniques will make your art stand out.
Notes
Did you create this craft? If so, we would love to hear from you! Please feel free to leave a comment on the blog or share a photo of your creation on Pinterest.
Recommended Products
Thank you for supporting our family-owned business!


Frequently Asked Questions
Here are some frequently asked questions about How To Draw a Dog Step By Step Tutorial. Get some quick answers to everything you need to know.
What additional tips can you provide for beginners who are following this step-by-step dog drawing tutorial?
For beginners, a great tip is to start by drawing the outline of the dog’s body lightly with a pencil. This allows you to easily make adjustments with an eraser later on.
Pay attention to the anatomy of a dog, especially if you want to draw a specific breed.
For example, a Golden Retriever will have lots of hairs and floppy ears, so keep that in mind when you draw the fur and draw the ears.
Can this step-by-step tutorial also be applied to drawing a dog in different poses?
Absolutely, the basic principles in this tutorial on how to draw a dog can be adapted for different poses.
For instance, if your dog is looking to the side, you might adjust the shape of the head and the position of the dog’s eyes.
For a standing dog, focus on getting the size and angle of the dog’s front legs and back legs correct.
How can art lessons further enhance the skills learned in this draw a dog – step by step guide?
Art lessons can provide a deeper understanding of techniques like shading, which can make your dog look more lifelike.
They can also teach you ways to draw different breeds of dogs, each with their unique characteristics.
For example, you might learn how to add shades of brown for breeds like Golden Retrievers.
Are there any easy steps that can be added to make this drawing of a dog even simpler for beginners?
Yes, you can simplify the process by breaking it down into smaller steps.
For instance, you can start to draw the dog’s body by drawing two circles to form the chest and belly.
Then, you can draw the dog’s neck and connect it to the body right away.
Keep your strokes simple and don’t worry about details like fluffiness until you’ve worked on the basic outline.
How can one adapt the techniques in this easy step-by-step tutorial to create their own unique style of dog art?
Once you’re comfortable with the basics, you can start experimenting with your drawing skills.
For example, you can draw the dog’s ears in different styles—think droopy or folded.
You can also play around with the dog’s eyes to give them a unique expression or even add a line for a wagging tail to give your favorite dog breed some character.
Wrapping up How To Draw a Dog
Congratulations on reaching the end of this guide on How To Draw a Dog!
You’ve navigated through each step, from the snout to the wagging tail, and hopefully created a canine masterpiece of your own.
Whether you’re a beginner or have some drawing experience, mastering the art of drawing a dog is a rewarding journey.
I hope you gain value from How To Draw a Dog Step by Step Drawing Beginner Tutorial.
If you like this article about How To Draw a Dog and would like to know more, please comment below.


