How To Draw a Ladybug (Step by Step)
How To Draw A Ladybug! What’s the first thing that enters your mind when you think about ladybugs? You might likely have thought about a bug that is a female. Isn’t it so?
Ladybugs
Do you know that ladybugs are not truly bugs? They are beetles! The most astonishing thing about them is that they smell with their feet and antennae. Isn’t it surprising! Ladybugs have between two to seven spots and some even have stripes or no spots. They can come in many different colors- blue, black, yellow, pink, and green, orange, red, and even purple, and more.
One ladybug can approximately eat up to 5000 insects in its lifetime. Ladybugs are connected deeply with all manner of spirituality, symbolism, lore, and cultural beliefs. It’s most commonly represents good luck, great fortune, protection, and love. They mostly have short six legs.
Draw a Ladybug
Ladybugs are one of the simplest bugs to draw and you can draw them along with scenery at the back to make the art piece look even prettier. You can add a few tulips or roses you learned to draw in our previous tutorials or make something else using your imagination. You can even add a leaf on which you can draw the ladybug.
Pursue this enjoyable drawing tutorial to learn how to draw a ladybug step by step. Like our previous collections, this one is going to be super easy as a piece of cake. This tutorial is ideal for kids and even grownups but is specially made for beginners.
Let’s start our easy how to draw a ladybug!
What You Need
- Our printable temple (optional, you can grab it at the end of the tutorial)
- Paper
- Your favorite market
- Coloring supplies
How To Draw a Ladybug:
Note that the new stuff drawn in each step is illustrated in red.
Step 1:
The most prominent part of a ladybug is its massive body with an interesting design and texture. Draw a circle or much of an oval shape for the body. Later in the steps, we will learn how to draw a ladybug face.

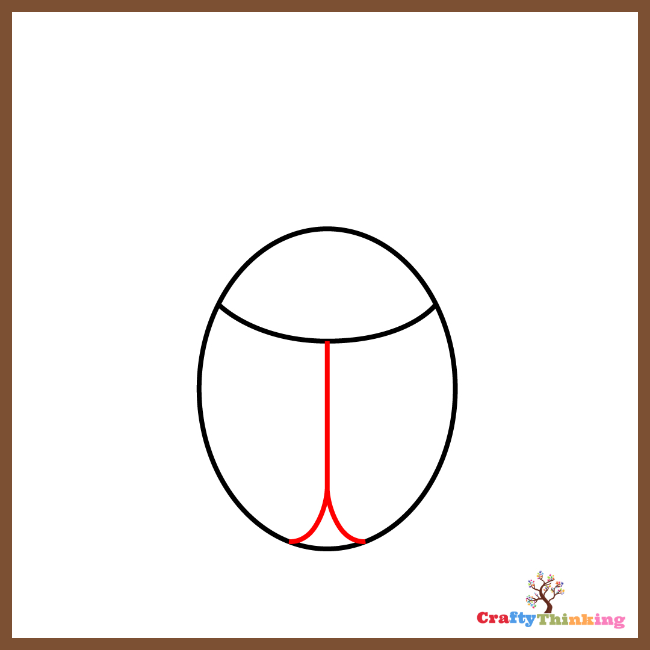
Step 2:
Now draw a curved line on the top half of the body you previously drew. You can drag the line from the left to the right or from the right to the left; whatever feels more natural to you.

Step 3:
Draw a straight line appearing from the curve you drew in step 2. The line should divide the body into two parts and make sure you end it a few spaces above the below half of the circle. Next, draw two outward-pointing arcs which form a triangle.
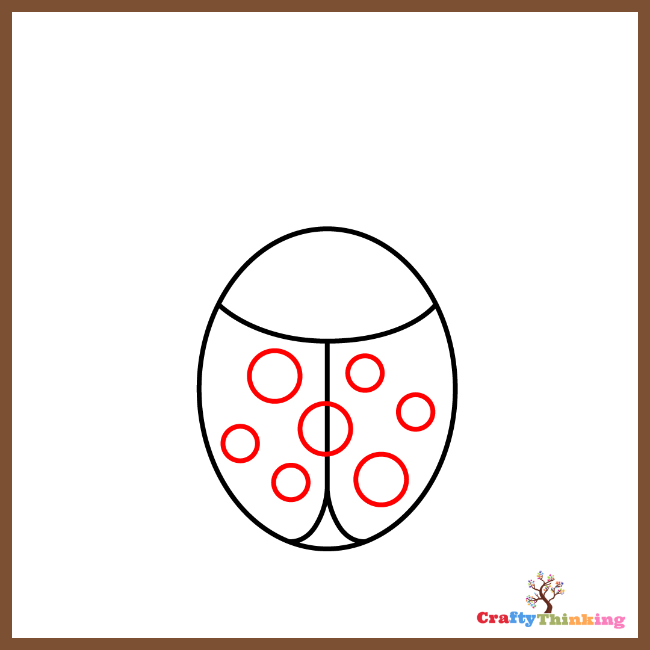
Step 4:
Now it’s time to make the spectacular design of a ladybug’s body. We have drawn 7 spots as it is the number of spots occurring the most commonly. You can even draw two or more spots or even no. instead, you can also draw stripes which only rare ladybugs have.
If you are drawing seven, then make three spots on the right and left each and one in the middle, on the center of the wing. I hope you are not facing any difficulties or problems while drawing.
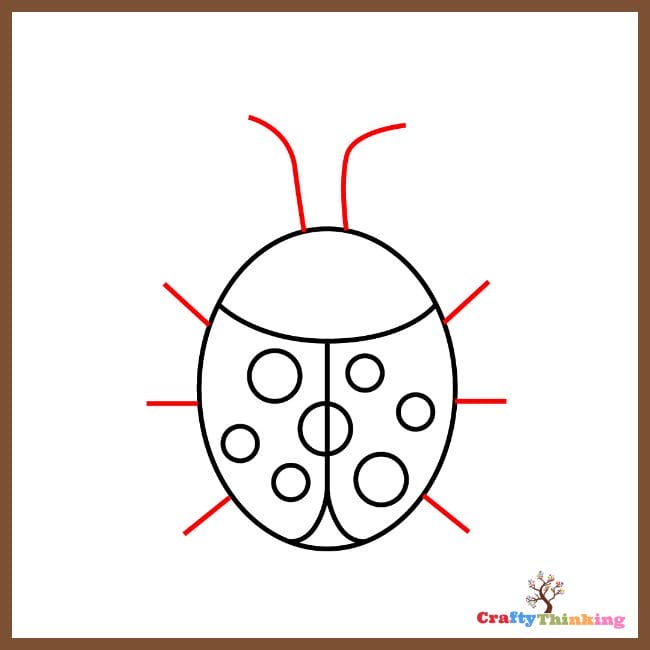
Step 5:
Easy until now? I am sure it is because we always keep the steps simple and unostentatious.
In this step, we will be drawing two things that are very important for a ladybug.
All ladybugs can walk but ours cannot walk because it has no legs. Let’s make this cute little creature legs. Draw 3 straight short lines on each side, right and left both.
The second part of this step is to draw the antennae. Draw two lines each popping out from one side of the head. You can make them straight, curved, spiral, or even with joints. See how easy everything is? At this point, you are just a step away from learning how to draw a cute ladybug.
Step 6:
Aren’t you forgetting something? We haven’t yet made the ladybug’s face. Let’s draw it!
Draw two circles in place of the eyes and to make the eye pupil, draw two miniature filled-in circles. Also, add spots on the top of the antennae and the legs.
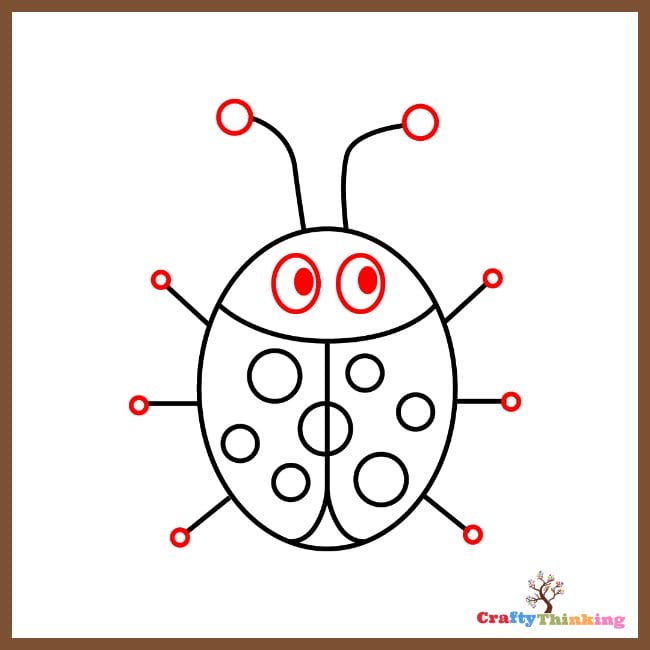
Step 7:
Now it’s time to color the brilliant drawing just like we always do in the last step. It is going to be super interesting and fun. Grab your most favorite colors and begin.
Two add more dimensions; you can color it darker around the edges and slightly lighter in the middle. We made our ladybug red as it is the most popular and common one and decided to make the spots black.
You can color it in any way; black yellow, orange, or any other.

Congratulations! You have learned how to draw a ladybug step by step.
As our favorite bugs are ladybugs, why not draw them. And let’s not forget the fact that ladybugs are wonderful! Ladybugs and butterflies are our favorite bugs and so we are making you learn how to draw a ladybug easily. If you want to draw a butterfly, you can go check out our how to draw a butterfly easily step by step.
As mentioned above, you can draw scenery behind and display this masterpiece in any corner of your house. Doesn’t it sound interesting and fun? This tutorial is also a part of our awesome collection of step by step drawing instructional exercises.
If you are a teacher you can show this to your students for thanksgiving to practice. We should always be keen to find new ways to draw.
If you like this article about how to draw a ladybug and would like to know more, please comment below.
Check Out These Drawing Tutorials


Grab the complete printable here: