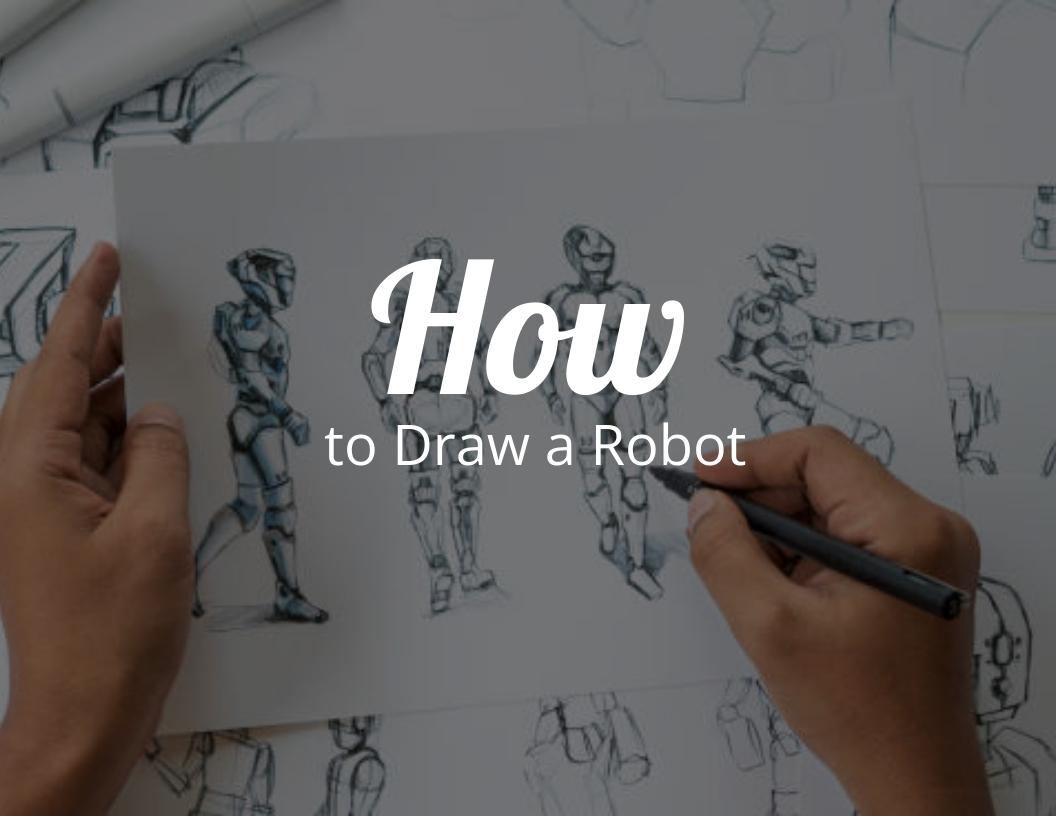
How to draw a robot?
In this tutorial we will learn how to draw a robot! This tutorial is suitable for people of all ages. We will follow the step by step easy and simple instructions to draw a robot.
Robots
Robots are one of the most favorite stuffed toys for children. Robots have some unique character that other toys do not have. They help the kids to develop their imagination and cognition! In the present era, there is a lot of development in the field of robotic engineering. Robots are human- machines which perform the same tasks as performed by humans.
Many of the big firms use robots for their various work purposes. A lot of restaurants have robots for serving the customers. Some robots are used for surgical purposes where minor details are needed to be focused.
Robots are the loveable gadgets one can have. The use of robots help the children to develop and grow their scientific approach!
Draw a Robot
You have seen many of the kids playing with the robot toys. Doesn’t it look adorable? In this tutorial we will learn how to draw a cute robot, the most favorite toys for the children. This tutorial is suitable for people of all ages.
Let’s start drawing a robot!
What you need:
- Our printable cute robot drawing guide
- Pencils for drawing the shapes
- Colors for coloring
- Paper
How to draw a robot?
Get it started!
STEP 1:
Draw two oval shaped figures in the middle of the paper parallel to each other.

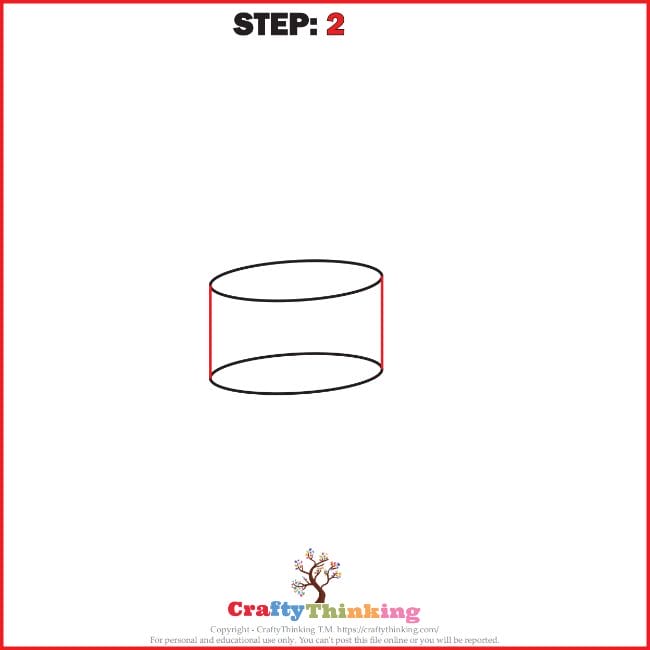
STEP 2:
Next, draw two straight vertical lines joining the sides of two parallel ovals. This will form a 3D cylindrical figure. It will serve as the body of the robot.
STEP 3:
Next, start drawing the face of the robot. For this purpose, draw a square above the body of the robot such that the lower border of the square touches the upper part of the robot’s body.
The upper part of the square is a curve facing downwards. This represents the head of a robot.

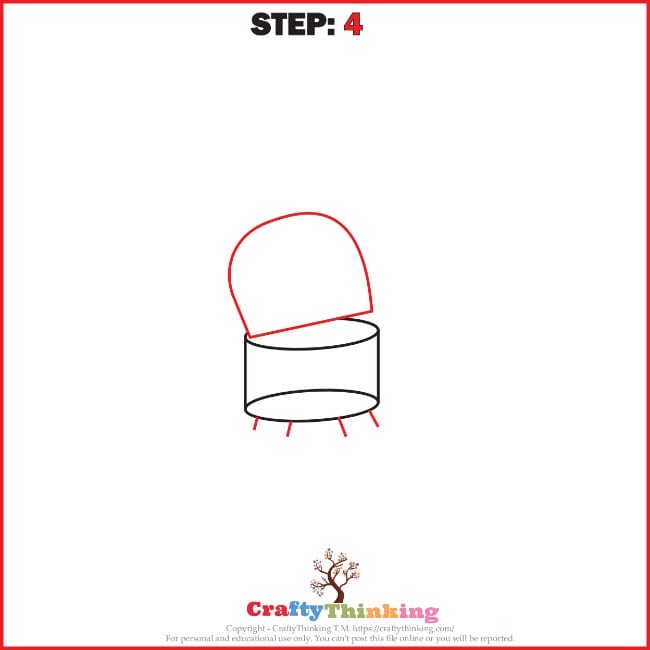
STEP 4:
Start drawing the legs of the robot. For this purpose, draw the four slanting small lines at the lower border of the robot’s body.
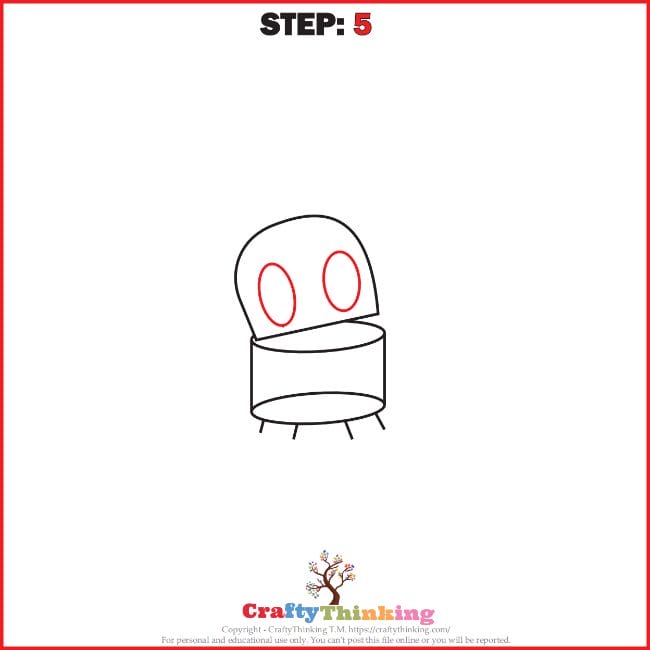
STEP 5:
Draw two big ovals on the sides of the robot face as the eyes of the robot.
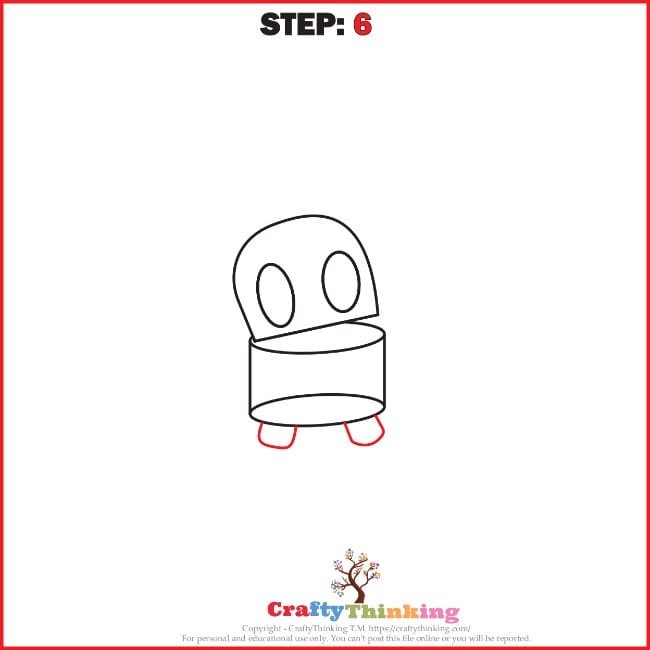
STEP 6:
Join two of those slanting lines drawn on the lower border on each side of the robot’s body with the help of a curve facing upwards. Thus, we’ve drawn two legs of the robot.
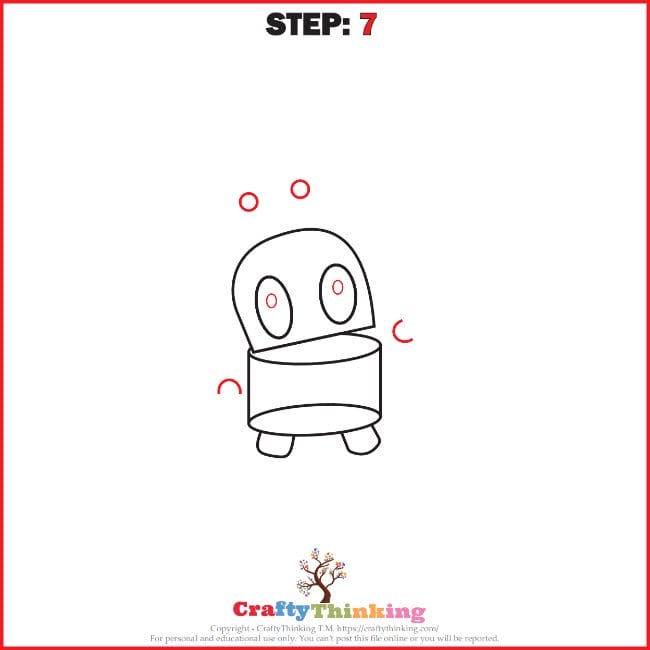
STEP 7:
Draw two small circles inside the robot eyes as the eyeballs. Also, draw the two small circles above the head of the robot as the antenna of the robot.
Next, draw two arms of the robot. For this purpose, draw two curves on the sides of the robot body. One of the curves faces downward and the other faces the left side.
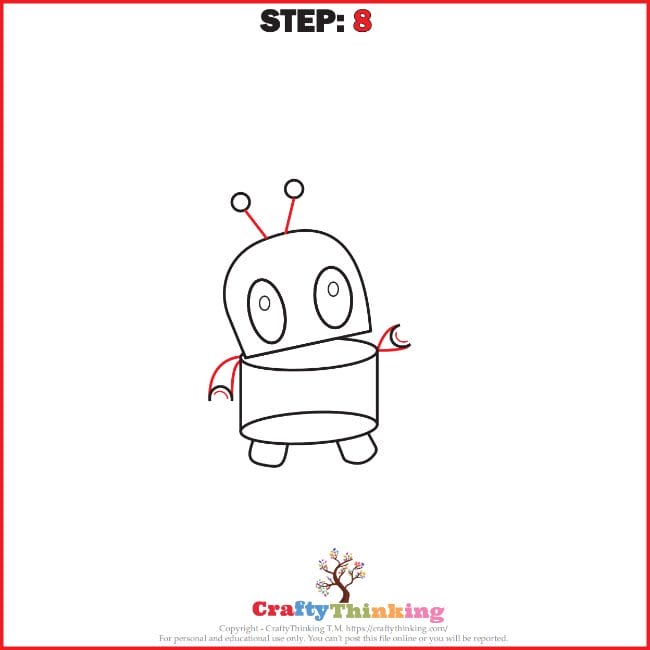
STEP 8:
From the two ends of the curve drawn, extend two lines backward so that they meet the body of the robot. Do the same on both sides of the robot.
They will represent the complete arms and hands of the robot.
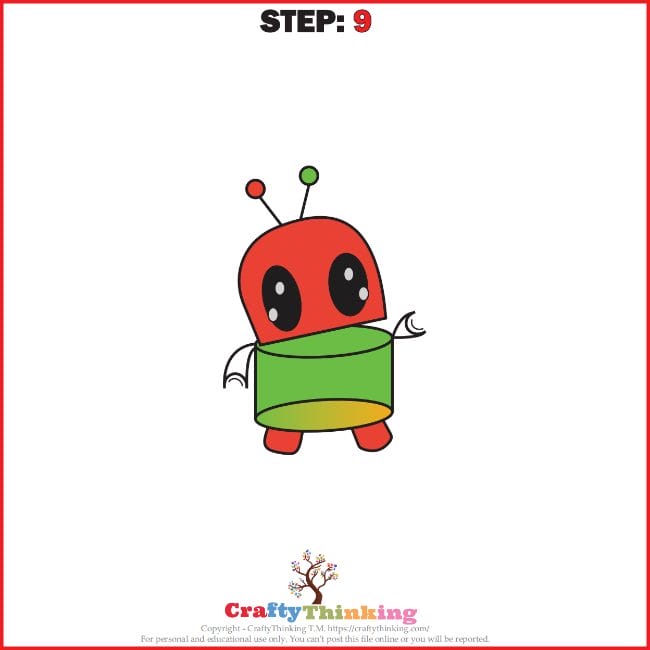
STEP 9:
Color the robot so that it looks attractive and wonderful!
We’ve given the vibrant colors; you can give the color of your choice! Yes!! Our drawing of the cute robot is completed!
Congratulations!! You’ve completed How to draw a robot.
If you like this article about How to draw a robot and would like to know more, please comment below.
Check Out These Drawing Tutorials


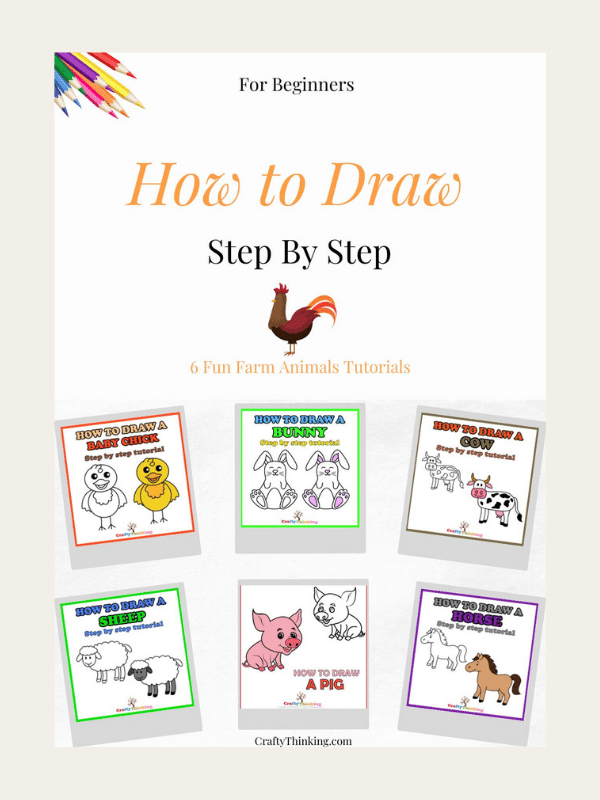
Grab the complete printable here: