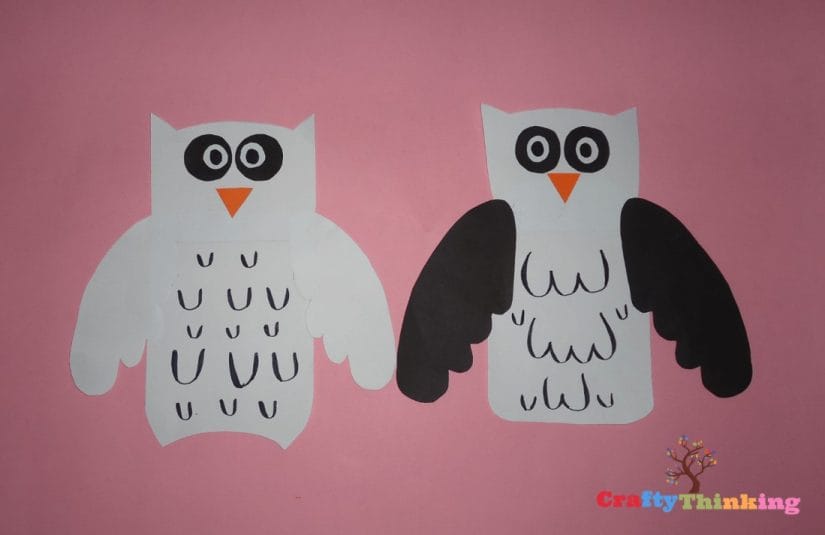
Stunning Paper Snow Owl
In this tutorial, we will learn how to craft a Paper Snow Owl step by step. The owl craft for kids is fun and easy to make for toddlers and preschoolers.
We always like to learn more about the animals that live in cold weather. Snowy Owls are white owls found mostly in the Arctic. They have golden-colored eyes and brown specks throughout their feathers. As the owls grow older, they begin to lose the darker specks of color in their feathers. Most owls are active at night but hunt during the day.
These big birds are amazingly interesting animals. Their entire bodies, even legs, and toes, are covered with soft, fluffy feathers, and their feet have additional thick pads to keep them warm. They also make a beautiful subject for an art project.
Paper Snow Owl
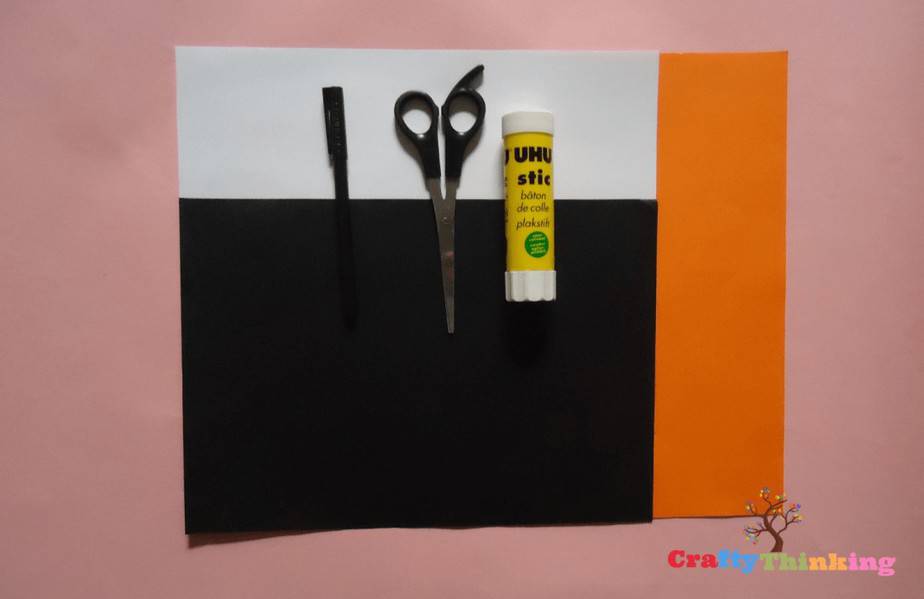
Let’s get started! To make this super cute snowy owl project all you need are a few simple materials you probably already have at home:
What You Need:
- Black, orange, and white colored sheet
- Black marker
- Glue stick
- Scissors
Get ready to add this simple snowy owl craft to your winter activities this holiday season.
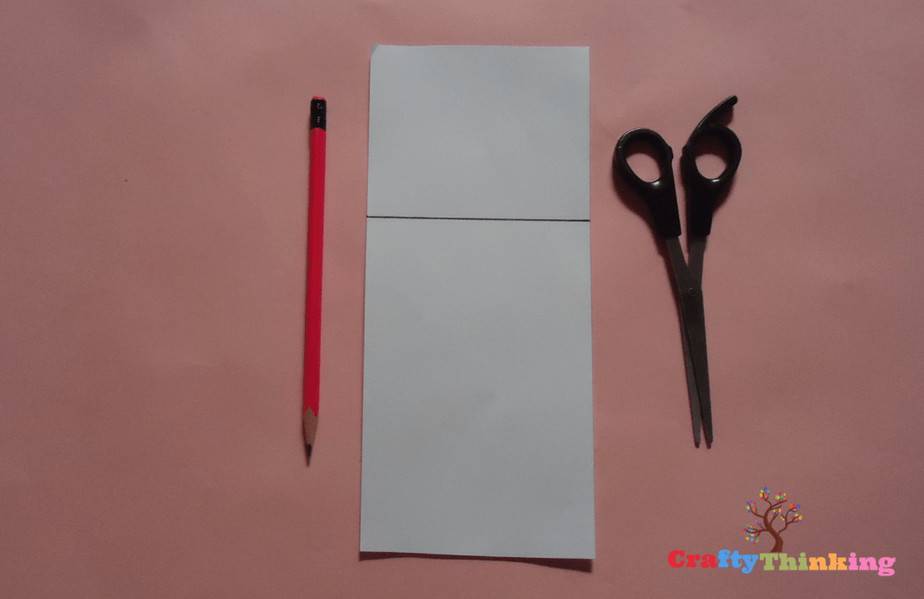
Step 1:
First cut a rectangle out of white paper and draw a horizontal line above the half of the shape.
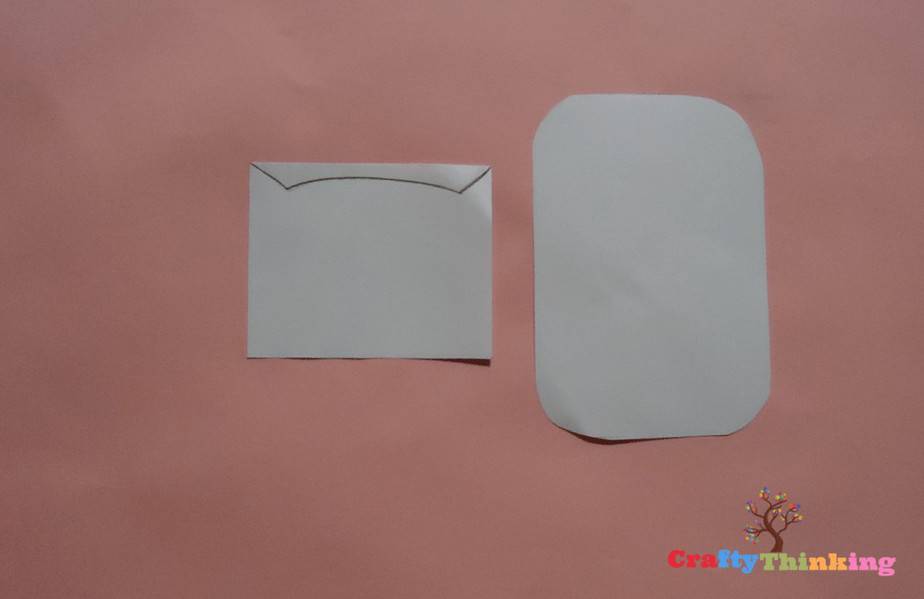
Step 2:
Now cut along the line you drew in Step 1. It will result in two rectangles, one big and one small. Also, carve out a shape on the top of the small rectangle as we have done. Also, cut the corners of the big rectangle to make them round.
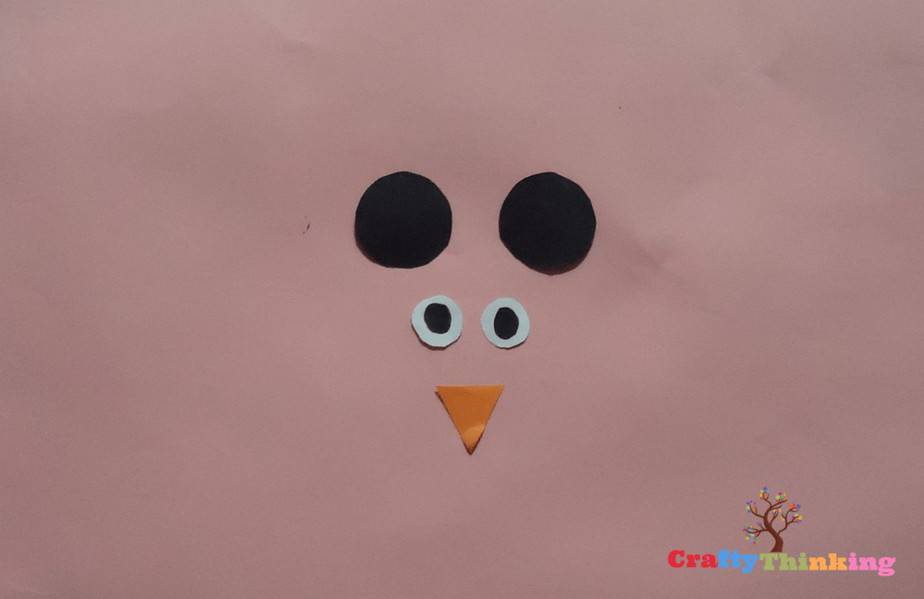
Step 3:
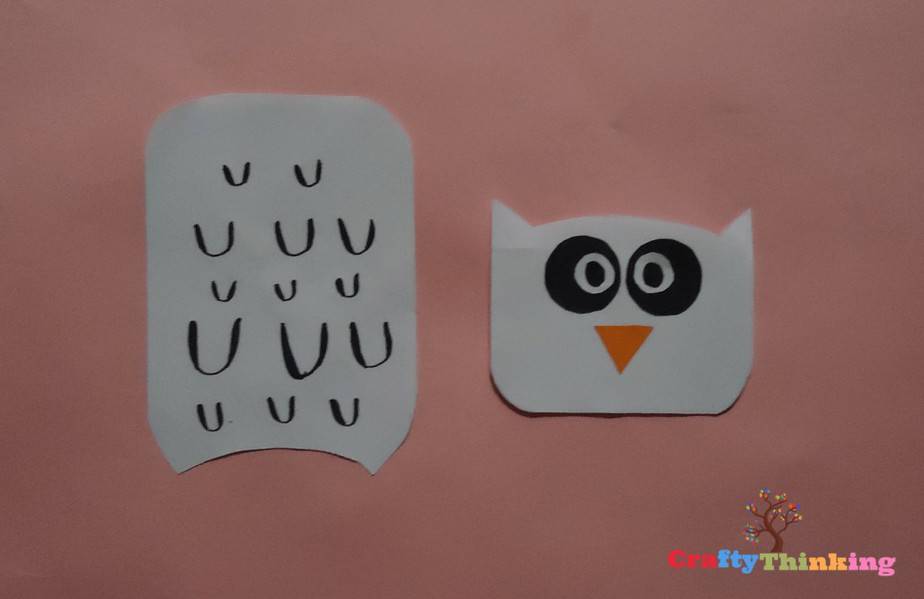
Now cut two black circles and two white small white circles and draw a pupil in the middle using the black marker. Also cut a small triangle out of orange paper which will be the nose. The black circles will be surrounding the eyes.
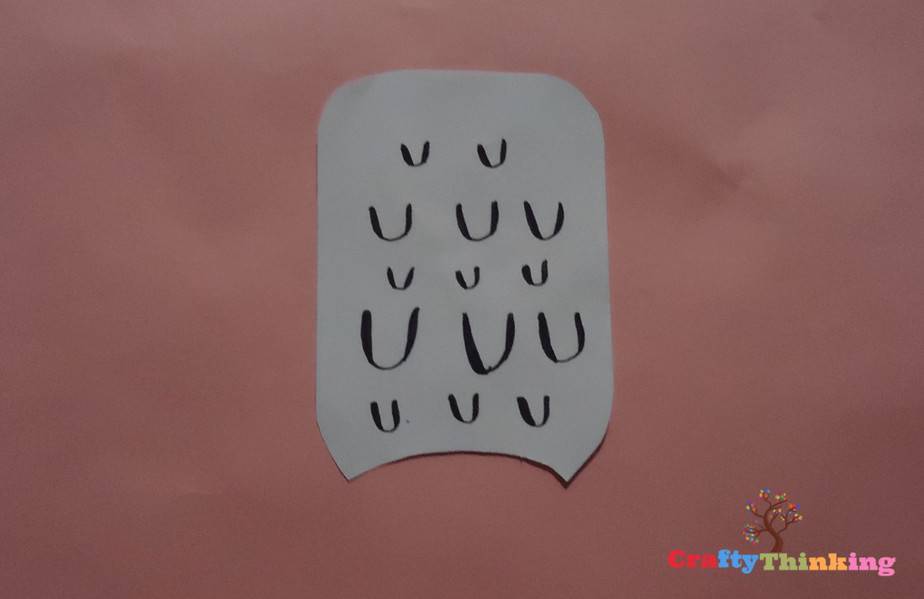
Step 4:
Now cut the bottom of the big rectangle to make an arc. Also, add some texture and details on the body as we have. You can make the letter U or W on it. The body is complete!
Step 5:
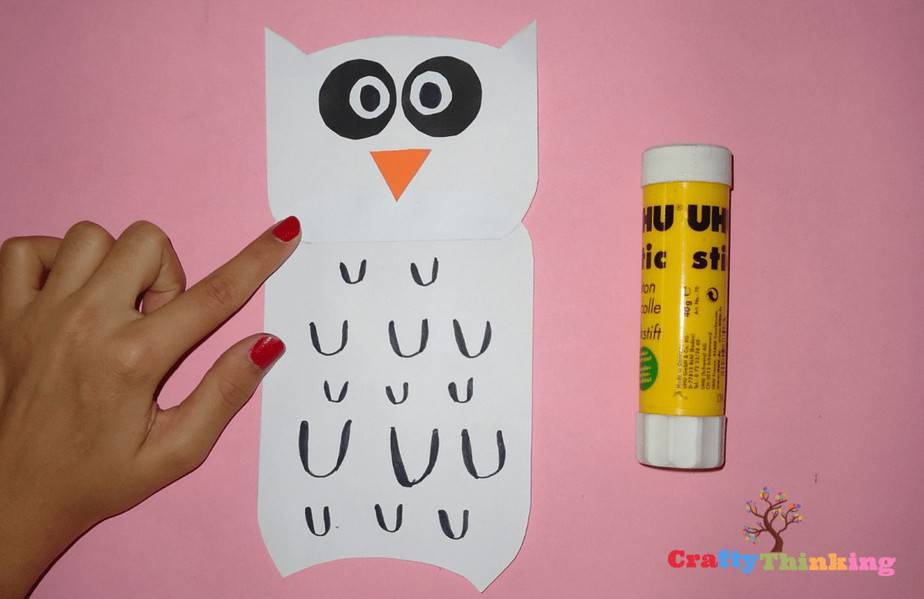
Now on the small rectangle which is the face, glue the black circles in place of the eye. Also, stick the eyes on the black circles as we have. Under and in between the eyes, glue the nose which is the orange triangle.
Step 6:
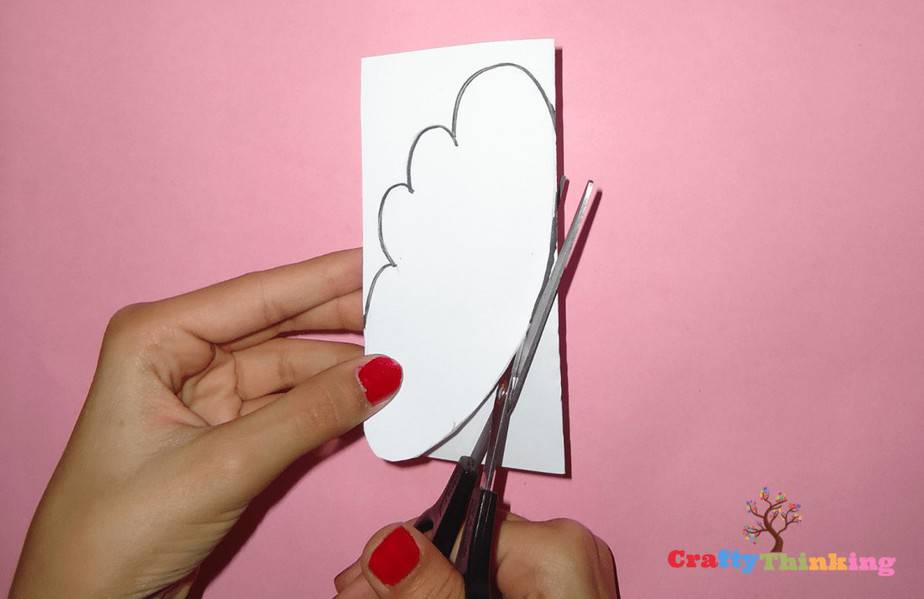
Now take a big piece of white paper and draw an owl wing/ feather on it. Cut it out. This will result in two owl wings.
Step 7:
Now glue the owl’s head on its body like shown in the illustration below.
Step 8:
Now glue the wings top on the end of the head like done in the figure below.
How cute is this Paper Snow Owl art project! He is adorable and so fun for kids to make during the cold, winter months.
Looking for more fun winter science projects for kids? We’ve got lots of fun ideas for you to try!
If you like this article and would like to know more, please comment below.