The Zig Zag Stitch: A Comprehensive Guide
This article will find everything you should know about the zig-zag stitch.
We will discuss how to use a zig zag stitch, when to use a zig-zag stitch and the applications of zig-zag stitch in sewing and clothing.
So, if you are wondering about zig-zag sewing and stitching, read on to get the most exciting ideas to use today.
Here we have provided many of the uses of zig-zag stitch knitting.
What Is A Zig Zag Stitch?
What Is A Zig Zag Stitch? A zigzag stitch is created by sewing back and forth over the same spot on the fabric, creating a zigzag pattern.
What Is The Purpose Of A Zig Zag Stitch?
What Is The Purpose Of A Zig Zag Stitch? Zig-zag stitches enable a seam to move with the fabric’s stretch, adding extra strength and preventing the thread from breaking.
Raw edges can also be encased in this way to prevent fraying and remove bulk from woven fabric seams.
3 Zig Zag Stitch Basics for Beginners
- A zig-zag presser foot can be used when sewing a zig-zag stitch.
- When making a zig-zag stitch, be sure to adjust the needle thread tension.
- If you use the zig-zag stitch, the needle thread on the fabric’s wrong side should show slightly more than the bobbin thread on the right side of the material.
- Make sure you choose the correct zig-zag stitch pattern.
- Standard zig-zag settings apply to all your stitches except 3-step zig-zag, which have their settings.
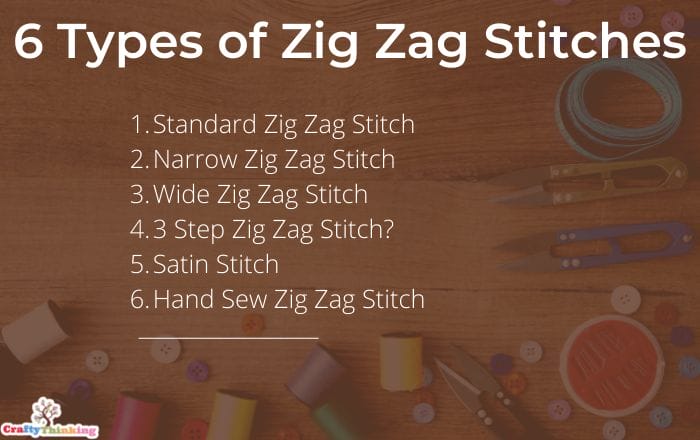
6 Different Types of Zig Zag Stitches to Add Variety to Your Sewing
You can use various zigzag stitches to add interest and variety to your sewing projects.
Adding variety to your sewing can make your projects more creative and fun.
Here are 6 different types of zigzag stitches to try:
1. Standard Zig Zag Stitch
- Uses/Purposes: Zig-zag stitches are commonly used to sew knit fabrics, sew elastic onto knit fabric, finish raw edges, and attach appliques.
- Machine settings: The stitch length is 2, and the stitch width is 2 to 3.
- Needle thread tension: 2 to 5.
2. Narrow Zig Zag Stitch
- Uses/Purposes: a narrow stitch supports points of strain. When the stitch is little and zig-zag, it is often called a bar tack.
- Lining straps, pockets, edges, and corners are embellished with it.
- Machine settings: adjust stitch length from .05 to 1.5 and stitch width from 05 to 2.5.
- Needle thread: 1 to 4
3. Wide Zig Zag Stitch
- Uses/Purposes: Wide zig-zag stitch is commonly used to stitch knit fabrics, attach elastic to incorporate fabrics, and finish raw edges.
- Needle thread tension: 2 to 5
4. 3-Step Zig Zag Stitch
Note: select the 3-step zig-zag stitch pattern from the stitch pattern selector.
- Uses/Purposes: 3-step zig-zag stitching is stronger than the standard zig-zag stitching, which benefits lingerie since it will stretch as the fabric is worn.
- Machine settings: stitch lengths 1 to 4 and stitch width 5(you can adjust these as needed to get the stitch you desire).
- Needle thread tension: 1 to 4
5. Satin Stitch
- Uses/Purposes: It is a decorative stitch that is long and narrow. The stitch is typically used on tablecloths and blankets to overcast raw edges.
- Applique is also made with a satin stitch.
- Machine setting: Stitch length .5 to 1 and stitch width 5
- Needle thread tension: 1 to 5
6. Hand Sew Zig Zag Stitch
- Uses/Purposes: It is used to prevent the fabric from fraying. The zigzag stitch creates a more sturdy seam less likely to come undone.
- Applique is used.
- Machine setting: -Stitch length: 2.5-3.0 and Stitch width: 0.5-1.
- Needle thread tension: varies
What is a Hand Sew Zig-Zag Stitch?
What is a Hand Sew Zig Zag Stitch? A stitch by hand sewn zigzag stitch is a type of stitch that uses two or more parallel lines to create a zigzag pattern.
This type of straight stitch is often used in hemming and seaming fabrics, as it helps to prevent fraying and provides extra durability.
Simple tutorial on how to make a hand sew zig zag stitch?
Make sure your machine is set appropriately. Then, before you start zig-zag sewing your final piece, test your sewing machine on a scrap of fabric.
During the test of your scrap, you must ensure that the needle thread tension is correct- it should be neither too tight nor too loose.
In addition, make sure to choose the appropriate stitch length and width.
- Set your zig-zag presser foot on your fabric to begin sewing it.
- Your needle will then be manually inserted into the fabric. First, pull your thread needle away from the machine to ensure it is tight. It should resist being pulled.
- To secure the stitch, sew about three stitches forward and reverse them.
As you take the hand stitch zig-zag forward, reverse the stitch at the end.
How to secure your zig-zag stitch? This was mentioned briefly above but did a reverse stitch after your zig-zag stitch is complete to ensure it.
As a final step, reverse both ends of your seam to ensure they are secure.
How To Do A Zig Zag Stitch?
Do you want to add some personality to your knit or crochet project?
The zig-zag stitch is a great way to do just that! This stitch is easy to do and is perfect for giving your project a bit of flair.
We will show you how to do the zig-zag stitch.
- Take a scrap of fabric and practice the zig-zag stitch on it. The best way to zig-zag hand stitch sew is to fold it double and stitch through two layers.
- Select the zig-zag stitch in your stitch selector.
- Select the length and width you want. Then, starting with 5.0 wide and 2.0 long, try it on your scrap. It will result in a medium-size yet quite open zig-zag stitch.
- Put the fabric beneath the presser foot.
- Start zig-zag stitch knitting slowly by lowering the foot.
- As you begin to sew, hold the thread tails.
- That way, they will not get sucked into dog food this way.
- The stitch length and width should be adjusted according to the scrap you are using. Several settings are suggested in the below section.
Tension tips for a perfect zigzag stitch
Despite being a solid stitch, the zig-zag stitch can pucker and snap if the tension is too tight.
If you are trying a new stitch on a piece of new fabric, always check the zig zag sewing machine tension.
Zig-zags can be worked by zig-zag hand stitch, but given that most sewing machines include this stitch option, learning to sew zig zags by hand is not necessary.
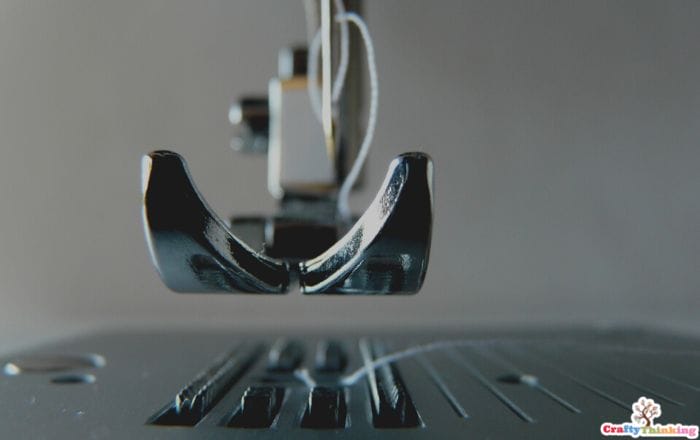
Presser Foot For A Zig Zag
A multipurpose presser foot is most commonly used for zig-zag sewing.
Possibly your machine has a zig-zag foot or a satin stitch foot with a slight groove underneath and a wider slot.
Zig-zag stitch is highly versatile. You can use it to finish seams, apply appliques, add bartacks, or stitch satin stitches.
Using a satin stitch foot when sewing with this stitch may help you ensure our fabric doesn’t pucker.
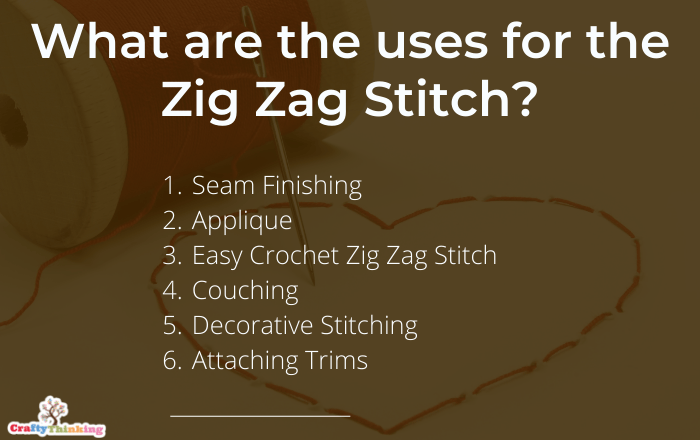
What are the uses for the Zig Zag Stitch?
There are many ways to use the Zig Zag Stitch, a type of stitch used in sewing.
It can be used to join two pieces of fabric together and create decorative seams.
The stitch can also reinforce a seam or create a decorative border. Continue reading about more uses for the zigzag stitch.
1. Seam Finishing
It helps prevent fabric edges from unraveling when used as a seam finish.
Using too wide a width can cause the fabric edge to tunnel under the presser foot. Choose a medium-length stitch.
2. Applique
With a satin stitch, a zig-zag stitch is used to create a machine applique.
- To attach the applique to the main fabric, stitches are sewn around the edge.
- When the needle is moved right, it stitches off the edge of the applique, and when it is moved left, it stitches into the applique.
If you want the applique to look precisely the way it should, you must experiment with scrap fabrics.
- Set the width to medium as a starting point and then adjust from there.
- Setting the stitch length high enough will prevent the fabric from appearing between the stitches.
- But not so high that the stitches won’t feed under the foot.
- Make use of a satin stitch foot (as an optional necessity) with a groove at the base so that dense stitches can pass through easily.
3. Easy Crochet Zig Zag Stitch
There is nothing complicated about crochet zig-zag stitch, and you must know how it works.
The process will come together once you know the exact steps to follow.
To make a simple scarf, you can use any color yarn. In addition, you can craft an easy crochet zig-zag stitch beautifully with an easy method.
4. Coaching
Utilize the zig-zag stitch to embellish lightweight cords and yarns.
You should choose a stitch width setting that covers the cord without actually stitching into it if your machine has adjustable stitch width and length settings.
Pick a stitch length long enough to let you see the cord without hiding it. For maximum control, slow down and take your time.
5. Decorative Stitching
Sewing zig zags can give fabric texture. Different thread colors and types can be used.
To customize your project, you should experiment with different stitch lengths and widths on your machine.
The satin stitch foot (an accessory available with some machines) is helpful for dense sewing stitches such as satin stitches.
To ensure that thicker threads, such as 12 wt. Cotton can pass freely through the needle; choose a larger size needle.
To support the stitches, a stabilizer is recommended underneath the fabric.
6. Attaching Trims
If you’re sewing over ribbons and trims, use the zig-zag stitch. You can easily embellish your project with it.
Choose a zig-zag width that matches the width of the ribbon.
Choose a long enough one for stitch lengths that are adjustable on your machine.
When sewing around complex shapes, using an open-toe foot is useful, allowing you to see what is being sewed.
7. Sewing on Buttons
You can attach buttons with a zig-zag stitch. Please ensure the fed teeth are disengaged, or cover them (consult your machine manual).
The button sewing foot (an additional accessory for some machine models) is helpful for securing the button in place while stitching.
It also allows you to see the stitching area better than the all-purpose foot.
- The button should be placed underneath the foot of the fabric. Next, choose the zig-zag stitch setting on your machine.
- Make sure the needle moves left and right until it clears the holes on the button by slowly turning the handwheel toward you.
- Adjust the stitch width of your machine (if it has an adjustable stitch width) until the needle clears both holes.
- Attach the button with several stitches. Tying the tails of the thread to the back of the fabric will secure the material.
8. Elastic Insertion
The zig-zag stitch makes it easy to insert elastic. Place the elastic over the opening of the All-Purpose Foot if it is 1/4 “to 3/4 “wide.
While sewing, this will help prevent the elastic from slipping.
9. Gathering
Fabrics that are difficult to gather can be a challenge to sew. For example, a zig-zag stitch can be used to create a “casing” for a cord. Tie the line at one end with a knot.
You can select a stitch width if our machine has adjustable width covering the cord but not stitching it.
When choosing a stitch length setting, select a relatively long one.
To stitch zig-zags quickly, it is helpful to use a cording foot (which can be added to some machines).
It has a groove that guides the cord as you stitch. The fabric can be gathered by pulling the line once stitching is complete.
10. Free Motion Monograms
You can create monograms of any size and style by allowing your fabric to move freely.
The feed teeth of your machine must be covered or disengaged before you can set the device up for free-motion monogram printing (see your machine manual for details).
Pull out the presser foot and foot holder. The Darning/Embroidery Foot (an optional accessory for some machines) must be attached to the device.
Put the stitch in zig-zag mode. To give the stitches extra support, place a stabilizer underneath the fabric.
To help you in this process, you may wish to mark your monogram with a fabric marker on the main fabric. Then, as you stitch, manually assemble the layers.
11. Thread Painting
Sewing with free motion is called thread painting. Layering thread color allows for colorful images to be created.
Pull out the presser foot and foot holder. You may also need to attach the Darning/Embroidery Foot (an optional accessory for some machines).
Choose the zig-zag stitch. Choose the appropriate stitch width for your project if your machine has an adjustable stitch width.
Make sure that batting or stabilizer is underneath the fabric. Then, as you stitch, combine the layers manually.
Roll and Whip Heirloom Hems
Roll and whip hems, done with a zig-zag stitch, are among the techniques used in heirloom sewing.
It is suitable for fabrics such as batiste, which are lightweight. You should use a light thread to thread your machine.
Using a needle size 9/70 or 11/80 (an additional accessory for some machines) is recommended.
The Zig-zag stitch should be set on the machine. Use 5.0mm width and approximately 2.0mm length settings for devices with adjustable stitch length and stitch width.
Open Toe Foot (an optional accessory for some machines) should be used to ensure no obstruction exists in front of the needle.
It is best to align the fabric so that the zig-zag moves off the edge of the material. During the stitch’s movement to the left, the fabric is rolled over and and stitched.
1. Attaching Hook Closures
Use the zig-zag stitch for hook and eye closures of larger sizes and styles. The fed teeth should be covered or disengaged (consult your machine manual).
Choose the zig-zag stitch. The button sewing foot (additional accessory for some models) is best suited for sewing the larger hook and eye closures.
It helps hold each side of the closure securely and gives the stitching area a better view than the All-Purpose Foot.
Put the closure piece underneath the foot before stitching it in place.
Slowly turn the handwheel toward yourself to ensure the needle clears the closure piece when moving left and right.
Attach by sewing several stitches. Secure thread tails to fabric by tying them to the back.
2. Zig Zag Hem Stitch
This technique of zig-zag stitch hem is used to create elegant heirloom hems.
The SINGER size 90 WING Needle (an optional accessory for some machines) can be used to sew beautiful hemstitching.
You can set the stitch width and length to 3.0mm and 2.0mm, respectively, on a machine that can adjust them.
As you sew, catch the raw zig-zag hemstitch edge as you go, and turn up the hem allowance.
The needle creates a delicate finish by creating small holes in the fabric. You will get the best results if you are sewing organdy, organza, or batiste.
In addition, fabrics can be easier to manage when spray starched.
3. Lettuce Edging
Make a “wavy” zig-zag stitch out of zig-zag stitches, sometimes referred to as “lettuce edges.” Specifically, it is used on stretch knit materials such as jerseys and t-shirts.
The Zig-zag stitch is set on the machine. Next, select the medium stitch length and width setting for devices with adjustable stitch length and stitch width.
While sewing, stretch the fabric both from the front and back. It produces a wavy, curly edge when you release the material.
4. Attaching Lace
Zig zag sewing is one of several heirloom techniques used to attach lace.
A piece of fine, lightweight fabric with a flat edge on one side, such as batiste or lace, can be steamed with this method.
You should use a lightweight thread to thread your machine. A needle size 9/70 or 11/80 (supplied with some devices) is recommended.
The Zig-zag stitch should be set on your machine. Set the width of the stitch at least 5.0mm.
The length is approximately 2.0mm on machines with adjustable stitch length and width.
Ensure that the area in front of the needle is unobstructed by using an Open Toe Foot (an additional accessory for some machines).
You will do a Zig zag hand stitch the lace on the top of the fabric about 1/8 “to the left of the fabric edge.
You will roll the fabric over as you stitch it in place as the stitch moves to the left.
5. Edge Joining
A zig-zag stitch can be used to join two fabrics together. The first step is to press the fabric edges under.
Fabrics can be guided using the edge joining foot (added accessory for some models).
The folded edges should be placed side by side on both sides of the center guide, and a piece of lightweight stabilizer should be placed beneath the join.
Choose the zig-zag stitch. Choose the length and width settings you need for your project for machines with adjustable stitch lengths and widths.
Ensure that the right side of the needle sews on the suitable fabric while the left side of the hand sews on the left fabric.
Once you’re done, remove the stabilizer. If your stitches have a more robust appearance, use a Top Stitching thread and Top Stitching Needle (an additional accessory for some machines).
Create unique pieces with Zigzag stitching
Zig-zag stitching is precisely as its name suggests and looks much like a zig-zag. Due to its zig-zag motion, it securely locks in the raw edges of the fabric while allowing for some stretch.
Depending on what you’re zig-zag sewing, you can sew in various ways with a zig-zag stitch. The zig-zag stitch comes in a narrow, a 3-step, or a wide variety.
Here we’ll go over zig-zag stitches, how you can adjust your machine, and what it’s for.
- The stitches are angled toward each other to create a zig-zag seam. The seam looks elegant and robust.
- Besides zig-zag stitch knitting lace, applique, and needlework, the zig-zag machine also uses quilting hair padding and zig-zag stitch hand sews.
- In this technique, bobbins and chains are used.
- Zig-zag stitches result from the needle moving crosswise between the needle holes when the fabric moves one stitch down the seam(a fabric step) and the hand moving on the opposite side(the needle step).
- The seam width is determined with the fabric step, and the zig-zag width is contrasted with the needle step.
- Five thousand stitches are done per minute on zig-zag machines, with seams spaced as far apart as 10mm.
- It is possible to obtain a zig-zag seam by changing the order and direction of horizontal needle movements and the fabric’s movement.
- These seams repeat after a few stitches rather than after two.
A Very Versatile Stitches
The Zig Zag Stitch is one of the versatile stitches you find in the world of stitching and clothing.
There is no end to the things you can do with a single Zig Zag stitch style. However, some changes in the width and length of the stitch create so much variation and different usage.
Also, you can create versatility by lowering the tension. So, you can explore more and more in this effortless crochet zig-zag stitch style.
Zig Zag Stitch FAQ
what is zig-zag stitching?
What is zig-zag stitching? Zigzag stitching is a type of machine stitching that uses a zigzag pattern.
This stitching is often used to finish the raw edges of fabric or sew stretchy fabrics. Zigzag stitching is also sometimes used for decorative effects.
Why does my zig-zag stitch pucker?
Why does my zig-zag stitch pucker? There are a few reasons that your zigzag stitch might be puckering. One reason is that your fabric is too tight.
- When the fabric is pulled too tight, it doesn’t have enough give to move when the needle goes in and out. This can cause the fabric to pucker.
- Another reason might be that your tension is too loose. If the tension isn’t tight enough, the stitches will be too big and will cause the fabric to pucker.
- Finally, make sure you use the correct size needle for your fabric. If the needle is too big, it can also cause puckering.
How to zig-zag stitch stretch fabric?
How to zig-zag stitch stretch fabric? To zigzag stitch stretch fabric, you will need a sewing machine with a zigzag stitch function. You will also need a stretch needle and thread.
- First, stretch the fabric out so that it is taut.
- Then, set your sewing machine to a medium-wide zigzag stitch.
- Start stitching at one end of the material,
- and sew slowly and evenly as you move along the fabric.
- Be sure to backstitch at the beginning and end of your seam.
does a zig-zag stitch stretch?
Does a zig-zag stitch stretch? Yes, a zigzag stitch can stretch. This is because the threads are not all pulled in the same direction so that the fabric can give a little bit.
This can be helpful when you are working with fabrics that need to have some give, like knit fabrics.
what is a zig zag sewing machine?
What is a zig zag sewing machine? A zigzag sewing machine is a type of sewing machine that creates a zigzag stitch.
This stitch is often used for decorative purposes or to reinforce a seam. Zigzag sewing machines can be either hand-operated or electronic.
can you do a zig zag stitch with a walking foot?
Can you do a zig zag stitch with a walking foot? Yes, you can do a zig zag stitch with a walking foot.
The walking foot helps to feed the fabric evenly through the machine, so it’s perfect for stitching curved or zigzag lines.
why is my zig zag stitch skipping?
Why is my zig zag stitch skipping? There are several reasons why your zig zag stitch might be skipping. One possibility is that your needle is not properly inserted into the fabric.
- Another possibility is that the tension on your sewing machine is not set correctly. If the tension is too loose, the stitches will be too loose and may skip.
- If the tension is too tight, the stitches will be too tight and may also skip. Finally, make sure that the presser foot on your machine is down when you start sewing.
- If it is not, the fabric will not feed properly and you will get skipped stitches.
why is my zig zag stitch not working?
Why is my zig zag stitch not working? The most common reason is that the tension is not set correctly.
- The tension should be set so that the top thread is slightly tighter than the bottom thread.
- If the tension is too loose, the stitches will be too big .
- and if the tension is too tight, the stitches will be too small.
- Another reason could be that the needle is not positioned correctly.
- The needle should be in the center of the foot and should not be pushed to one side.
- Also, make sure that the presser foot is down when you start sewing.
why is my zig zag stitch straight?
Why is my zig zag stitch straight? First, check to see if your needle is properly inserted into the fabric.
- If the needle is not properly inserted, the stitches will not form correctly.
- Next, check the tension on your sewing machine.
- The tension should be set to “medium” or “4”.
- If the tension is too loose, the stitches will be too loose and will pull apart easily.
- If the tension is too tight, the stitches will be too tight and will pucker the fabric.
- Finally, make sure you are using the correct size needle for the type of fabric you are sewing.
If you are using a heavy-weight fabric, you will need to use a larger needle than you would for a lightweight fabric.
In Conclusion
Hence, you have learned all the basics and technicalities of Zig zag sewing, stitching, zig-zag stitch knitting, zig-zag stitch hem, crochet zig-zag stitch, and many more.
All you have to do is collect the required little material and craft a beautiful zig-zag stitch now.
Don’t forget the durability and usefulness of this stitch, and keep sewing it. The sewing world has endorsed it.
Please comment below if you like this article and want to know more.