How to Draw an Elephant (Step by Step)
How to Draw an Elephant! Did you know that the African elephant is the largest land mammal? Have you ever seen it?
As elephants are heavy, this makes them the only animals that cannot jump! Most people believe that elephants are afraid of mice. The real truth is that they get scared of anything in the wild that suddenly passes by quickly.
Elephants are one of the few species which would recognize themselves in the mirror!
Researchers have found out that elephants possess complex and deep feelings. They can also develop close bonds with humans and they can remember their caretakers after a long time too. Aren’t they super cute?
Draw an Elephant
So, today, you will learn how to draw an elephant and in just a few steps you would be able to master how to draw an elephant step by step. You just need to put a lot of focus into it. The elephant that we will be drawing today is super cute and cartoonish so it would be really fun to draw it for all the ages as the steps are simple like always.
So now, let’s now begin the tutorial so you can easily learn how to draw a simple and cute elephant step by step.
What You Need
- our directed drawing template (completely optional but super handy, grab it at the end of this tutorial)
- pencil or marker
- paper
How to Draw an Elephant Step By Step
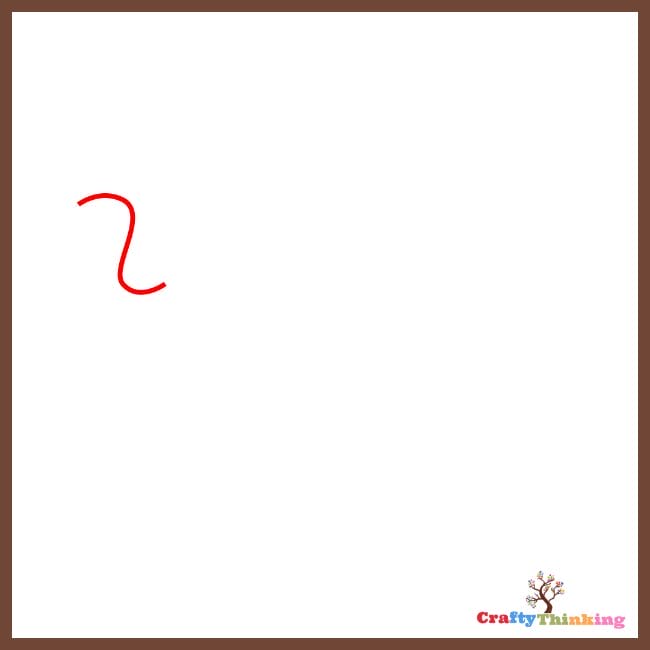
Step 1:
You will begin by drawing the head of the elephant. You can either simply draw the letter ‘S’ on the right or the left side depending upon the fact whether you want to draw the head on the left or the right side.
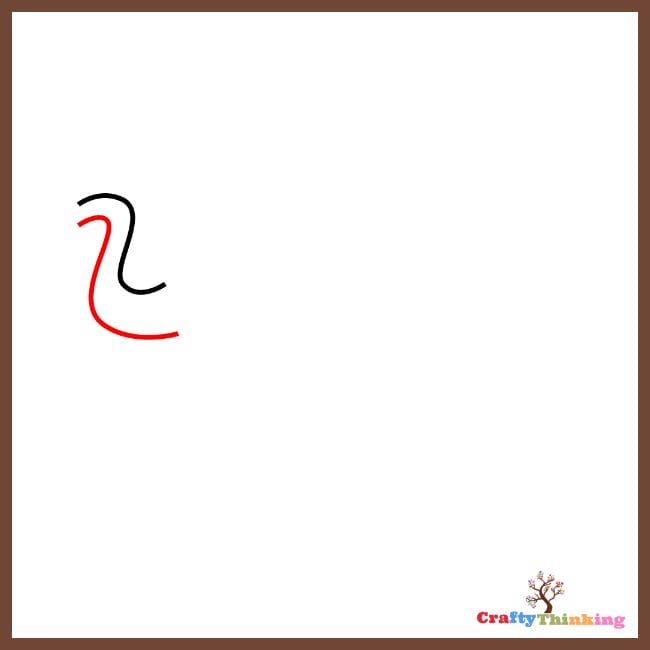
Step 2:
You will now draw another S shape under the one you previously drew to double it. Can you guess what this is? Yes, it’s the trunk of your elephant!
The elephant’s trunk has no bones and it can lift to 700 pounds.
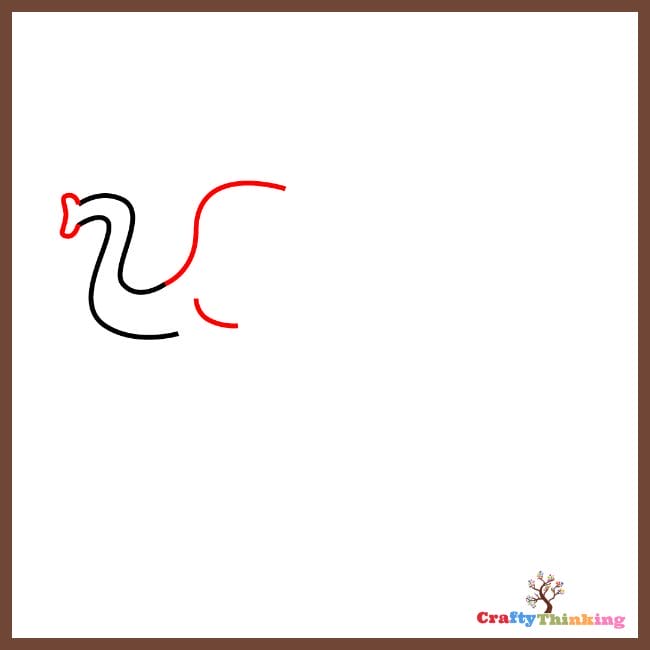
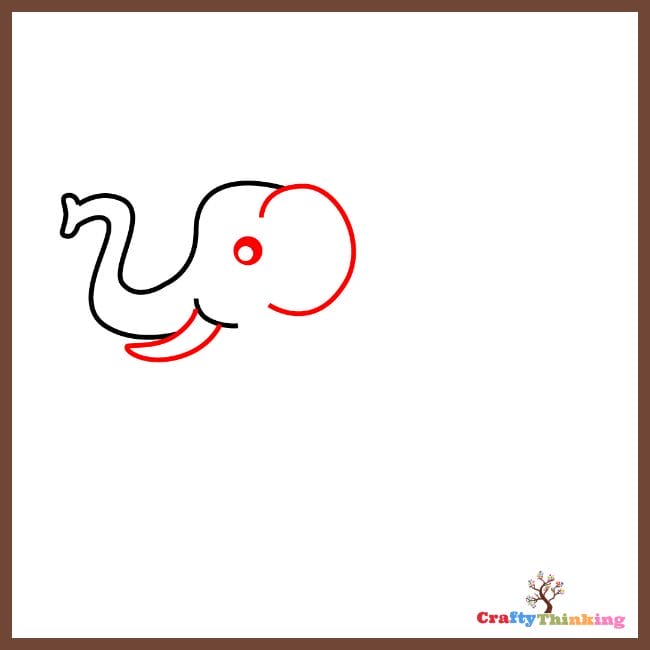
Step 3:
You will now finish up drawing the trunk.
Draw a tiny heart shape that is tilted aside.
You will also begin drawing the head. Take a start from the upper line that you drew for the trunk in the preceding steps. Sketch a slightly curved line sloping upwards and then becoming horizontal.
On the bottom of the uncompleted head, you have drawn. Sketch a tiny upwards pointing curved line as you can see from the illustration.
Step 4:
You will now learn how to draw an elephant face step by step easily.
Firstly, you will draw the ear of the elephant. It will be drawn only on one side. If you want to draw an African elephant, then, you can draw larger ears and if you want to draw the Asian elephant, then, you can draw ears that are smaller and rounder.
Secondly, you will draw the eyes of the elephant. The eyes should be medium-sized. Then draw another tiny circle inside the eye you drew previously and fill in the entire eye except for the smaller circle inside it.
Thirdly, you will draw the tusk of the elephant. It will begin from the small curve you drew in step 3. It will be just like a dagger shape or a curved cone or horn pointing downwards.
Did you know that around 20,000 African elephants are being killed each year just to obtain their tusks or ivory as the tusks serve a lot of uses like making ornamental items?
Step 5:
You will now draw the other ear of the elephant which will be at the back. Just draw a curved line from the center of the head to the center of the first ear.
Also, draw a line projecting from the base of the tusk to the ear but make sure that the line does not fully connect to the ear as you can see from the illustration.

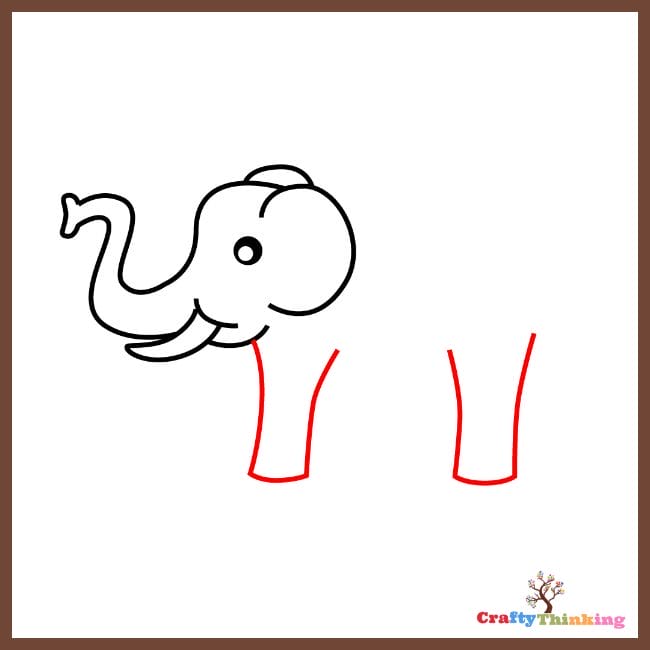
Step 6:
You will draw the first pair of legs. Sketch a line beginning from the base of the line you drew in the previous step, stretch it downwards and then make it horizontal and then take it back up again but it won’t be connected to anything.
Draw a similar leg at the end of your drawing just like the way we have done. Make sure that you do not draw it too far away.
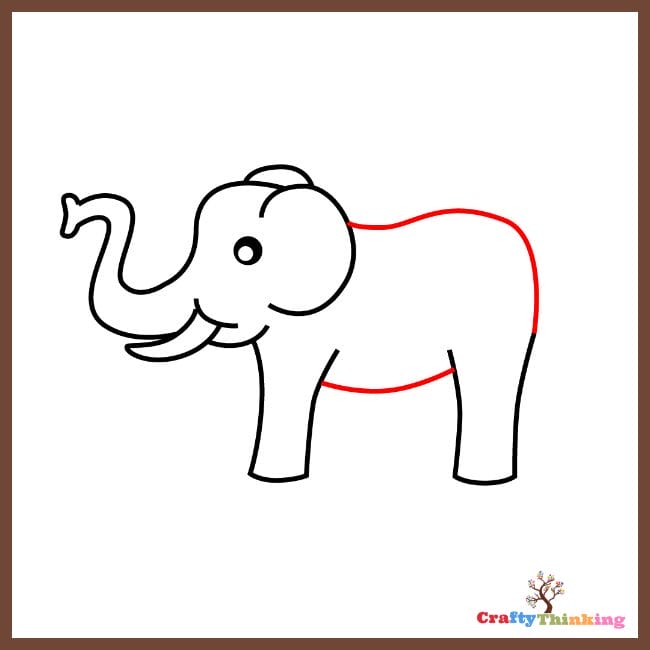
Step 7:
Make the belly by connecting the two legs. The line wouldn’t be too straight or too curved. You won’t begin this line exactly from the tip of the legs but a bit below from it.
Next, you will draw the back of the elephant from the center of the ear working your way horizontally and then curved, finally connecting it to the leg at the back.
Make sure to observe this illustration very closely as to comprehend the steps even more easily.
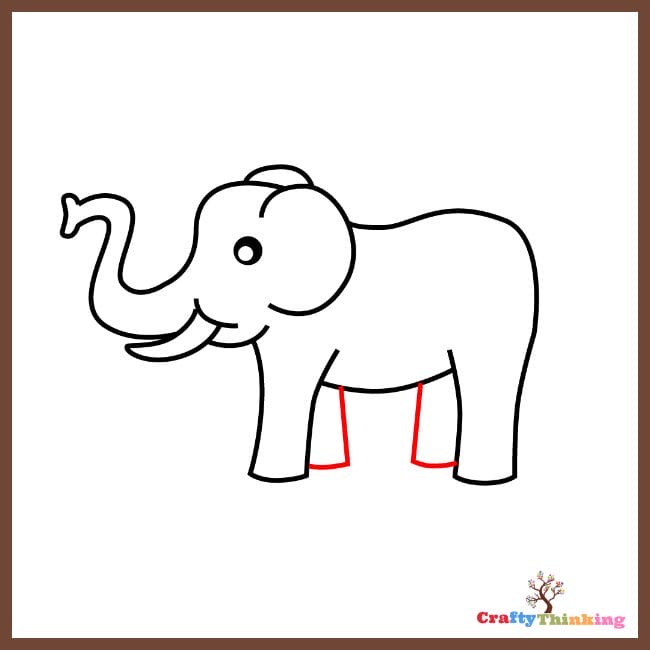
Step 8:
You will now draw another pair of the legs at the back joining the front pair of legs.
Well done! Just a few more uncomplicated steps and you will be done!
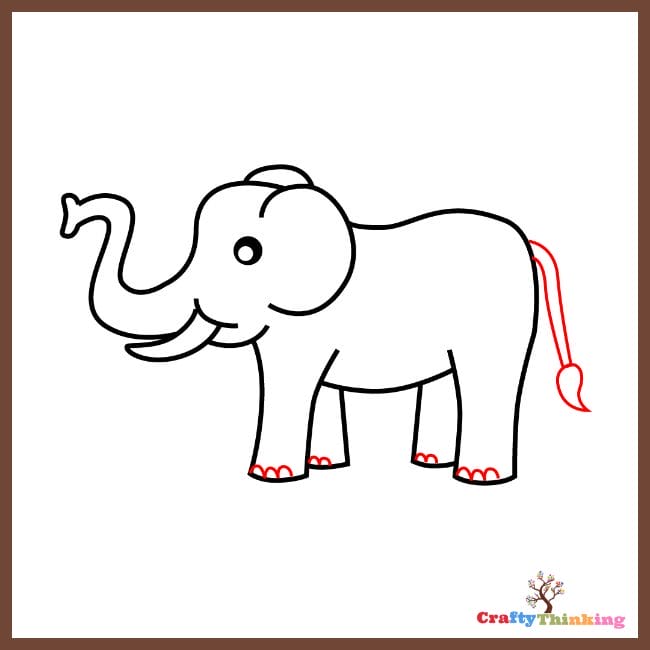
Step 9:
All that is left to do is to bless your elephant with a tail and then wrap the drawing by adding a few more details. It will be represented through two double lines and a flame kind of shape at the bottom.
Now, you will draw a pattern of downwards facing curved lines at the feet. This represents the toes of the elephant.
Step 10:
All that is left is to color.
Make sure that you color it in the way that you love. We have colored the elephant blue.
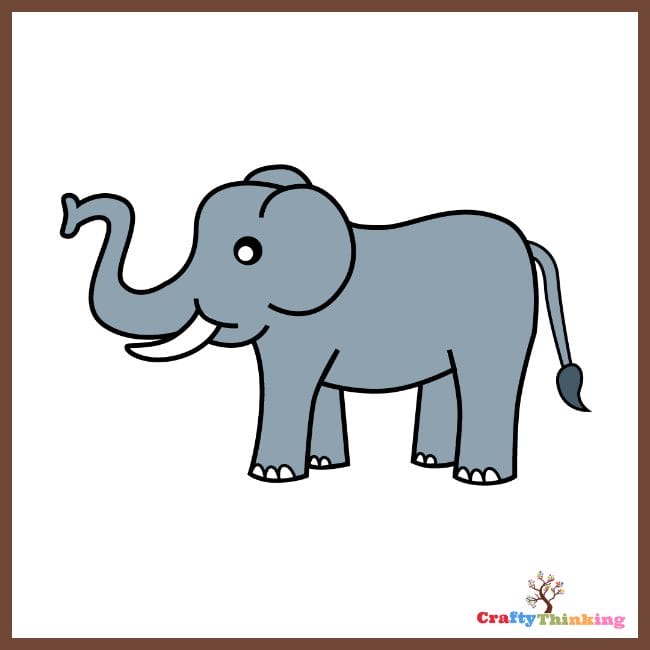
Congratulations! You have successfully mastered how to draw an elephant!
If you like this article about how to draw an elephant and would like to know more, please comment below.
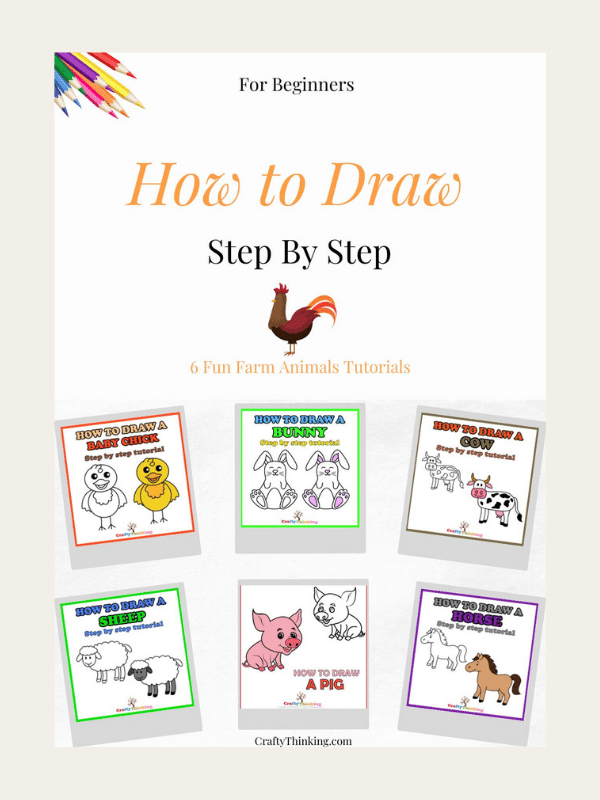
Check Out These Drawing Tutorials

Here goes our How to Draw Printable Here