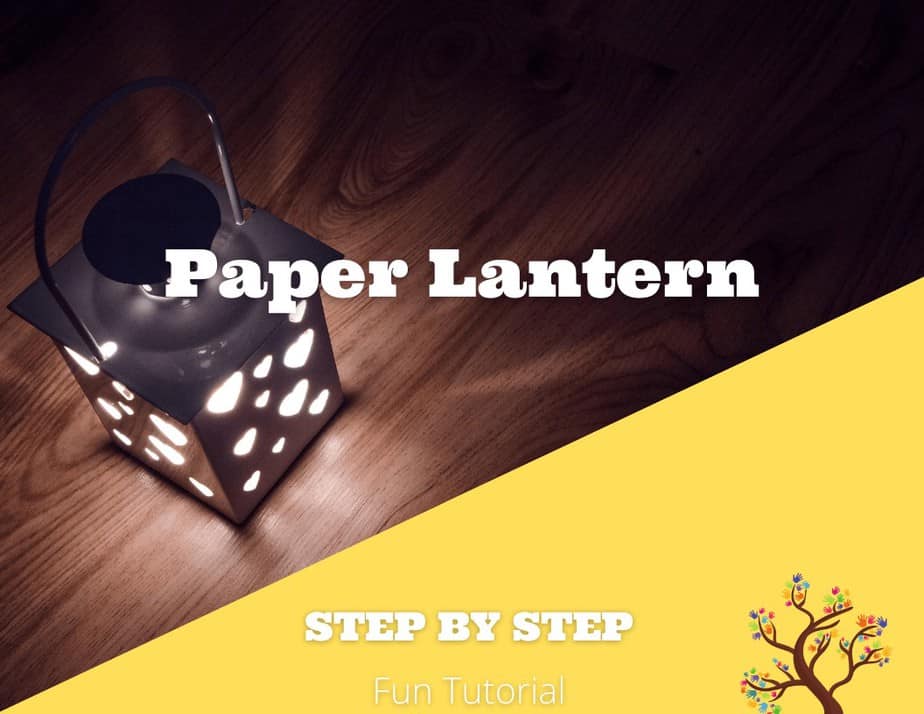
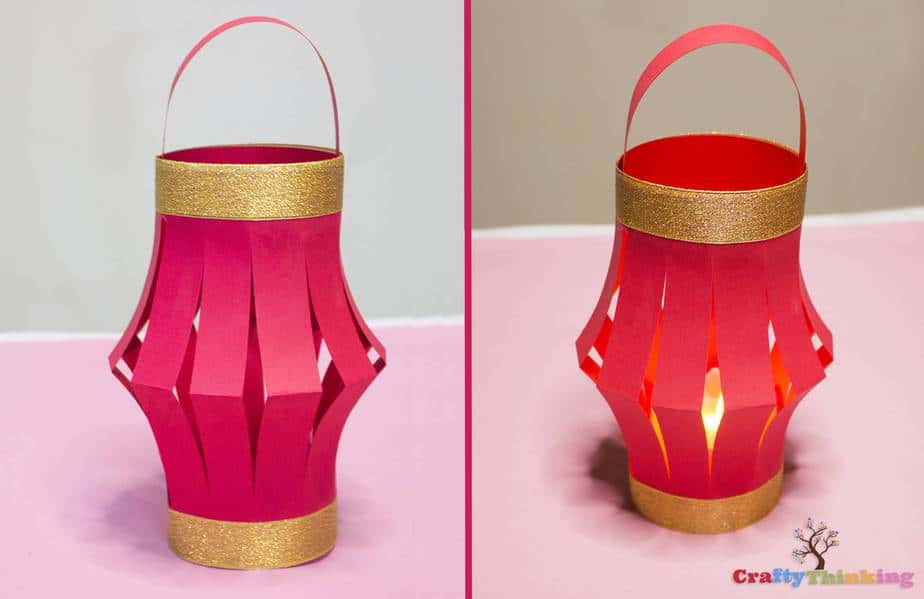
Easy To Make Paper Lantern
This paper lantern looks so classy and it’s so easy to make. It can be used as festive decorations for any occasion or event. Let’s start the tutorial.
DIY Paper Lantern
Supplies Needed:
- Paper
- Scissor
- Stapler or tape
- Scale
- Pencil
- Glue
- Things to decorate your lantern (washi tape, ribbons, stickers, glitter glue, etc)
Step 1
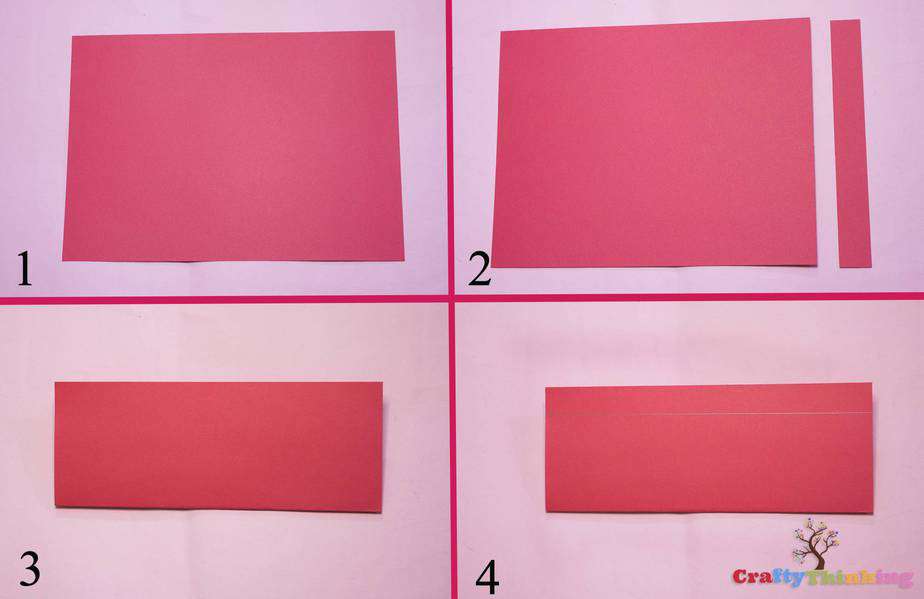
- Take an A4 size paper, you can use any color of your choice.
- Cut a 1 inch wide strip from one short side of the paper. The strip will be used for the handle.
- Fold the paper in half, lengthwise.
- Draw a horizontal line 1 inch from the long edge opposite the fold. This line is just a guide for cutting.
Step 2
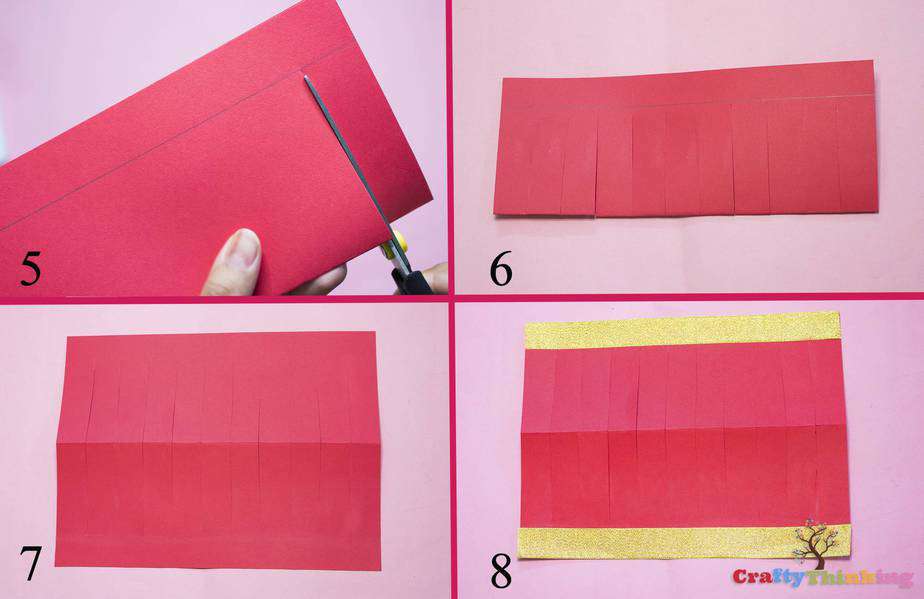
- Start cutting from the folded edge and cut a straight line about 1 inch from one short edge, all the way up to the horizontal line.
- Continue to cut more straight lines about 1 inch apart until you reach at the end of the other side .
- Unfold the paper. The paper will have various vertical slits along the middle. Erase any pencil marks.
- Apply some washi tape on the top and bottom edges. You can keep your lantern plain or decorate it with paint, glitter, stickers, etc.
Step 3
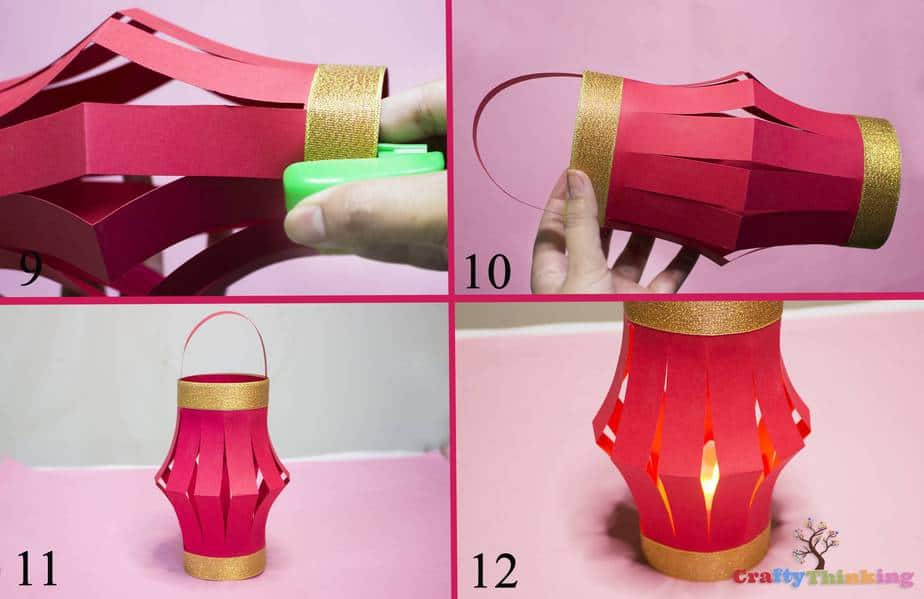
- Form the lantern into a tube shape. Overlap the long edges at least half inch . Staple or tape at the top and bottom of the overlap.
- Take the paper handle you made earlier. Glue the ends on the inside of the lantern’s top edge.
- You can decorate the handle also if you like.
- Once the glue dries, hang the paper lantern wherever you want. Put an led candle underneath the lantern and it will give a classy and warm touch to your decor.
Yay! You have just completed the Paper Lantern
If you like this article and would like to know more, please comment below.