

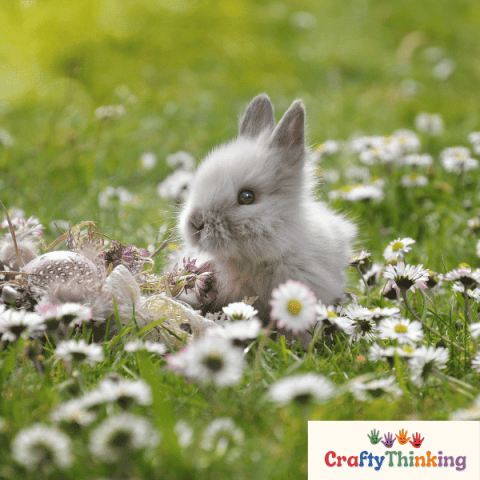
How to Draw a Bunny Rabbit Step by Step Guide
How to Draw a Bunny Rabbit is a delightful skill that both beginners and seasoned artists can enjoy mastering.
Bunnies, with their soft fur and endearing features, have always been a favorite subject for many.
Whether you’re looking to capture the essence of a wild hare or the cuteness of a pet rabbit, this guide will provide you with the essential steps to bring your bunny drawing to life.
Keep reading to find out How to Draw a Bunny Rabbit with this Step by Step Guide.
You might also like:
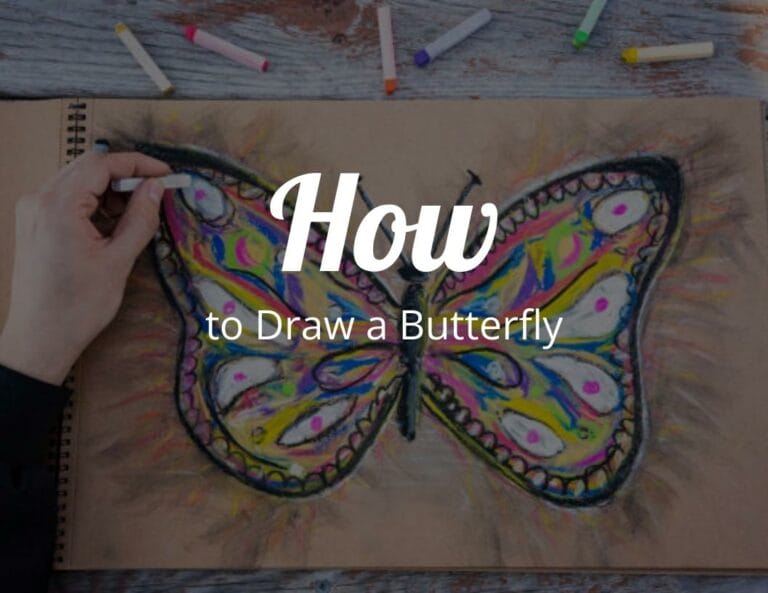
- How to Draw for Kids
- Creative Drawing Ideas
- List of Art Supplies for Beginner’s
- Art Supplies for Toddlers List
- Art Supplies List for Preschool
- Art Supplies List for Elementary School
- Art Supplies List for Middle School
- Art Supplies List for High School
- List of Art Supplies for Artists
- List of Art Supplies for Painting
How to Draw a Bunny?
To draw a bunny, start by sketching a basic oval shape for the head and a larger, elongated oval attached below it for the body.
Add two long ears at the top of the head and then draw the facial features, including eyes, a small nose, and a mouth.
Complete your bunny by adding two front paws, hind legs, and a fluffy tail.
How to Draw a Bunny Rabbit Step by Step Tutorial
Drawing a bunny rabbit can be a delightful experience, especially when you have the right guide to assist you.
Whether you’re aiming for a simple sketch or a more realistic depiction, this tutorial will provide you with easy steps to achieve your goal.
From the cute face to the fluffy tail, we’ll cover every detail.
So, if you’ve ever wondered, “How do you draw a simple bunny?” or “What’s the best way to draw a realistic bunny?”, you’re in the right place.
Let’s hop into it!
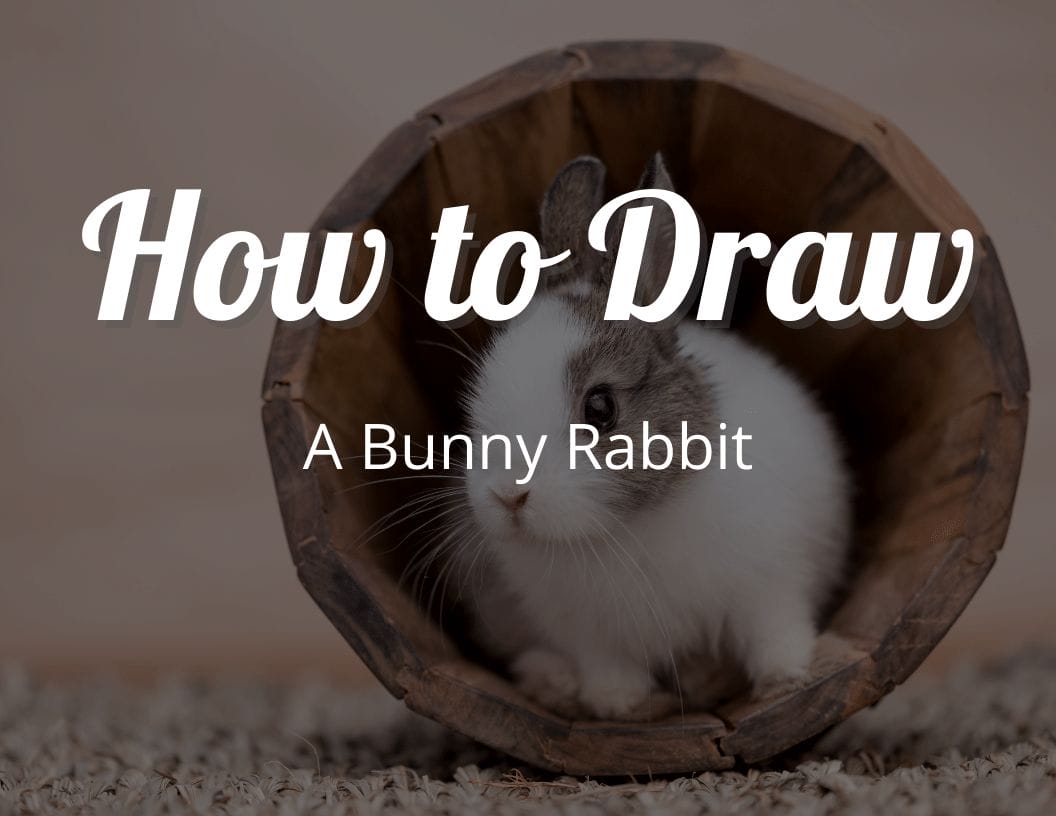
Step 1: Drawing the Bunny’s Face
- Begin your bunny drawing by sketching the face.
- Opt for a bell shape or, for simplicity, a half oval shape will also suffice.
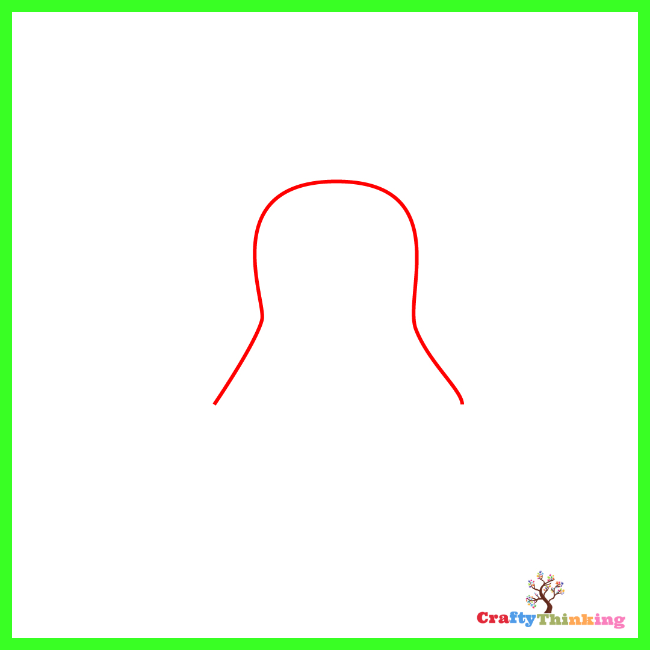
Step 2: Crafting the Bunny Feet
- The feet are essential in making our bunny drawing look more realistic.
- Draw one foot on the left and another on the right,
- Ensuring they connect to the head’s stretched line.
- Sketch an oblong U shape for each foot and add curves to represent the toes.
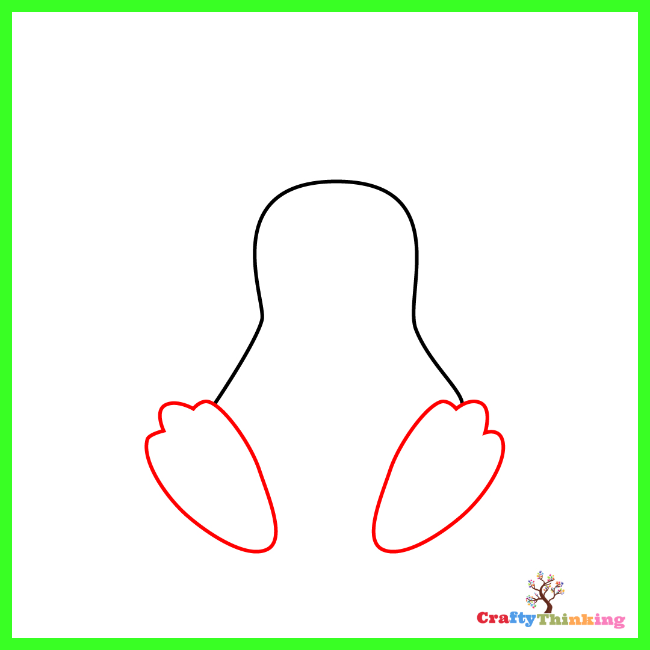
Step 3: Adding Hands and Completing the Body
- Draw a U shape on both sides for the bunny’s hands.
- Sketch the belly with a curve in the middle of the feet.
- Connect the body by drawing a loosely curved line at the bottom, joining both feet.
- This technique will give your drawing a cute cartoon bunny appearance.
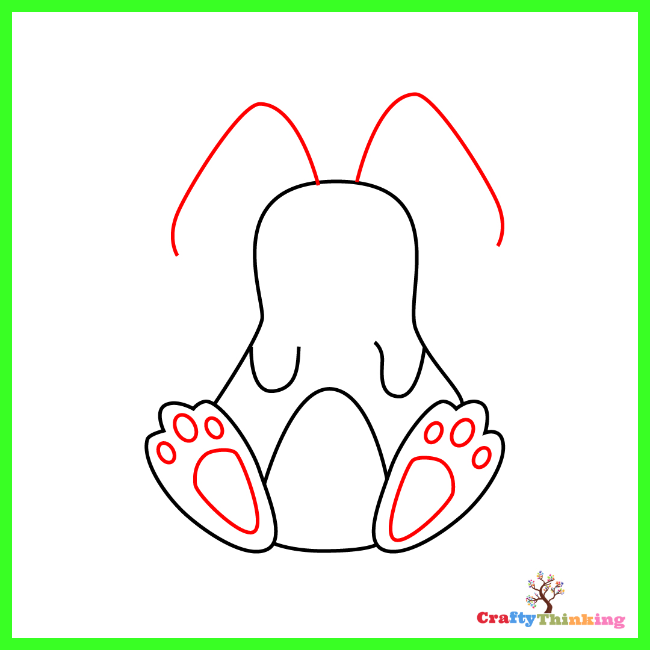
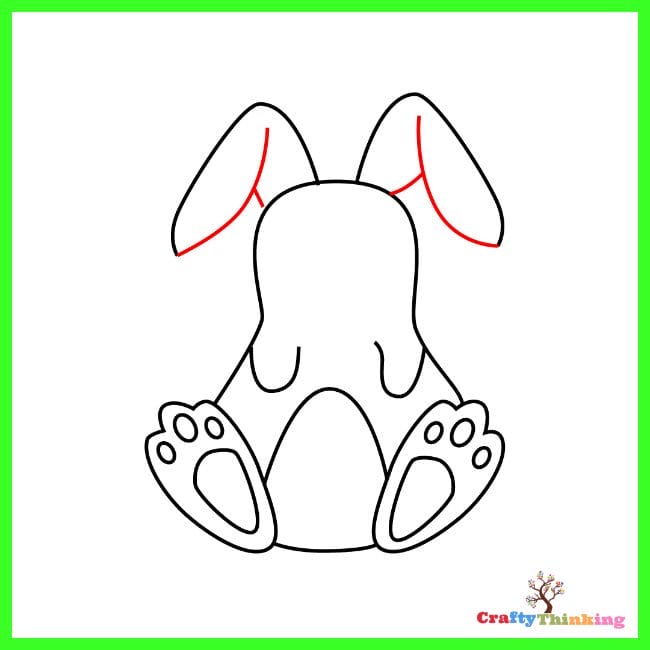
Step 4: Detailing the Ears and Feet
- For the ears, sketch curves that resemble inverted U shapes.
- Bunnies have powerful hearing, and their ears are always alert.
- Add details inside the ears with another curved line.
- For the feet, draw a slightly triangular or oval shape inside the paws
- And add three small circles under the curves to represent the toes.
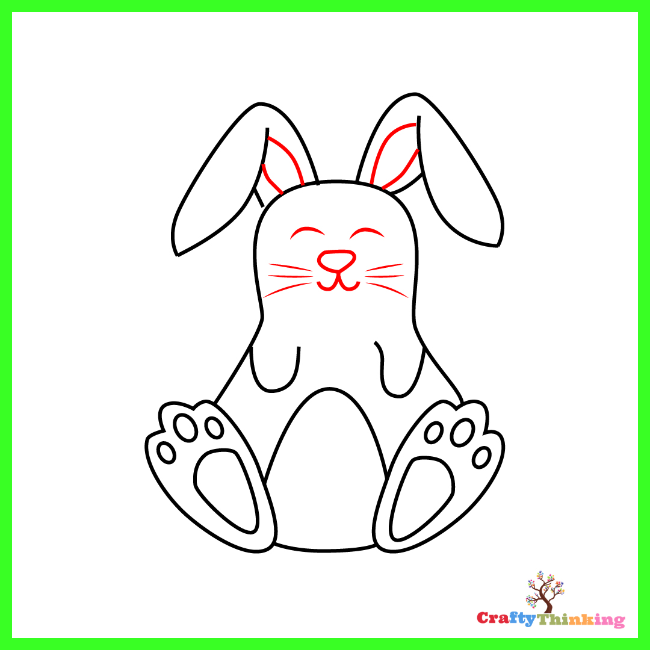
Step 5: Enhancing the Bunny’s Facial Features
- Draw two upside-down curves for the eyes, adding to the bunny’s cuteness.
- Sketch a triangular shape for the nose.
- From the nose’s center, draw a straight line and two curves emerging from its end to represent the mouth.
- Don’t forget the whiskers!
- Add three straight lines on each side of the face.
Step 6: Final Touches
- Add more details to the ears for a realistic touch.
- Consider adding elements like shadows, grass, or flowers beneath the bunny to make the drawing stand out.
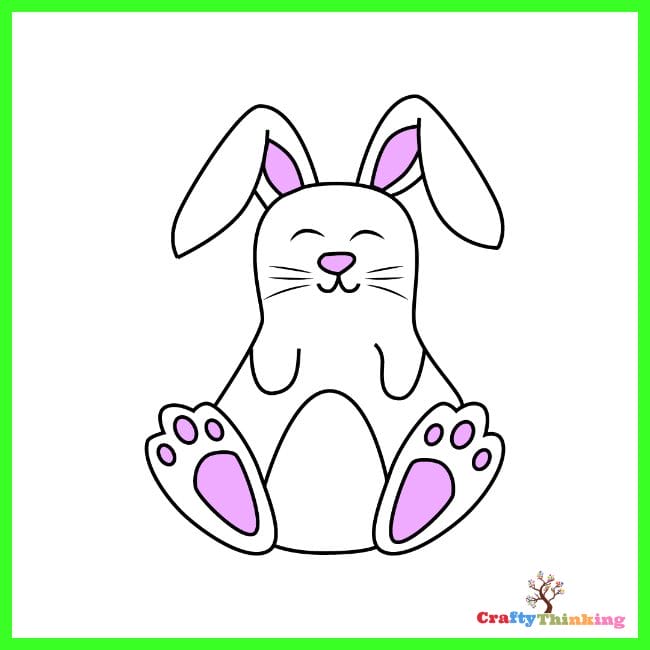
Step 7: Coloring Your Bunny Drawing
- The last step is to bring your bunny to life with colors.
- Enhance its cuteness with the right shades and make your portrait look lively.
Congrats
Drawing a bunny doesn’t have to be complicated, especially with this easy step-by-step tutorial.
Whether you’re drawing for fun or to teach kids, this guide offers a comprehensive approach to creating a beautiful bee.
I hope you gain value from this “How to Draw a Bee a Step by Step Cute Bee Tutorial”. Happy drawing!
How To Draw a Realistic Bunny Rabbit
Drawing a realistic bunny rabbit can be a delightful experience, capturing the intricate details and the soft texture of its fur.
With the right approach and a bit of patience, you can create a lifelike representation of this adorable creature.
Let's dive into the step-by-step process to make your drawing journey enjoyable and fruitful.
Materials
- A good quality drawing paper or sketchbook
- Pencil (HB or 2B recommended)
- Eraser
- Blending stump or cotton swab (for shading)
- Fine liner or ink pen (optional for outlining)
Instructions
1. Start with the Basic Shapes:
- Begin by drawing an oval for the bunny's head.
- Below the head, sketch a larger oval for the body, ensuring it's proportionate to the head.
2. Draw the Ears:
- From the top of the head, extend two long, slightly curved lines upwards for the ears.
- The inner part of the ears can be narrower, resembling a leaf shape.
3. Sketch the Facial Features:
- For the eyes, draw two small circles, ensuring they're evenly spaced.
- Add a tiny triangle for the nose at the center of the face.
- Draw a 'Y' shape below the nose to represent the mouth and the beginning of the chin.
4. Detailing the Face:
- Add whisker dots on either side of the mouth.
- Sketch the inner details of the ears by drawing a slightly curved line inside each ear.
5. Draw the Front Legs:
- Starting from the bottom of the body oval, draw two parallel lines for one leg and repeat for the other leg.
- The legs should be slightly apart, and the feet can be rounded at the ends.
6. Sketch the Hind Legs:
- Draw two large ovals on either side of the body, representing the powerful hind legs of the rabbit.
- Add details like the toes using small curved lines.
7. Tail and Final Touches:
- At the back, add a small fluffy circle for the tail.
- Refine your drawing, erasing any unnecessary lines and adding more details like fur texture using short, quick strokes.
8. Shading and Texture:
- Use the blending stump or cotton swab to shade the bunny, giving depth and dimension.
- Focus on areas like the ears, under the body, and around the eyes to give a more realistic appearance.
9. Final Outlining (Optional):
- If desired, you can outline your drawing with a fine liner or ink pen to make it pop.
10. Background (Optional):
- Consider adding a simple background, like grass or a setting where you'd typically find a bunny, to complete your artwork.
Congratulations!
You've now successfully drawn a realistic bunny rabbit.
With practice and dedication, you'll continue to improve and capture the essence of this beautiful creature even more accurately.
Final Note:
- How to Draw a Realistic Bunny Rabbit is a skill that requires patience, attention to detail, and practice.
- By following this guide, you've taken a significant step towards mastering the art of drawing lifelike animals.
- I hope you gain value from How to Draw a Bunny Rabbit with this Step by Step Guide.
Notes
Did you create this craft? If so, we would love to hear from you! Please feel free to leave a comment on the blog or share a photo of your creation on Pinterest.
Recommended Products
Thank you for supporting our family-owned business!

Is there a video tutorial available to complement this bunny drawing tutorial for visual learners?
At the moment, we primarily offer step-by-step instructions in written format.
However, we understand the value of visual learning and are considering expanding to video tutorials in the future to help those who learn best through visual aids.
For beginners and kids, how does this step-by-step instructions differ from other bunny rabbit drawing guides?
Our bunny drawing tutorial is designed with beginners and kids in mind.
We focus on breaking down the drawing process into easy steps, using simple shapes and lines together.
This approach ensures that even those new to drawing can follow along and create a fun bunny drawing.
Plus, our instructions are clear and concise, making it easier for young artists to understand.
After completing the draw a bunny tutorial, are there any recommendations on how to paint the bunny for added creativity?
Absolutely! Once you’ve finished drawing the bunny, you can enhance its cuteness by adding colors.
Consider using soft pastel shades for a gentle look or go bold with vibrant hues.
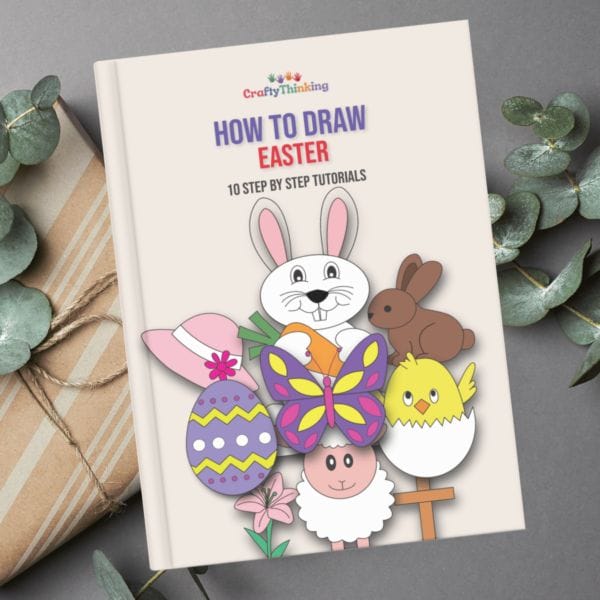
Don’t forget to add some easter egg designs if you’re drawing around the Easter season.
And always remember, the choice of colors is entirely up to your creativity!
Do you offer a printable version of this step-by-step bunny drawing tutorial for offline practice?
Yes, we do have a printable version available. This allows artists, especially kids, to practice their drawing skills offline, making it a great resource for crafts for kids or classroom activities.
Besides the drawing tutorial, are there any interesting facts about bunnies that can enhance the learning experience, especially when using a specific type of paper?
Bunnies are one of the most beloved animals worldwide. Did you know that a rabbit’s head can turn almost 360 degrees?
This allows them to keep an eye out for predators.
When drawing on specific types of paper or cardstock, knowing such facts can inspire the positioning or posture of the bunny in your artwork.
How to draw a cute bunny nose with these easy steps?
To draw a cute bunny nose, start by drawing a small circle or an oval in the middle of the bunny’s face. This will serve as the nose.
You can then add a slightly curved line below the nose to represent the top of the mouth.
Frequently Asked Questions
Here are some frequently asked questions about the How to Draw a Bunny Rabbit. Get some quick answers to everything you need to know.
-
How to draw a bunny face easy?
Begin with drawing the head using a round shape to form the bunny’s head.
Draw two large oval shapes for the eyes, and a small circle for the nose.
Draw a curved line for the mouth and add whisker lines on either side.
Don’t forget the large, slightly curved ears starting from the top of the head.
-
How to draw a peep bunny?
Drawing a peep bunny is all about simple shapes.
Start with a vertical, slightly elongated oval for the body.
Add a smaller oval on top for the head. Draw small circles for the eyes and nose, and you have your peep bunny!
-
How to draw a kawaii bunny?
Kawaii bunnies are all about exaggerated cute features.
Begin with a round shape for the head.
Draw large, sparkling eyes with highlights, a tiny nose, and a smiling mouth.
Add floppy ears and a round body to complete your kawaii bunny.
-
How to draw a simple easter bunny?
Start by drawing a round shape for the bunny’s head. Add two long oval shapes for the ears.
Draw the eyes, nose, and mouth.
or the body, draw a larger oval shape. You can add a basket with Easter eggs beside the bunny for added context.
Wrapping Up How to Draw a Bunny Rabbit
How to Draw a Bunny Rabbit has been a delightful journey, showcasing the intricate details and simple techniques that make the process both fun and educational.
With practice and patience, you’ll find that capturing the essence of these adorable creatures becomes second nature.
Drawing is not just about the final product but also about the joy of the creative process.
I hope you gain value from How to Draw a Bunny Rabbit with this Step by Step Guide.
If you like this article about How to Draw A Bunny Rabbit and would like to know more, please comment below.


