9 Easy March Crafts – (DIY Art Projects)
No winter lasts forever and no spring skips its turn because when winter passes spring always comes. If this season of love, youth, and joy has arrived where you live or if you are waiting for its beginning. These joyous arts and crafts are here to turn up your state of euphoria as these March Crafts for kids are the absolute way to welcome the ecstatic season of spring. March is the best time of growth and renewal, rain and rainbows, blossoms and flowers.
Children truly love exploring and experimenting with arts and crafts and that is the reason why the mind-blowing activities shared in this article will make it easier for kids to fill their minds with creative ideas related to March Arts and Crafts. Themed learning is quite delightful as you can pick any one of your favorite hands-on activities.
March Crafts For Kids
If you are looking for mesmerizing March crafts, we have gathered some amazing crafts for St. Patrick’s day, spring flowers, or birds feeder, and this list goes on of all the various activities that you can try every day in March. Don’t waste time to find the perfect activity of the day we have mentioned. Just pick any that catches your interest and start a fun-filled journey on it. We have put together a fun list of March crafts and a lot more fun ideas for toddlers, kindergarten kids and adults and we are so excited to share them with you. So get crafty and have fun creating with these awesome March crafts.
March Crafts For Adults
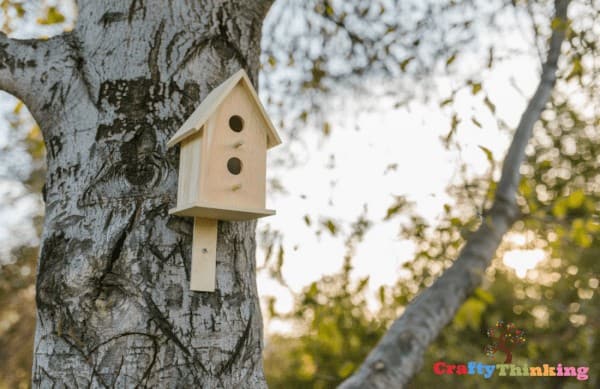
Birdhouse Craft
We all adore birds for their cuteness and lovely melodies. They are like worldwide famous animals that are usually kept as house pets all around. However, some of them are suffering as homeless creatures mainly because of deforestation which results in the destruction of their nests which can eventually lead to extinction but we can play our part in helping them by constructing birdhouses while enjoying the process at the same time.
This March craft for adults might seem hard but once you start making and working on this project based on the steps provided by this article, you will find it very easy. This will also increase your engineering and map solving skills. Let’s begin the work!
First, you would require the items for the construction. You will need few pieces of the wood sheet for the base of the house. Some wood sheets are required to build up the walls and roof of the birdhouse. Firstly, cut two squares out of the wooden sheet of the same size as the sidewalls of the trees house. Now take two more wooden pieces to cut the front and back of the house.
Give a shape of reverse V from the top. Make two or one small holes on the front wall of the sheet. Now join all four parts with the base to give it the shape of the house walls. Now add a canopy roof and fit it over the walls. Now the overall look of the house is ready.
You can add a stand at the back to hang it on the tree. You can also use different color paints of your choice to make it more attractive.
Painted Pots
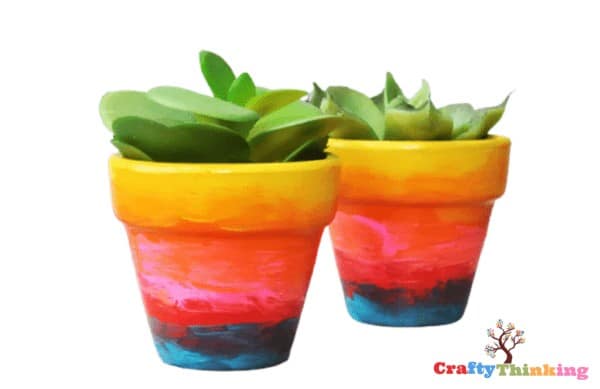
Painting is just like silent poetry or a luminous language by nature. You can engage in playing with different colors and adding more variety to them to create different shades and blending for textures! Especially when it has to be done on different objects, you fully concentrate for better output and you paint more carefully. This activity will help you in blending while painting and making better combinations.
We all know that plants are very important in our environment. They provide us with oxygen that enables us to survive. Some of us are also heavenly into plant décor in living rooms, bedrooms, or making a simple wall look fancy! If you try this activity, you will end up having beautiful colored potted plants. Even if you place them on your lawn under daylight, they will shine and look spectacular.
To do this craft, you would have to get a pot with some paints of your choice. The paint medium is your choice of how you want the texture to be. We have chosen yellow, orange, red and blue; see all these colors match perfectly! Now color the pot with the lightest paint on the top.
You will see the trend goes like lightest on the top and darkest going down the pot. This is a good trick to create better blending. Now the second color we used is orange and you will have to blend it with yellow to make it more dimensional. Used red then blue after this and you will soon have a colorfully painted pot.
Transfer some soil from your garden into the pot and sow a seed or carefully unlash a plant and place its roots into the pot. This will complete your painted pot décor!
March Crafts For Kindergarten
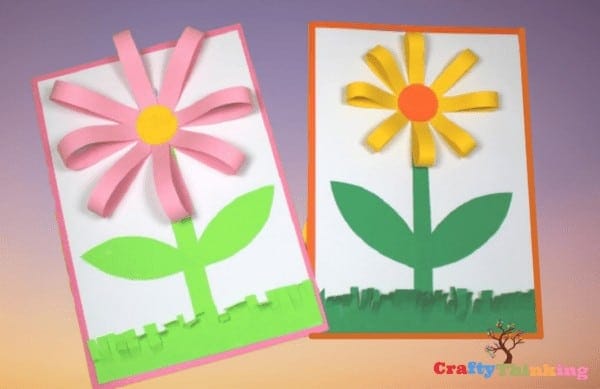
Flowers Craft
It is said that flowers are the music of the ground from earth’s lips spoken without sound. It is a very vital part of greenery that due to its alluring appearance and its beautifully hypnotizing fragrance. It pulls tourists and catches our sight with the eye-catching colors, shapes, and varieties. There are many kinds like the brightly colored and showy tulips, the pure white jasmine, and the sun-like sunflowers out of which the erect paradisiacal roses are the most popular ones.
Some floating flowers live on water like water lily which symbolizes peace and pleasure. For this craft, you would require different colors of paper to make the flowers. The items you require are two pink-colored sheets or any color of your choice for the petals., a yellow-colored sheet for the middle circle of the flower, a green-colored sheet for the stem, leaves, and grass, white-colored sheet for the base of the flower where it will be pasted.
Now let’s begin the steps. From the pink-colored sheet, cut a rectangle that will be the frame of the picture. Also cut a rectangle from the white sheet, but it should be smaller in size than the pink one. Now apply glue on the white sheet and proportionally paste it on the pink sheet in a way that it looks like the white sheet has a pink frame.
Next, from the second pink-colored sheet (or any color you chose), cut 8 long strips. Take both the ends of each stripe and glue them together but don’t flatten the strip in the middle. Now do the same with all the 8 strips and make them in a flower shape like shown in the illustration and glue them together. Now glue the flower petals on the prepared base (white paper with a pink frame) in the middle of the paper but make sure you only apply glue in the middle. Don’t touch the petals. Cut a yellow circle and glue it in the middle of the flower.
Now cut a strip from green paper as the stem and also leaves of the same size. Keep them until used. Also cut a small rectangle of the length of the bottom side of the white sheet. Cut small lines on the top of the green rectangle and roll and curl them.
Paste the stem on the paper such that it is emerging from the flower sown the sheet. Paste the leaves carefully and neatly and also glue the curly grass at the bottom. In this way, you have completed another March craft that you will love!
Popsicle Sticks Butterfly Crafts
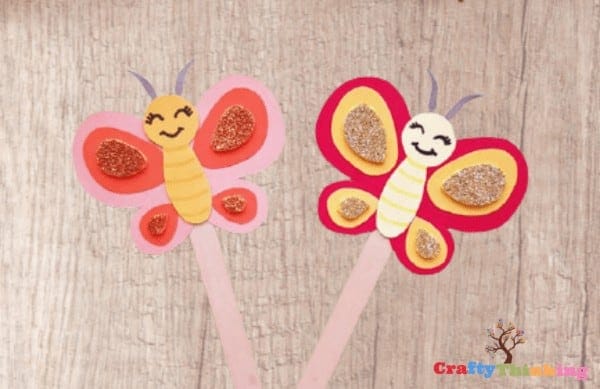
Butterflies are so beautiful! They are lovely insects with amazing color combinations and structures. They remind us of March as they begin appearing a lot during the spring season when the flowers bloom and so part of our March craft for kindergarten activities.
This March craft activity is about making adorable butterflies out of popsicle sticks the items that are required are: a red-colored sheet, a yellow-colored sheet, a white-colored sheet, purple colored sheet for the antennae, a popsicle stick, a golden glitter sheet, and a black and yellow marker.
To begin, you must prepare all the shapes that you need and cut them. For the body, cut an oval shape with a round bottom on a white sheet. Cut a circle that can fit the size of the oval body. Now cut the butterfly wings: four red ones, four smaller yellow ones, and four even smaller ones which are made out of gold glitter sheet.
Paste the golden ones on the yellow and the yellow on the red to complete the wings. Draw the face of the butterfly on the white circle. Make cute eyes and a smile. Also, make the butterfly details on the body as round lines with a yellow marker.
Now paste the wings on the popsicle stick shown in the illustration. Stick the head on the body and paste them on the Popsicle stick on the wings. You have almost completed the butterfly, just the antennae left. Make the antennae on the purple-colored sheet-like arcs and duct the shape out. Glue it at the back of the head and the butterfly puppet is complete.
You can make more and play with them in a puppet show that you can organize and prepare with your friends to show the parents. These puppets are lots of fun and you can make them fly in the sky!
DIY March Craft
St. Patrick’s Craft
Saint Patrick day is a holiday and celebration in memory of Saint Patrick’s death who bought Christianity to Ireland. This popular day is annually held on the 17th of March when Saint Patrick died. This day symbolizes the color green where everyone is seen to be wearing green and clover posters are held worldwide. Major things that are dining on this memorable day are Attending parades and drinking Irish beer and Irish whiskey
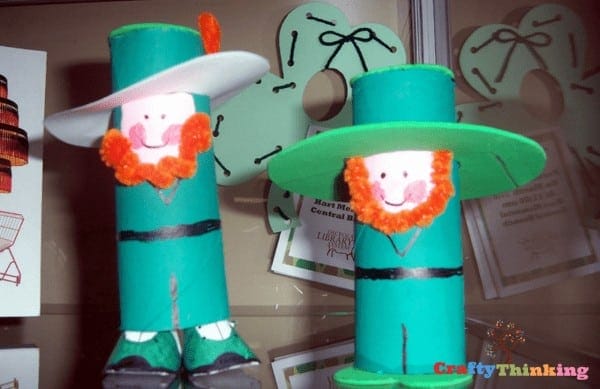
On this special day, which is part of the spring weather of March, we can all remember this great man and celebrate it to the fullest with the help of crafts that would work pretty well. We can make a mini model of Saint Patrick out of a tissue roll which would help to recycle it at the same time!
For this March craft, you have to grab an empty tissue roll, green paper, a green foam sheet, a black and pink marker, an orange pipe cleaner, and a white sheet. These are all the items that will result in a beautiful decoration once you put the things together in the steps shared by us!
Firstly, wrap the green sheet around the roll by cutting the sheet the same size as the roll. Glue the green paper around the roll neatly. Begin preparing the ends of the roll. The bottom end will be the shoes and the top will be the top of the hat.
For the shoes, place the roll on the top of the green foam paper and trace a circle. Now on one side of the circle, make the top part of the heart (two bumps) and cut it out like a heart with a round bottom. Glue this on the bottom, matching the circle properly with the bottom of the roll and the bumps you have made will be illustrating shoes.
Next, make a circle out of white paper and cut it. Make two eyes and a smile with a black marker and make two pink circles on the cheeks to show blushing! Glue it a little below the top of the roll so it leaves room for the hat. Now place the top end of the roll-on foam paper and trace it out.
Now, with a compass make a bigger circle around the traced one. Begin cutting around the bigger circle. Cut inside the smaller circle so you can see a cut hole in the circle with green foam paper. Now add glue on the edges of the cut hole and place it just above the face like done in the illustration.
Next cut the orang pipe cleaner into flakes and fluff them out. Apply glue on the edges of the white circle of the face. Begin pasting some orange pieces of the pipe cleaners on the applied glue to make the beard. Next, with the help of a black marker make a vertical line on the bottom of the roll to show that the pants separate.
Also, make a belt with it and a v-shaped neck. With this, we complete this delightful craft that reminds us of Saint Patrick. Make more with the leftovers and decorate your house for this precious day.
March Crafts For Pre-K
Cactus Tree
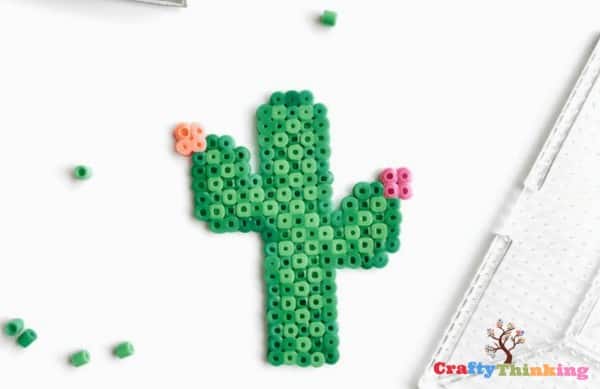
We have all heard about cactuses; they are spiky plants with sharp needles. They are the only plants that seem to exist in desserts. Cactuses are mostly found in green color. They can grow in areas with little annual rainfall as they have the special ability to store water in their stems, roots, and leaves.
For this March craft for pre K, you will need some basic commodities and items that we can find regularly in our households. Grab some beads or buttons of green color and also some of the pink or red-colored ones for the flowers. Now take a white A4 sheet and draw a cactus on it. Now apply glue on your cactus drawing and begin arranging the beads in it or if you have chosen buttons. Also, make space for flowers on the cactus and use glue to stick the pick beads as flowers.
Easter Eggs
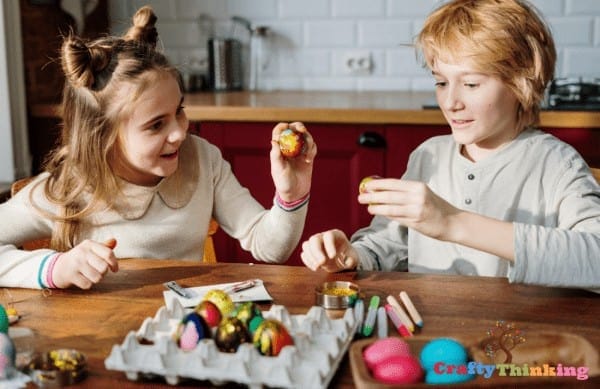
Easter eggs decoration is a highly fun-filled March craft for Pre K. You can paint together with different patterns colors and designs. You can always enjoy small talk along and learn more about this day and its importance while sharing ideas. And we all know that the egg hunt is so much fun after painting and arts on eggs.
For this Easter March craft, you need a few eggs that you could paint. Even if they are expired, it wouldn’t matter as they will end up in bushes and other hiding places after you have decorated them. In other words, it is just like tie-dye eggs. You have to mix colors and create a perfect egg for your egg hunt.
To start this craft, you will need a couple of different colored markers. You can grab yellow, red, green, blue, purple, and other colors like golden. To make them look much fancier, get some glitter or sprinkles for egg toppings. Take different markers and colors randomly like tie-dye or make patterns like stripes or hearts. You can apply glue on the egg and spray glitter on top for a shiny and adorable look.
March Crafts For 3 Year Olds‘
Rainbow
We all love rainbows, don’t we? They are the prettiest surprise on a sunny and rainy morning! We have always admired cartoons that bring rainbows as slides for kids and we have always wanted to ride a rainbow slide. They are colorful and fun-bringing and we often love watching them during a sunny atmosphere after rain. They spray around the sky, so big and majestic, and make us keep watching it forever!
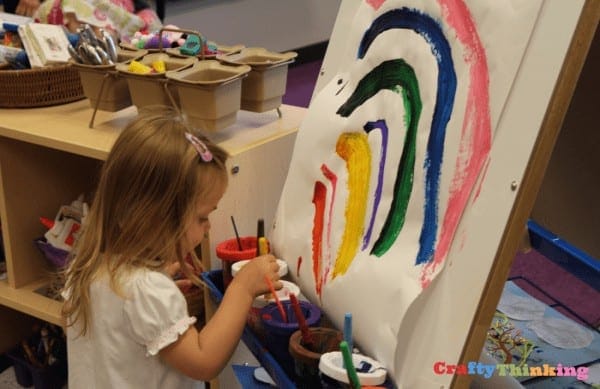
How about expressing our love for rainbows by making crafts and paintings related to them? Well, we all know that the rainbow contains the colors red, orange, yellow, green, blue, indigo and violet. All these colors look gorgeous when they appear together in the sky. You can make a beautiful rainbow painting that everyone will love. It is considered as one of the best March craft activities for beginner kids.
First, grab a canvas or art sheet and attach it to an artboard for support. Now grab all the seven colors of the rainbow as paints and brushes for each color. Now use the colors on your canvas to create a beautiful rainbow. First, use red, then orange, yellow, then green, and blue. Next use indigo and lastly violet. Kids can also do it randomly as they may not be that aware of the colors.
This March craft for 3 years old is very fun and helpful for kids to learn about colors and their identification. They will learn about rainbows and the colors that comprise the rainbow.
Letter Coloring
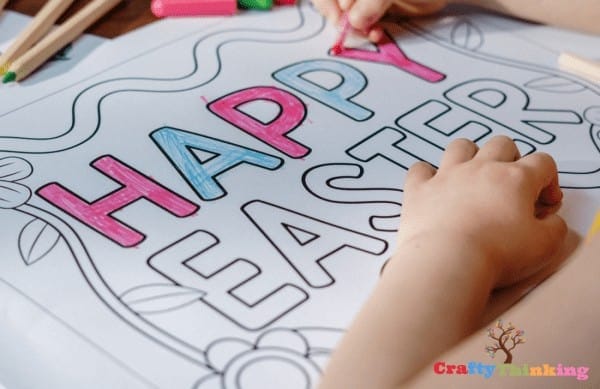
Easter is a Christian festival and an annual holiday that falls on Sundays ranging from March 22 to April 25 and is celebrated all across the globe. We all love playing with letters, learning their sounds and names which is just super much fun! What if we add coloring into learning to make it more fun, it would be more interesting! This March crafts activity will allow for the exploration of different colors and alphabets and you will learn more along.
You can take help from your parents and get an Easter day printout for coloring. You can get a printout with bunnies around and a caption of happy Easter day. Fetch some of your favorite colors of markers or color pencils; any medium you’ll like even if it’s crayons and oil pastels. Now begin coloring inside the letters and drawings with the trend of your choice.
You may want to use only two colors like pink and blue and keep repeating them or a different color for each alphabet. Color everything and you can also make a frame with chart paper for the day, you can paste this poster on your room door and love it!
You see, coloring is a lot of fun!
Conclusion
This blog post has given you some great ideas for March Crafts. They are easy, inexpensive and can be done with items most people have in their home so there is no need to go out and buy anything new! Even if you don’t feel like doing any of these projects this month, it’s always a good idea to keep your crafting supplies handy just in case the mood strikes again later on down the line. Next time we will talk about how to make DIY art projects that are perfect for kids! Stay tuned next week by subscribing below.
Do you have any questions about arts and crafts? If so, we encourage you to leave a comment below.