Amazing Must Have Pumpkin Art Craft
Pumpkin Art Craft is great in Fall because its the month of earthen warmth and peace. The crystalline and crispy orange, red and yellow leaves fill up the grounds with a blanket of rattles and crunch. The peachish atmosphere reminds us of pumpkins and every orange thing we could imagine about.
When we think about the month of fall, yes, we all get this idea of leaves falling from their homelands- trees. Before this month was named fall or autumn in English, it was therefore called the month ‘harvest’ just because of the fertile soil this month owned.
There are a hundred of things that we love doing in this month. For example, we go for collecting apples, picking up the perfect pumpkin or baking a pumpkin pie. The falling leaves leave the trees bare; however, some leaves still stick to the trees and dangle onto them.
Pumpkin Art Craft
Why not learn some fall crafts which are perfectly great for kids and grownups? We do prefer mommies helping their children. Who are willing to learn how to make a Pumpkin? Well, you will learn it in no time and have fun like we always do in other tutorials. So we all know how important pumpkins and jack-o-lanterns are during the month of fall! Everything is going to be super simple so let’s begin!
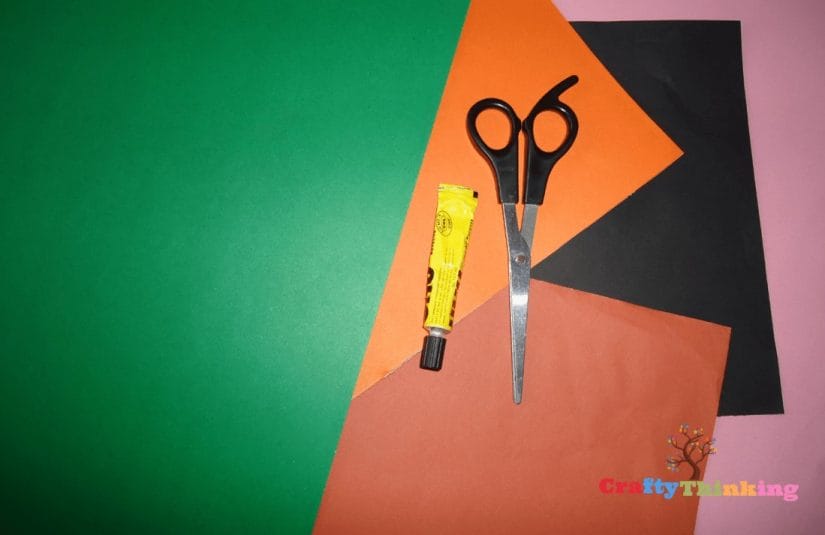
What you need:
- Green and Orange chart paper
- Glue
- Ruler and scissors
- Black paper
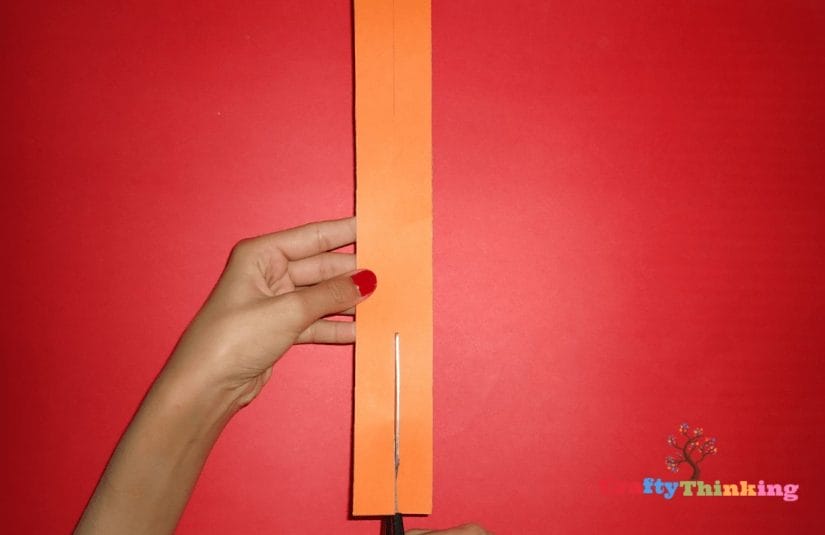
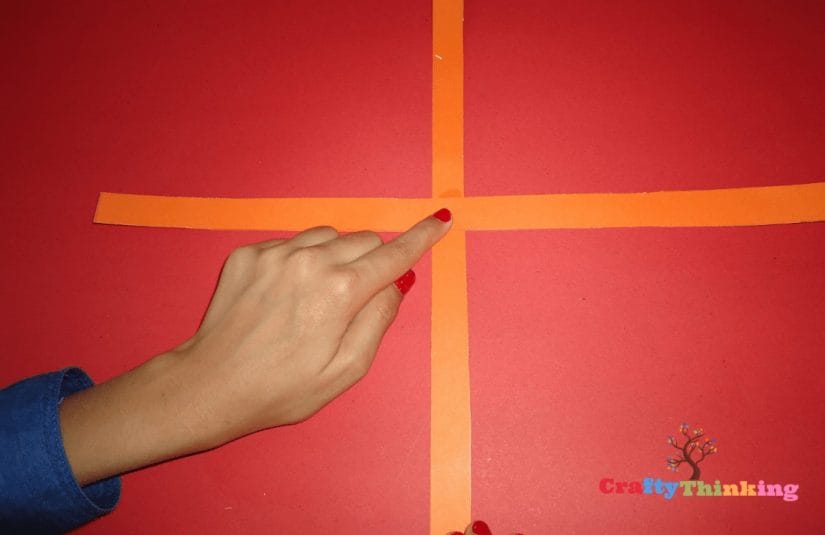
Step 1:
Start by grabbing the orange chart paper. This color has been chosen because it is the original color of a pumpkin. Mark four strips on the chart paper and cut them out. Make sure all of them are the same size.
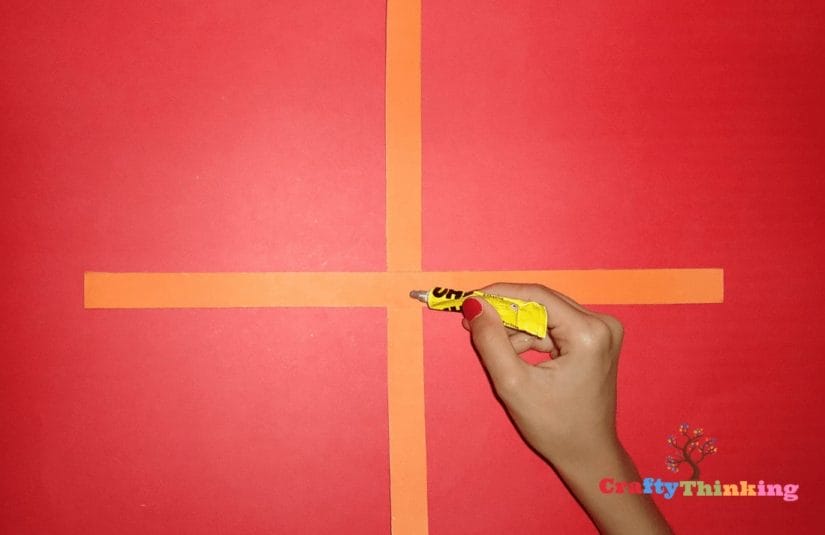
Step 2:
Take two of the strips and arrange them so they are crossing each other and forming a ‘plus shape. Glue them together. Do the same with the other two strips and make them into a plus shape as well.
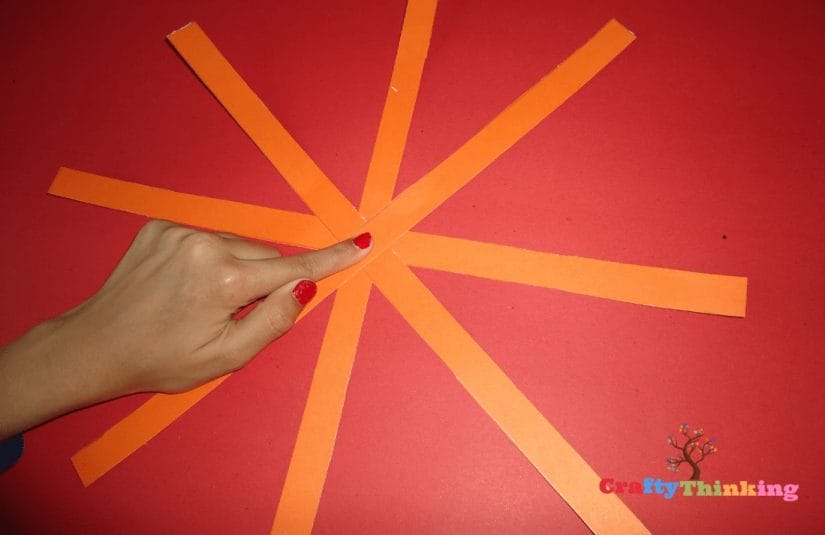
Step 3:
Now apply glue on one of the pairs of the strips so we can stick it to the other pair.
Step 4:
Now stick the pair you glued to the other one so that it somewhat form a snowflake-like shape.
Step 5:
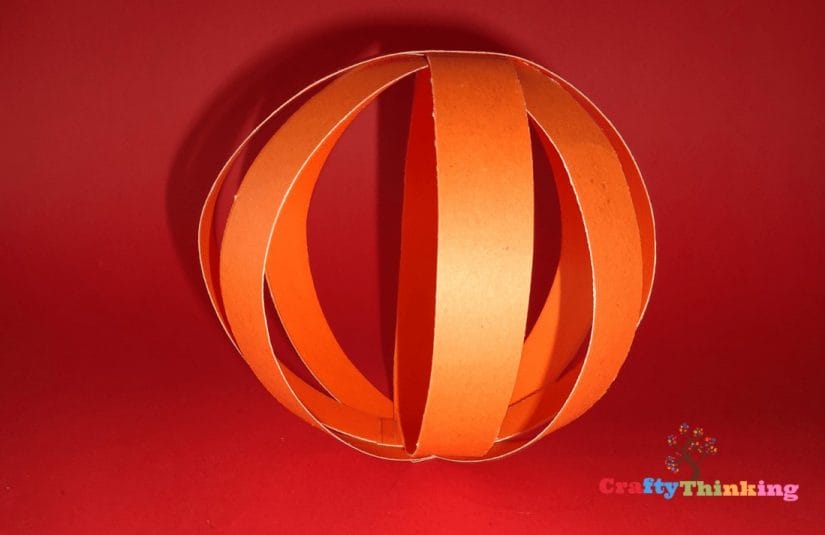
Now begin sticking the strips together in a pattern. Take the first opposite pair of strips together and glue it together.
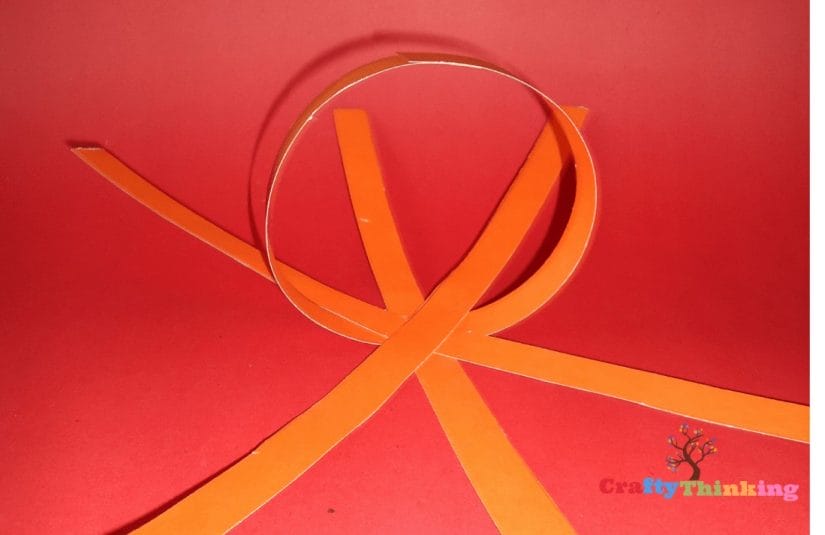
Step 6:
Take the second opposite pair of strips and glue it over the first one and continue just like it. This will start producing a pumpkin which will look absolutely cool.
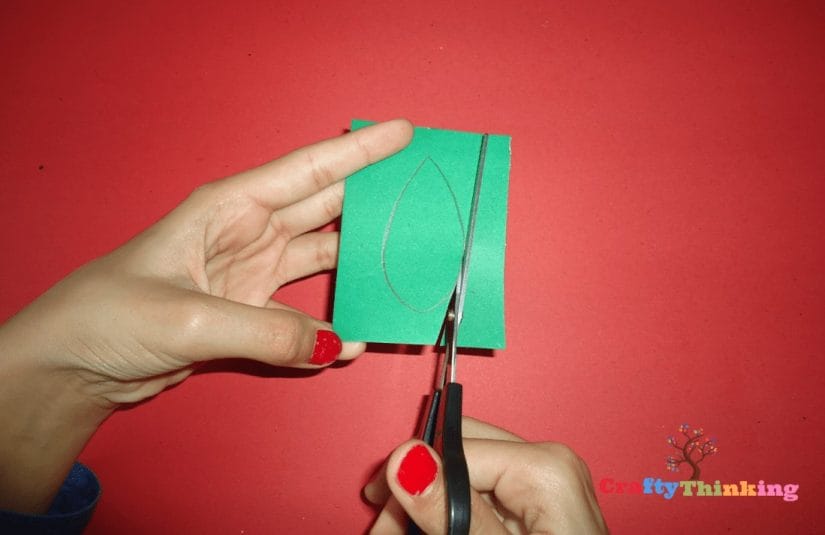
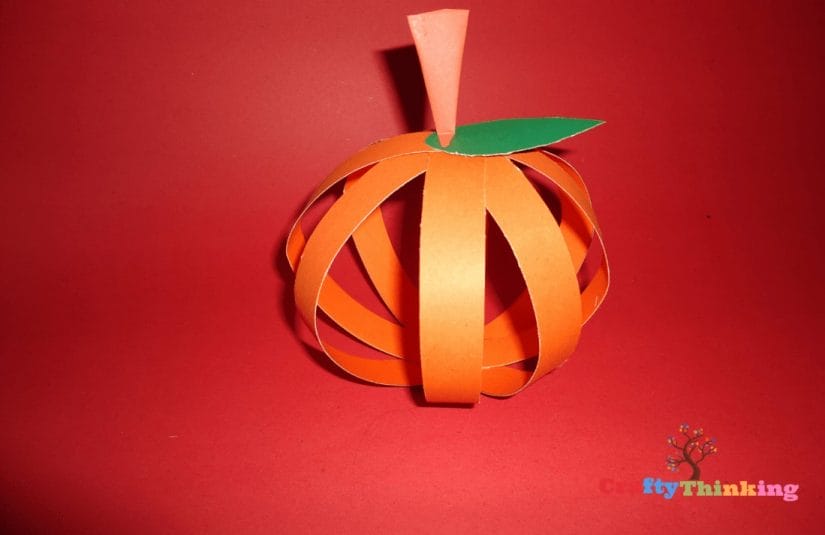
Step 7:
Now grab a green sheet and carve out a leaf. Cut it out and add glue to it.
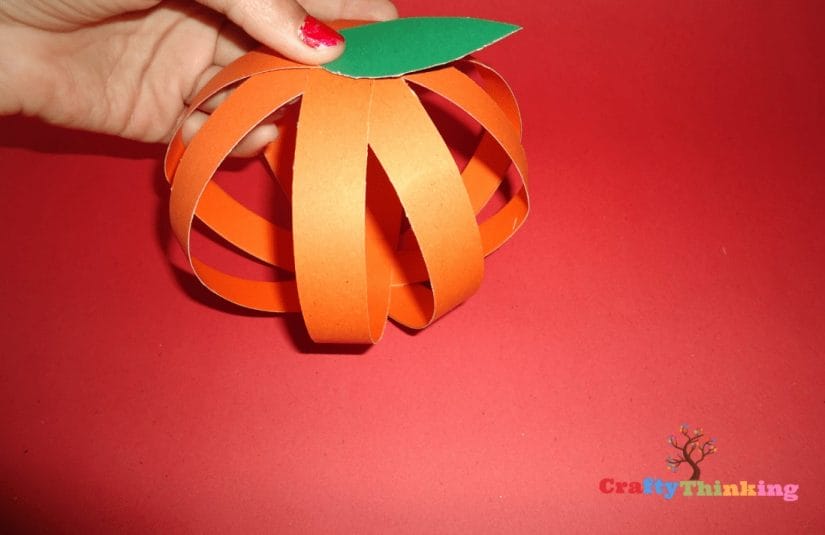
Step 8:
Now stick the leaf on top of the pumpkin where you joined all the strips. This is gradually forming a pumpkin which is a great decoration piece for the time of Halloween and fall.
Step 9:
Now using brown paper, make a cone by folding the paper and sealing it on the top using glue.
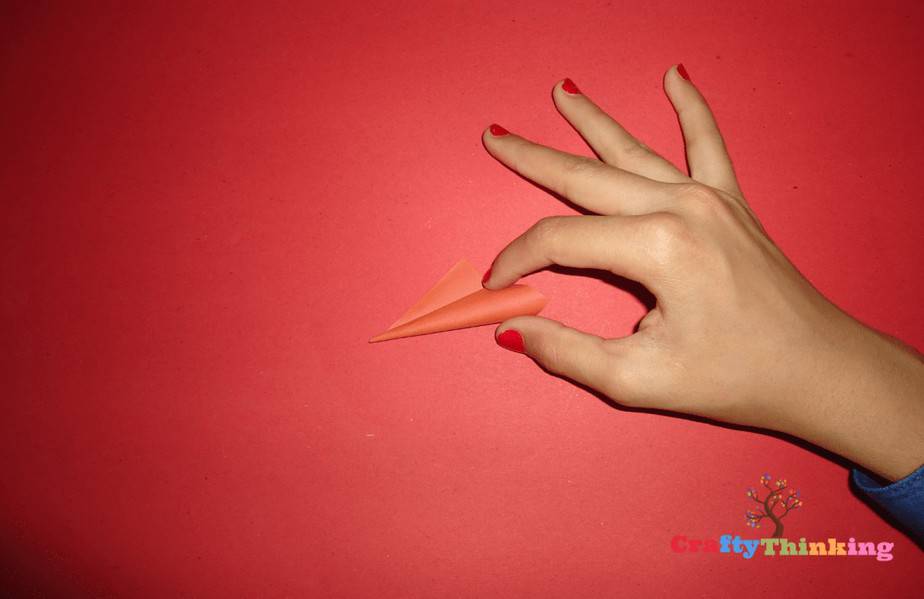
Step 10:
Now turn the bottom of the cone like done and shown in the illustration.
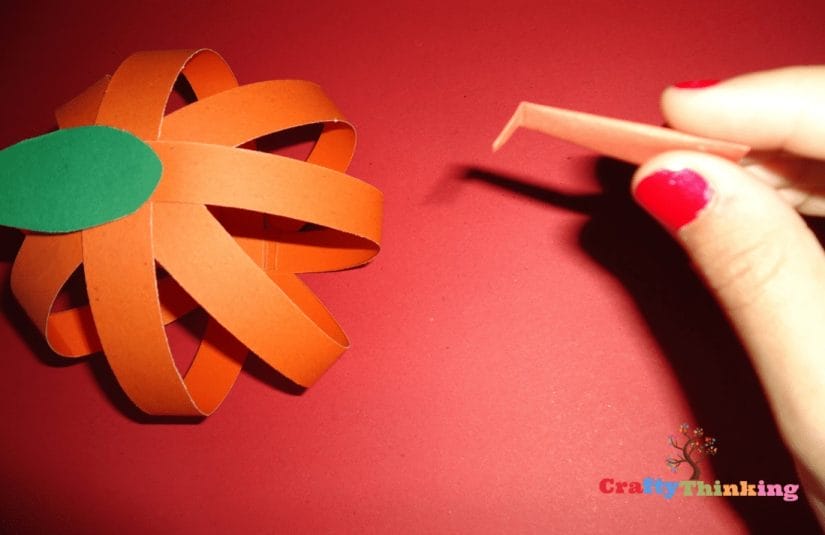
Step 11:
Now attach the cone’s bottom part (the turn) to the point where you glued the leaf. This will act as the stem of the pumpkin.
Step 12:
Cut out the eyes of the pumpkin which can be of any shape (we have cut out two squares, but you can also use a triangle.) and a smile which is horrifying. Make a slightly curved line and a W in the middle and a curved line at the end again to make the smile and cut the eyes and the mouth out.

Step 13:
Now attach the eyes and the mouth to the pumpkin which will make it look like an actual jack-o-lantern.
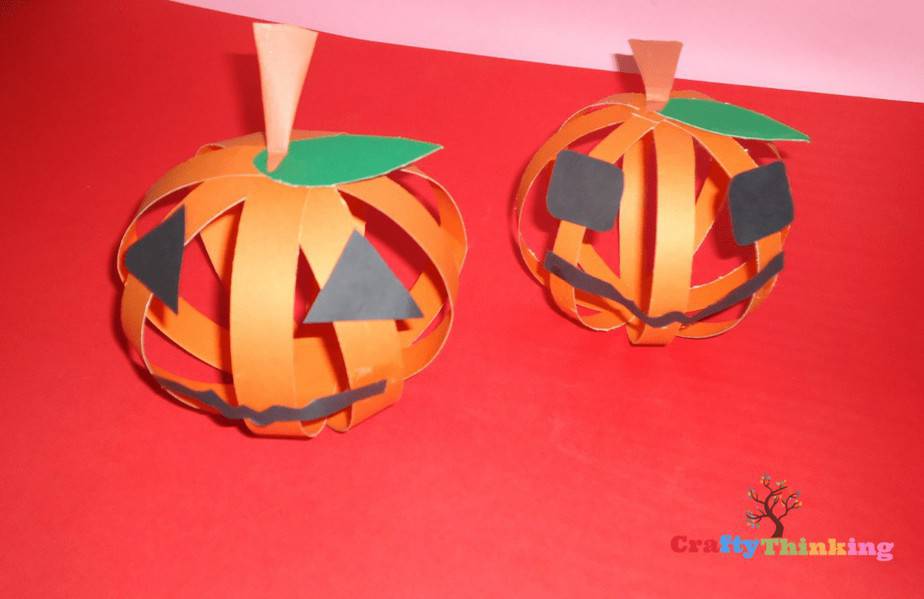
Hooray! You have learned how to make easy fall crafts. This autumn tree will look fabulous if you set it on your desk and later you can admire it and make it for a school project as well.
If you like this article and would like to know more, please comment below.