Easy Photo Frame Hacks 5 Minute Crafts
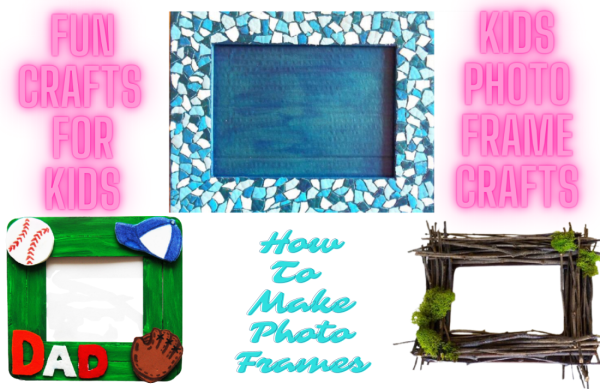
Photo Frame Hacks 5 Minute Crafts is a fun way to bring elders and kids together to make lasting memories. You can make making a fun family activity by using the unique design ideas from this article!
The picture frame crafts in this article are a low-cost way to brighten up your home. It can be invigorating and enjoyable to create a design that shows your personality and unique flair.
Photo Frame Hacks 5 Minute Crafts
You can make photo frame crafts from scratch or you can customize your old dull frames. We’ve compiled a collection of kid-friendly photo frame options. Don’t worry, you won’t have to spend a lot of money to create these lovely frames. The majority of the material items can be found in your own home!
Popsicle Stick Photo Frame

Ice cream sticks or popsicle sticks are some of the most common items and can be found easily. This is a simple item to put together to make a lovely ice cream stick photo frame.
Material Required
- Popsicle sticks or Icecream sticks
- Glue
- Thread or wire
How To Make a Popsicle Stick Photo Frame?
Take two long popsicle sticks and connect them with the help of glue forming a shape of T horizontally. Now on the horizontal stick make two frames, one in vertical shape and the other in horizontal shape. Make another frame on the left side at a little lower side of the first two frames. The basic structure of the frame has been ready. Now it’s time to add some extra shapes to enhance the craft. Make a few letters with these sticks of your choice and hang them with the wire or thread.
Your popsicle photo frame is ready to put your golden memories on it.
Photo Frame with Old Magazines
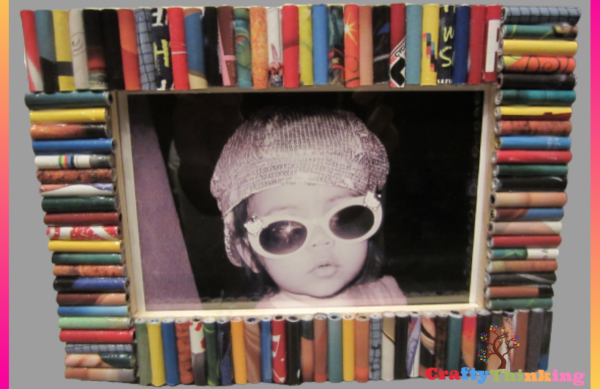
Your children may become bored sitting at home doing nothing fascinating. Why not do something creative with them, like photo frame crafts?
Material Required
- Photo frame paper card
- Glue
- Scissors
- Colorful magazine
How To Make a Photo Frame With an Old Magazine?
You can assist your children by cutting out rectangles from magazines that are two inches by one inch in size. Solicit your children’s help in rolling these magazine papers. The next step is for your children to glue these rolls together in a horizontal direction along the sides while keeping the top in a vertical direction. This vibrant photo frame will be complete after your children place a favorite photograph in the center.
Seashell Picture Frame Craft
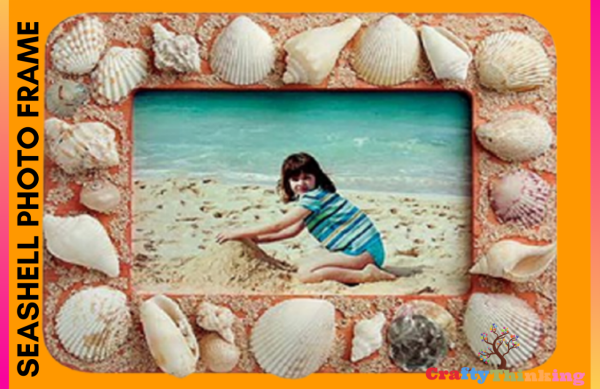
During our beach vacation, we all remember collecting seashells and constructing a sandcastle. You can decorate your old picture frames with these collected seashells.
Material Required
- Old picture frame
- Glue
- Paint & brush
- Seashells
- Sand
- Spoon
How To Make A Seashell Photo Frame?
Ask an adult to soak your beach treasures in a mixture of half bleach and half water overnight to keep them from stinking.
Paint your old picture frame with any acrylic paint and let it dry. Apply glue to the front of the frame, then adhere 20 to 30 seashells and other beach treasures as you like. Sprinkle sand on the undecorated portions of the frame using a spoon while the glue is still wet. Allow at least a day for the frame to dry completely before adding your favorite vacation photo.
Twig Frame
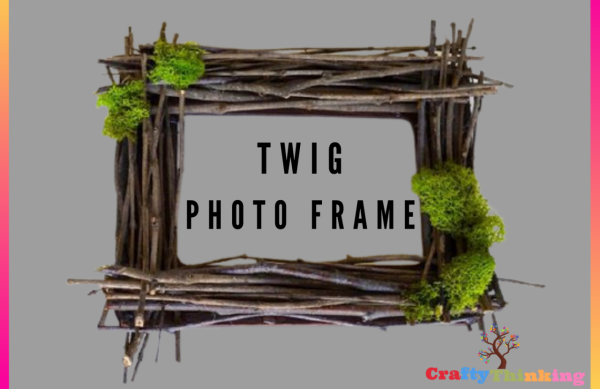
This DIY Twig Frame is one of the most cost-effective fall projects you can do! This is not only simple to make, but it can be done by both youngsters and adults! This gorgeous DIY picture frame is the perfect solution to display your photos uniquely.
Material Required
- Glue gun
- Small twigs
- Old frame
- Brown acrylic paint
- Decorative faux moss
How To Make a Twig Photo Frame?
For this craft, all you need are twigs from your lawn or neighborhood. Instead of green twigs, look for dead brown twigs and make sure there are no insects or evidence of decay. After collecting the materials, rinse them and allow them to dry before starting the project.
Paint the old frame with brown acrylic color and let it dry. Meanwhile, measure the frame and cut the twigs according to the height and width of the frame. With the help of a glue gun, paste them on the frame sides and try to cover the whole surface.
Twig picture frame is ready to display your memories, but you can further enhance the frame look by adding faux moss with the help of glue. The choice is yours where you want to paste the moss and you can also add some artificial flowers. Find a suitable place to hang this DIY twig frame made from your hands.
Colorful Craft Sticks Photo Frame

Handmade gifts are always the most meaningful! If you make this homemade frame for dad this year for Father’s Day, he’s sure to cherish it and keep it on his desk for a long time.
Material Required
- Craft sticks
- Acrylic paints
- Paintbrush
- Card paper
- Stickers
How to Make Craft Stick Photo Frame?
Make a square with the craft sticks by arranging them in pairs. Create a frame by gluing the craft sticks together and letting them dry for a few minutes. Take card paper and paste the picture at the center of the card with the help of glue. Now color the frame sticks by choosing the favorite color of your choice. Now adjust and paste the picture card on the back of the frame. It’s time to decorate the frame with different stickers of your choice.
You can add different quotations or draw any character if you are good at drawing. Another option to decorate the frame is to cut the different shapes on cardboard and paste them on the frame after coloring.
Egg Shell Mosaic Picture Frame
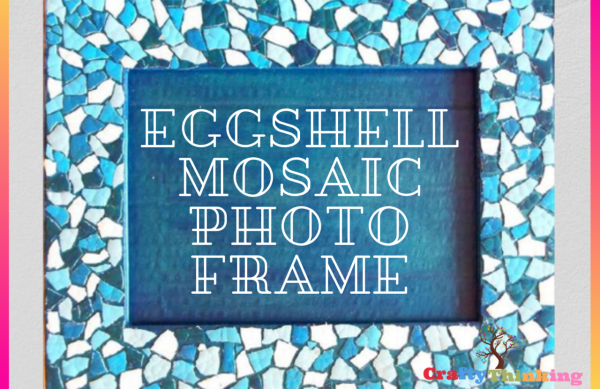
Things Required
- Cardboard
- Thermocol sheet
- Acrylic paint with a brush
- Cleaned eggshells
- Glue
How To Make An Egg Shell Mosaic Photo Frame?
Paint a piece of old cardboard that hasn’t been used in a while with any color of acrylic paint and let it dry. Now cut the thermal sheet into four parts to make a frame. Paint the thermal sheets and adhere them to the cardboard.
Color the eggshells and crush them into tiny flakes. Now comes the tricky part: start by dabbing glue over the painted Thermacol and randomly placing the egg flakes until you achieve the mosaic appearance. Move the eggshells around with the toothpick/needle. Repeat the process on the other side of the thermal until you’ve covered the entire surface. Allow time for it to dry. After it has dried, apply a final coat of adhesive to the eggshells to seal them. Varnish can also be used to make it water-resistant. Now your frame is ready and you can add a picture at the center of the cardboard.
If you like this article and would like to know more, please comment below.