Spring Card Ideas That Will Bring a Smile to Your Loved Ones’ Faces
With the arrival of spring comes a reminder to show your loved ones just how much you care about them.
What better way to do this than with a handmade spring card? With some creativity and a few simple supplies, you can create an unforgettable and heartfelt spring card that will bring a smile to your loved ones’ faces.
Whether you are looking for ideas for a special occasion or just want to brighten someone’s day, these spring cards are sure to deliver.
Check out these amazing art projects 👇
- Daycare Art Projects
- Preschool Art Projects
- Kindergarten Art Projects
- 1st Grade Art Projects
- 2nd Grade Art Projects
- 3rd Grade Art Projects
- 4th Grade Art Projects
- 5th Grade Art Projects
- 6th Grade Art Projects
- 7th Grade Art Projects
- Ice Cream Art Project
- Fun Craft Projects for Kids
DIY Spring Card
Welcome the season of renewal and create a beautiful card for someone special with our easy-to-follow DIY tutorial!
Learn how to make a spring card in just a few simple steps.
Supplies Needed:
- Color Paper
- Golden Rhine Stones
- Scissor
- Glue
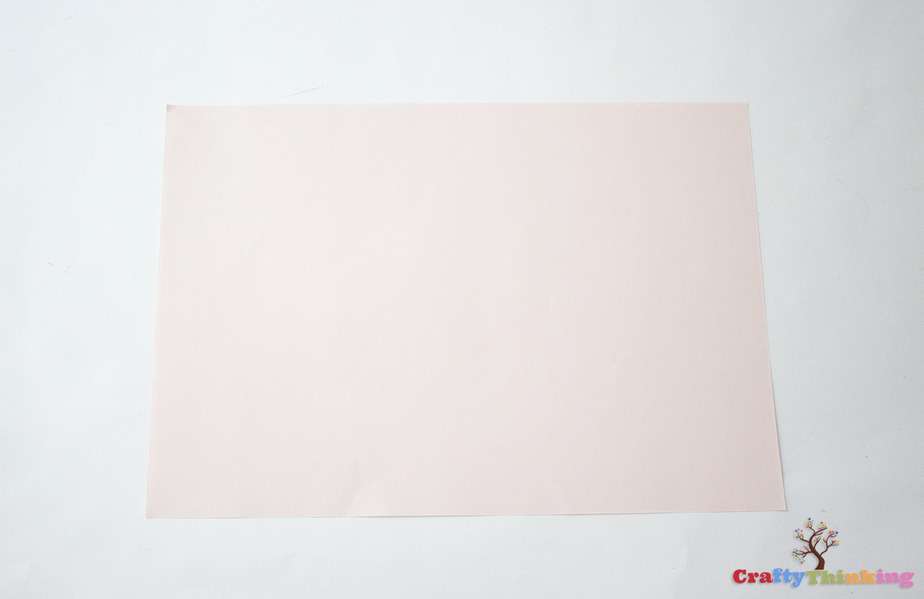
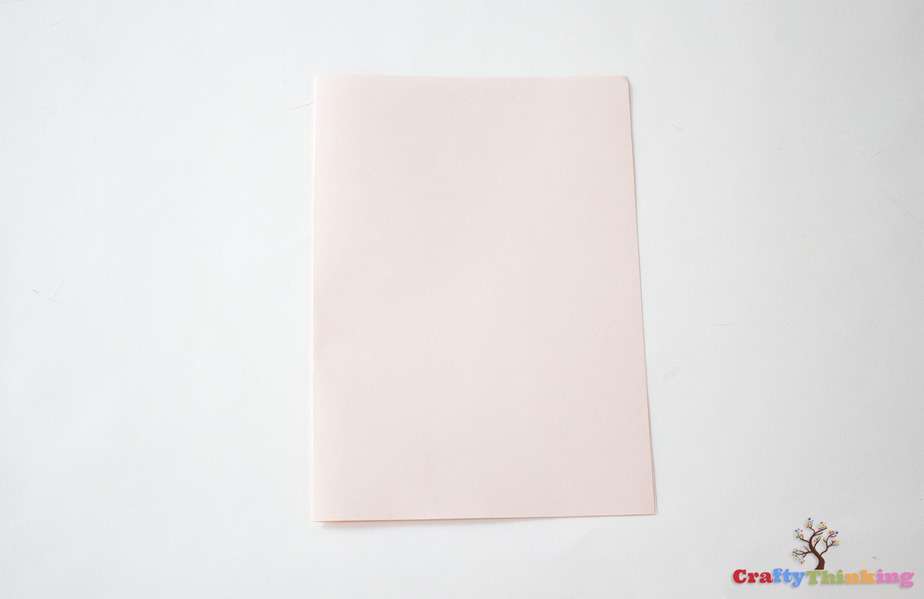
Step 1
Take an A4 size light pink color paper and fold it in half.
Step 2
Take a 4 x 4 inch square sheet of paper, draw a spiral, cut it and roll it.
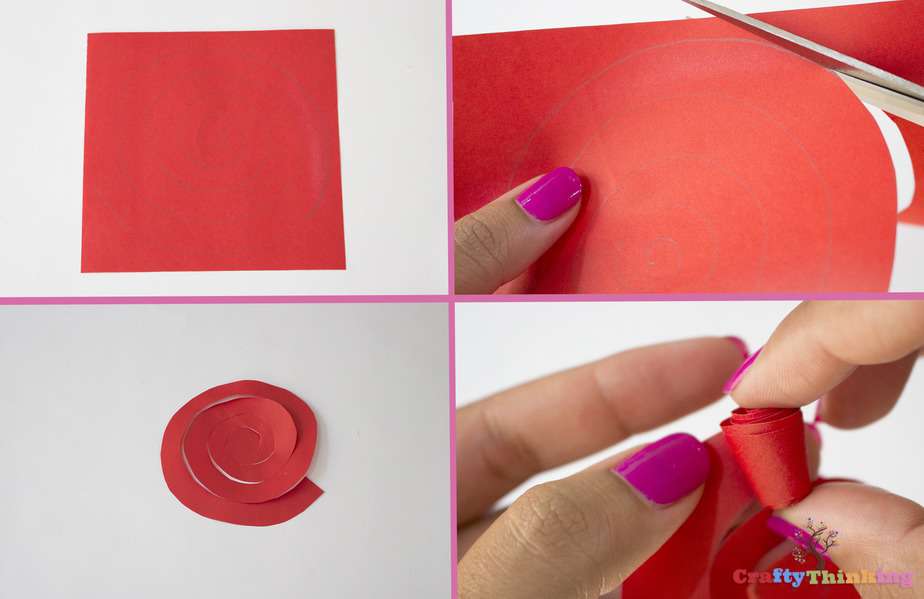
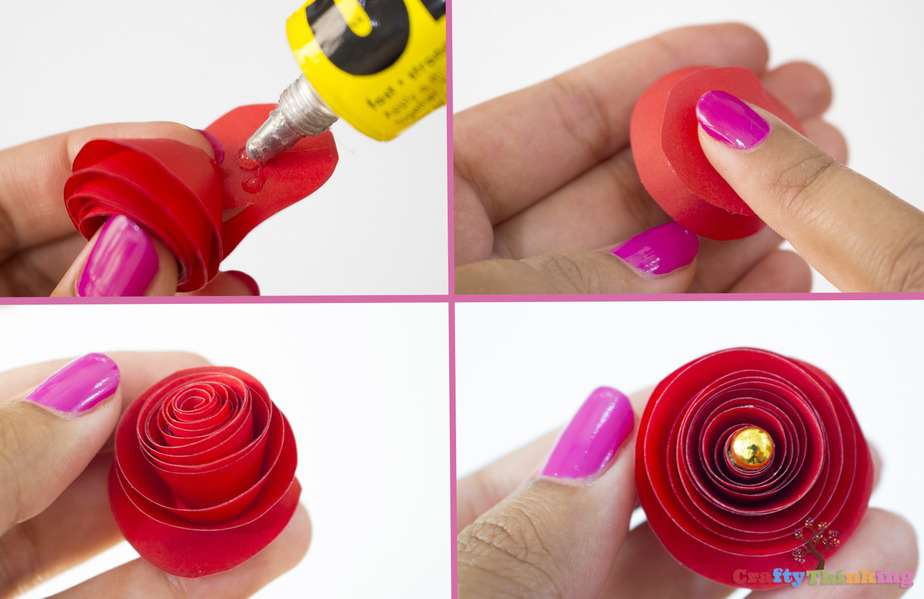
Step 3
Glue down the flower when you reach at the bottom. Add golden rhine stone in the center.
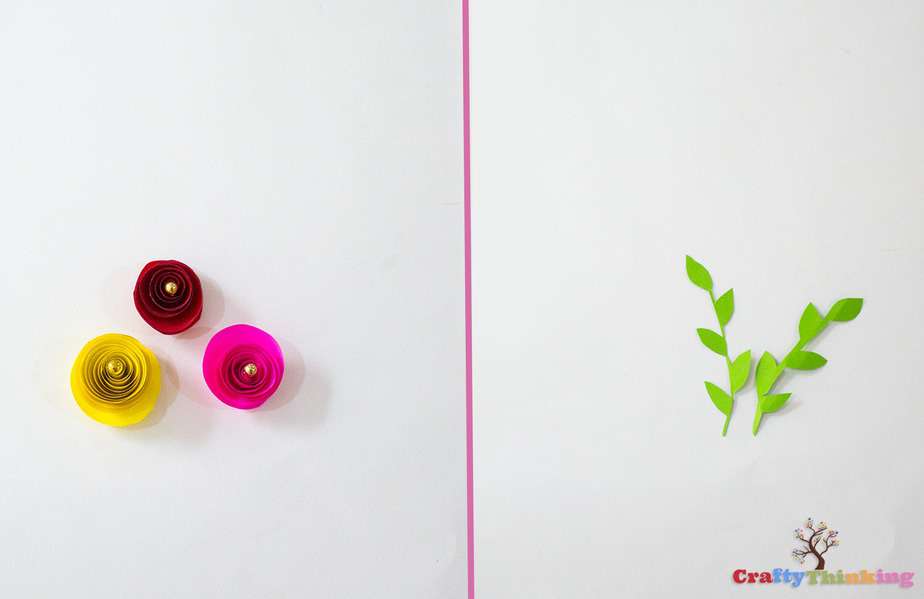
Step 4
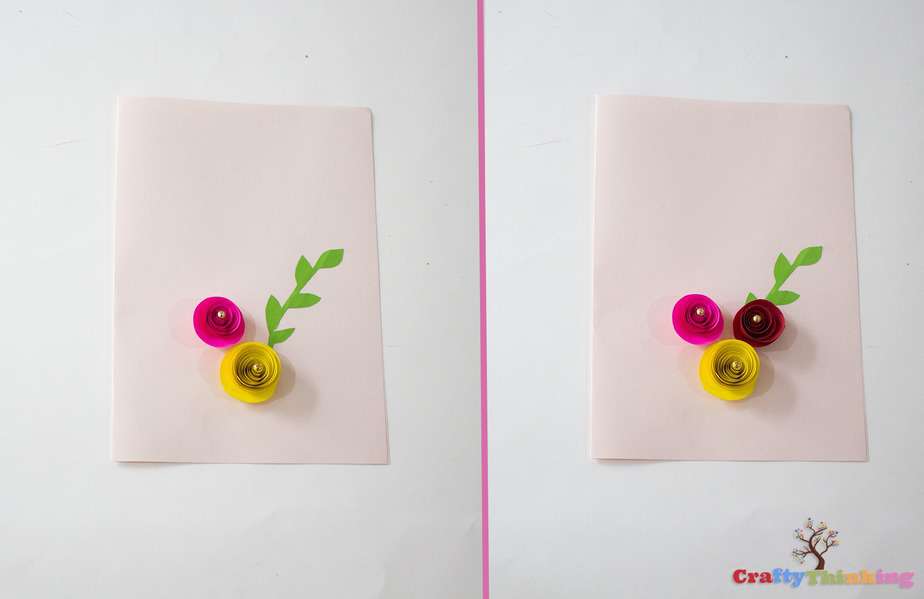
Make one red, one yellow and one pink flower. Then take a green color paper, draw leaves and cut them.
Step 5
Glue the roses and the leaves on the card as showing below.
Step 6
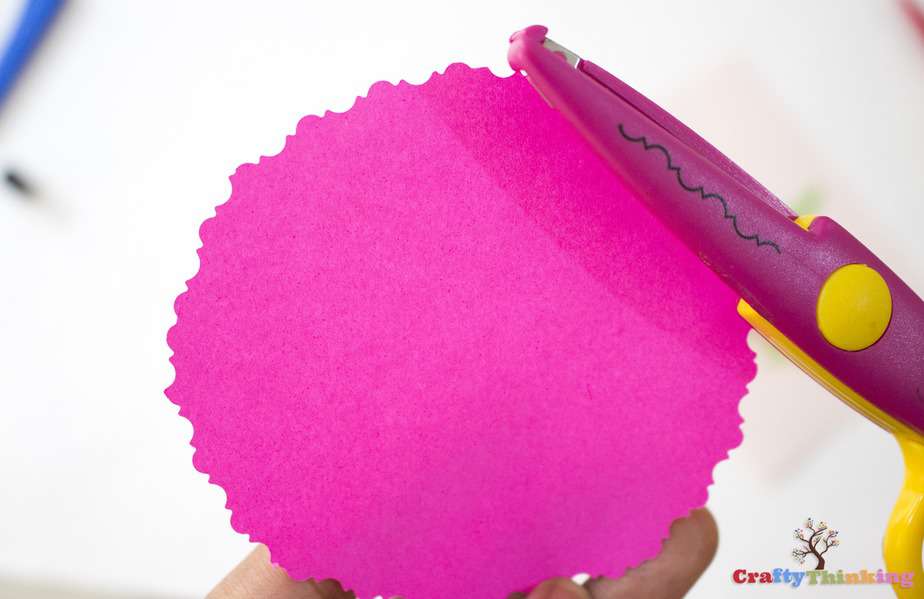
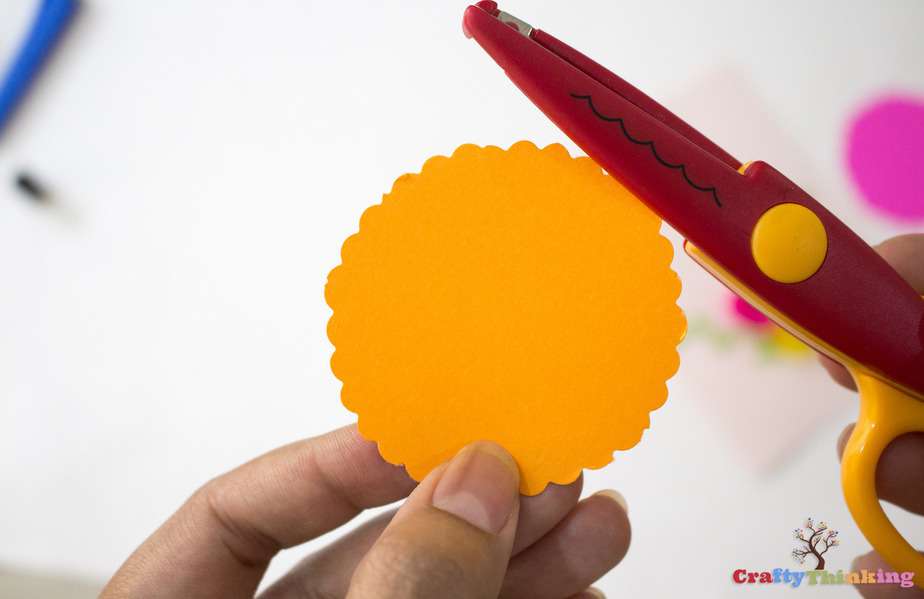
Cut a big circle with 3.5 inch diameter using decorative scissor.
And a small circle with 2.5 inch diameter.
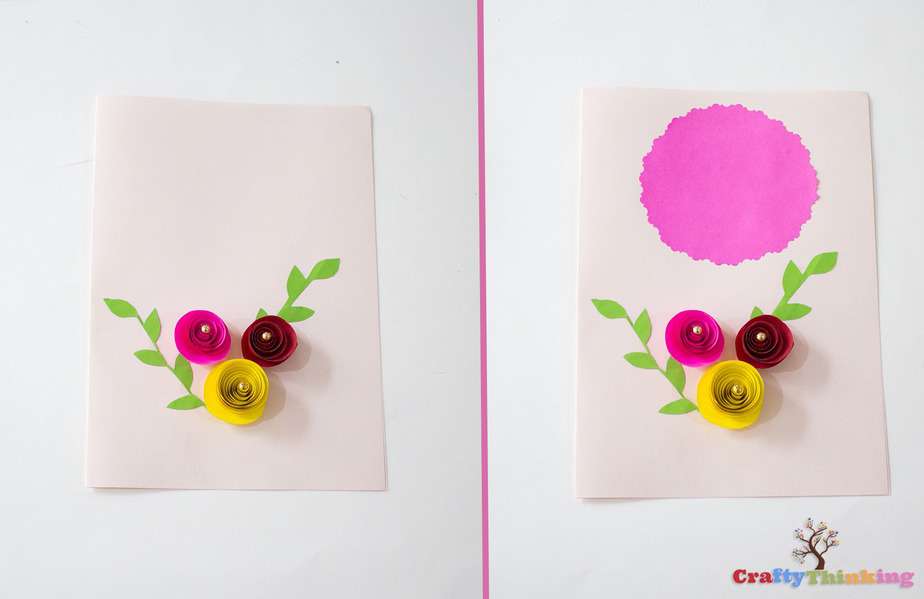
Step 7
Stick the circles on as demonstrated below.
Step 8
Cut two big leaves and stick them like so.

Write “Happy Spring” with a pink pen, and your beautiful spring card is ready!
If you like this article and would like to know more, please comment below.