Bored at Home? Try 23 Craft Ideas For 9 Year Old Boys
Looking for Craft Ideas For 9 Year Old Boys to ignite creativity and imagination? Look no further!
We’ve got you covered with a list of fun and engaging crafts that will keep your little one entertained for hours on end.
From pool noodles to beads, paper stars to finger puppets, there’s something for every interest and skill level.
Get ready to embark on a DIY adventure unlike any other as you transform simple materials into cool crafts that are sure to impress.
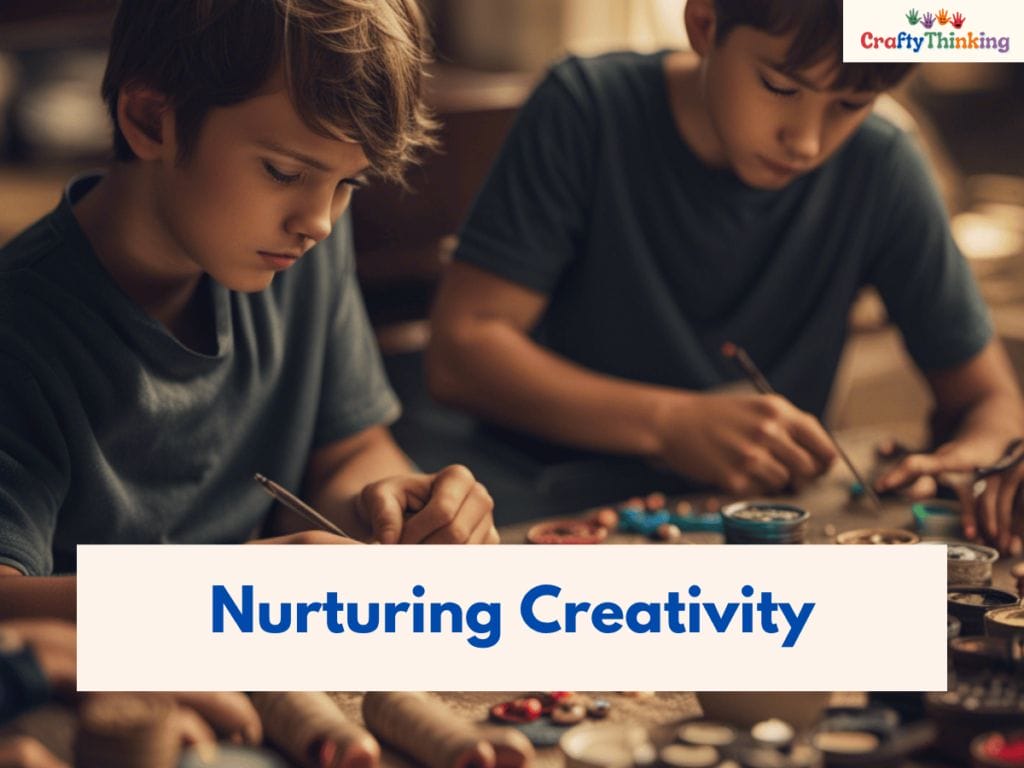
These craft ideas aren’t just about keeping your child busy, they’re also about nurturing their creativity, building their confidence, and encouraging them to explore new interests.
So grab some supplies and let’s get started on this crafting journey together!
You might also like:
- Craft Ideas for 2 Year Old Boys
- Craft Ideas for 3 Year Old Boys
- Craft Ideas for 4 Year Old Boys
- Craft Ideas for 5 Year Old Boys
- Craft Ideas for 6 Year Old Boys
- Craft Ideas for 7 Year Old Boys
- Craft Ideas for 8 Year Old Boys
What are craft ideas for 9 year old boys?
Craft Ideas for 9 Year Old Boys could include a wide range of engaging activities like building their own LEGO masterpieces or creating original comic books.
They might also enjoy hands-on projects like making a DIY birdhouse or designing and painting model cars.
Best DIY Craft Ideas For 9 Year Old Boys
Are you ready to unleash your child’s creativity? Look no further than the Best DIY Craft Ideas For 9 Year Old Boys!
This exciting and engaging list is packed with a wide range of DIY craft projects specifically designed for boys aged 9.


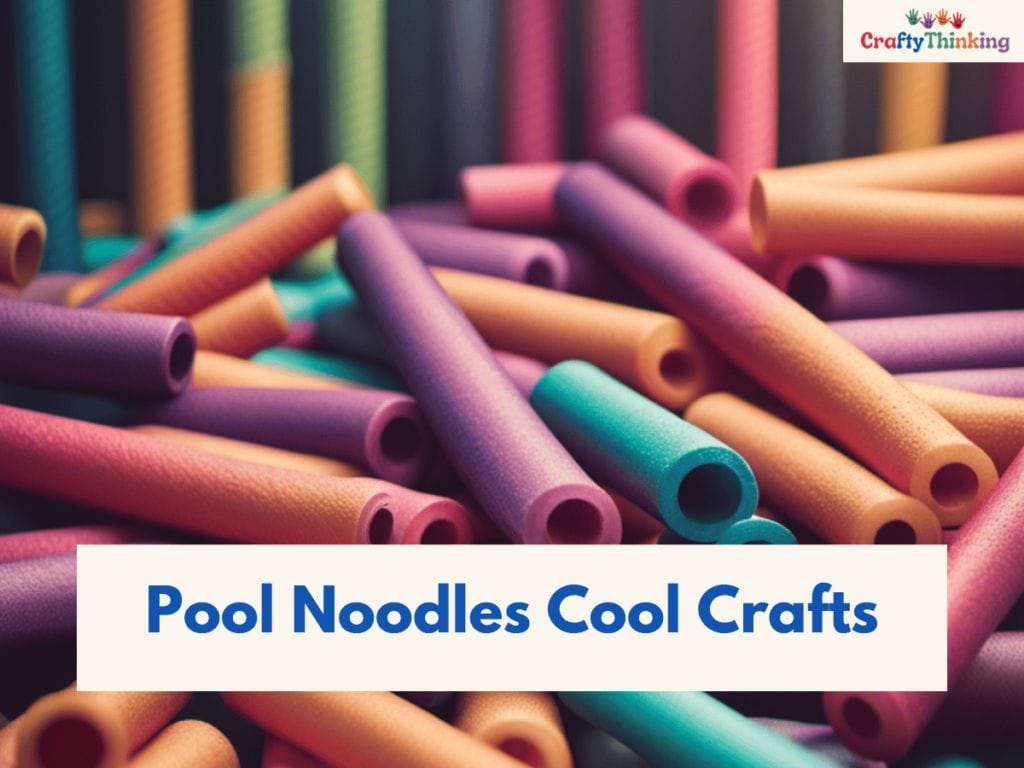
Turning Pool Noodles into Cool Crafts: A DIY Adventure
You’re gonna love turning those pool noodles into cool crafts in this DIY adventure!
As a 9 year old boy, you might be looking for craft ideas that are simple to make but still fun and engaging.
Well, look no further than your own backyard pool! With a little creativity and some basic supplies, you can turn those pool noodles into all kinds of cool crafts that will impress your friends and family.
First up, try making a pool noodle race car! This is a great project idea for older kids who love racing and cars.
Pool noodle race car
Simply cut the noodle in half lengthwise, then attach four plastic wheels (you can find these at any craft store) to the bottom with hot glue or tape.
Add some details like headlights or flames with markers or stickers, and voila – you have yourself a speedy little racer!
Another fun craft idea for tweens is to use the noodles to create giant bubbles!
DIY Bubble Gun
Cut the noodle into sections about 6-8 inches long, then wrap each one in bubble wrap (the kind used for shipping packages).
Dip the ends in bubble solution (you can make your own with dish soap and water), then blow through the middle of the noodle to create huge bubbles that will amaze everyone around you.
So get creative and recycle those old pool noodles into frugal fun projects that will keep you entertained all summer long!
How to Make a Pool Noodle Bubble Gun
Materials
- Pool noodle
- Plastic container
- Bubble solution
Tools
- Scissors
Instructions
Step 1: Cut the Pool Noodle
Cut a small section of the pool noodle. This will be the handle of your bubble gun.
Step 2: Make a Hole in the Container
Cut a hole in the bottom of the plastic container. The hole should be the same size as the pool noodle.
Step 3: Attach the Pool Noodle to the Container
Insert the pool noodle into the hole in the container. It should fit snugly.
Step 4: Dip the Pool Noodle in Bubble Solution
Fill the container with bubble solution and dip the pool noodle into it.
Step 5: Blow Bubbles
Blow through the other end of the pool noodle to create bubbles.
Notes
Did you create this craft? If so, we would love to hear from you! Please feel free to leave a comment on the blog or share a photo of your creation on Pinterest.
Recommended Products
Thank you for supporting our family-owned business!
And if you’re ready for another craft idea, check out our next section on bracelet making: a fun craft for tweens.
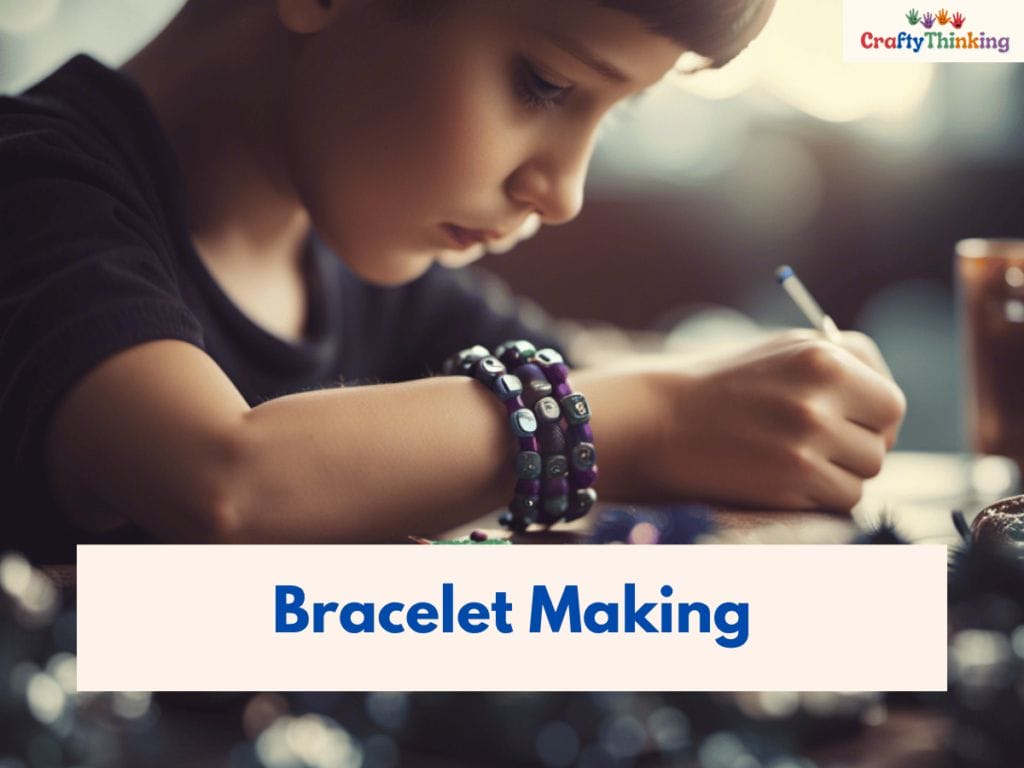
Bracelet Making: A Fun Craft for Tweens
Bracelet making is a fun activity that tweens can enjoy, but have you ever imagined the satisfaction of creating your own unique accessory?
Bracelets are a great craft idea for 9 year old boys who want to show off their creativity. Kids will love making bracelets with different materials such as beads and yarn.
The best part is that there are endless possibilities for personalization, allowing them to create something truly one-of-a-kind.
Bracelet Making
- To start, gather some materials such as colorful beads, strings or yarns in different textures and colors.
- You can even throw in some charms or pendants to add an extra touch of personality.
- Next, choose a pattern or design that appeals to you and get started!
- You can experiment with braiding techniques or simply stringing together beads in unique patterns.
- This fun craft is perfect for those rainy days when kids need something creative to do indoors.
- Making bracelets is not only a great craft for girls, but also for boys who want to express themselves through their accessories.
- It’s a wonderful way for them to unleash their creativity while developing fine motor skills and hand-eye coordination.
- Plus, it’s a perfect opportunity for parents and children to bond over an enjoyable activity together.
So why not give it a try and see what amazing designs your child comes up with?
As much as bracelet making is fun on its own, if you’re looking for another exciting craft idea that’s sure to engage young minds then bead art could be just the thing!

How to Make a Bracelet
Materials
- String or cord
- Beads
Tools
- Scissors
Instructions
Step 1: Cut the Cord
Cut a piece of cord long enough to fit around your wrist when tied.
Step 2: Thread the Beads
Thread the beads onto the cord in your desired pattern.
Step 3: Tie the Ends
Once you've added all your beads, tie the ends of the cord together to form a bracelet.
Notes
Did you create this craft? If so, we would love to hear from you! Please feel free to leave a comment on the blog or share a photo of your creation on Pinterest.
Recommended Products
Thank you for supporting our family-owned business!
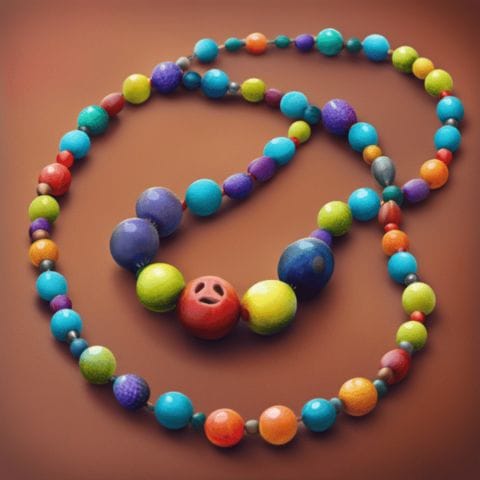
Unleashing creativity with bead art has become increasingly popular over the years, especially among young boys who love exploring new ways of expressing themselves through art.
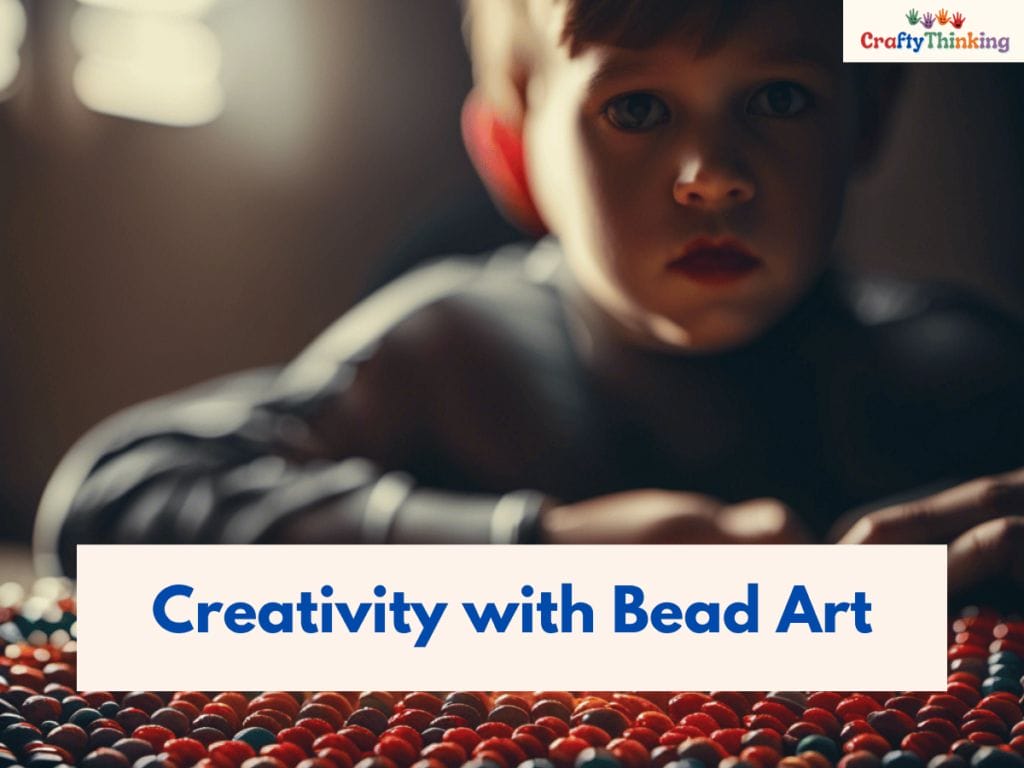
Unleashing Creativity with Bead Art: A Popular Craft for Boys
Unleashing creativity with bead art has become increasingly popular among young boys, providing them with a unique way to express themselves through colorful and intricate designs.
This simple craft involves stringing beads together to create necklaces, bracelets, or other decorative items.
- Kids love the freedom that comes with this activity; they can choose from a variety of colors and shapes to make their own personalized pieces.
- Bead art is an excellent craft for tweens who want to unleash their creativity while also developing their fine motor skills.
- Working with small beads requires concentration and patience.
- Which can be beneficial for kids who struggle with focus or attention.
- Additionally, creating friendship bracelets or other bead-based gifts can be a great way for kids to show appreciation for their friends and family members.
- Incorporating scrap materials into bead art projects is another fun way to get creative.
- Kids can use old buttons, broken jewelry pieces, or even bits of fabric in their designs.
- By exploring different textures and colors, they’ll learn how to mix and match materials in new ways.
Overall, bead art offers endless possibilities for young crafters looking to explore their artistic side! As you continue your search for engaging activities for your nine-year-old boy.

How to Make Bead Art
Materials
- Beads (these can be any type you like, but pony beads are a good size for beginners)
- Bead pegboard
- Ironing paper
Tools
- Iron
Instructions
Step 1: Choose Your Design
Decide on the design you want to create. This could be a picture, a pattern, or an abstract design.
Step 2: Place the Beads
Place the beads on the pegboard following your design. Make sure each bead is on its own peg.
Step 3: Iron the Beads
Place the ironing paper over the beads, then iron over the paper to melt the beads together.
Be sure to follow the instructions provided with your beads, as different types may require different heat settings or ironing times.
Step 4: Let it Cool
Allow your bead art to cool completely before removing it from the pegboard.
Notes
Did you create this craft? If so, we would love to hear from you! Please feel free to leave a comment on the blog or share a photo of your creation on Pinterest.
Recommended Products
Thank you for supporting our family-owned business!
Consider building a world with Lego – more than just a toy! With its seemingly infinite combinations of bricks and accessories, Lego allows kids to use both sides of their brain as they plan out designs and execute them step-by-step.
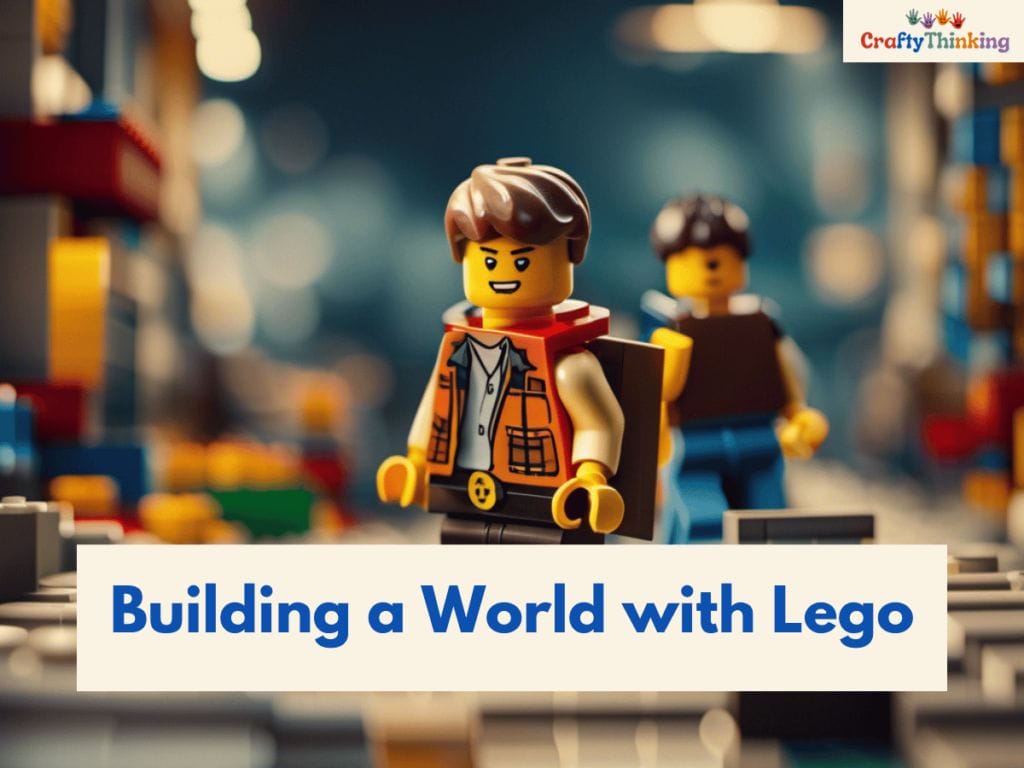
Building a World with Lego: More Than a Toy
Building a world with Lego isn’t just a toy, but an activity that helps kids develop their planning and execution skills while using their creativity.
Lego has been consistently named as one of the best toys for children to play with due to its seemingly endless possibilities.
It’s no wonder that 9-year-olds love to build with these colorful blocks.
Lego crafts are perfect for boys who enjoy building things from scratch. They can build robots, cars, airplanes, and even cities!
Lego sets come in various themes, including Star Wars and Harry Potter, which makes it more exciting for kids to personalize their creations based on their favorite characters.
Young boys can easily follow step-by-step instructions included in Lego sets, but some may prefer more freedom when creating something unique.
Free printables online offer additional inspiration and guidance on how to make different designs using Legos.
However, adult supervision is still necessary, especially when dealing with small parts that could be choking hazards.
How to Build a Lego World
Materials
- A variety of Lego bricks
- Lego baseplates
Instructions
Step 1: Plan Your World
Decide what you want to include in your Lego world. This could be buildings, roads, parks, or anything else you can imagine.
Step 2: Start Building
Begin building your world on the baseplates. You can start with the largest structures and then fill in the smaller details.
Step 3: Expand Your World
As you get more Lego bricks, you can continue to expand and modify your world.
Notes
Did you create this craft? If so, we would love to hear from you! Please feel free to leave a comment on the blog or share a photo of your creation on Pinterest.
Recommended Products
Thank you for supporting our family-owned business!
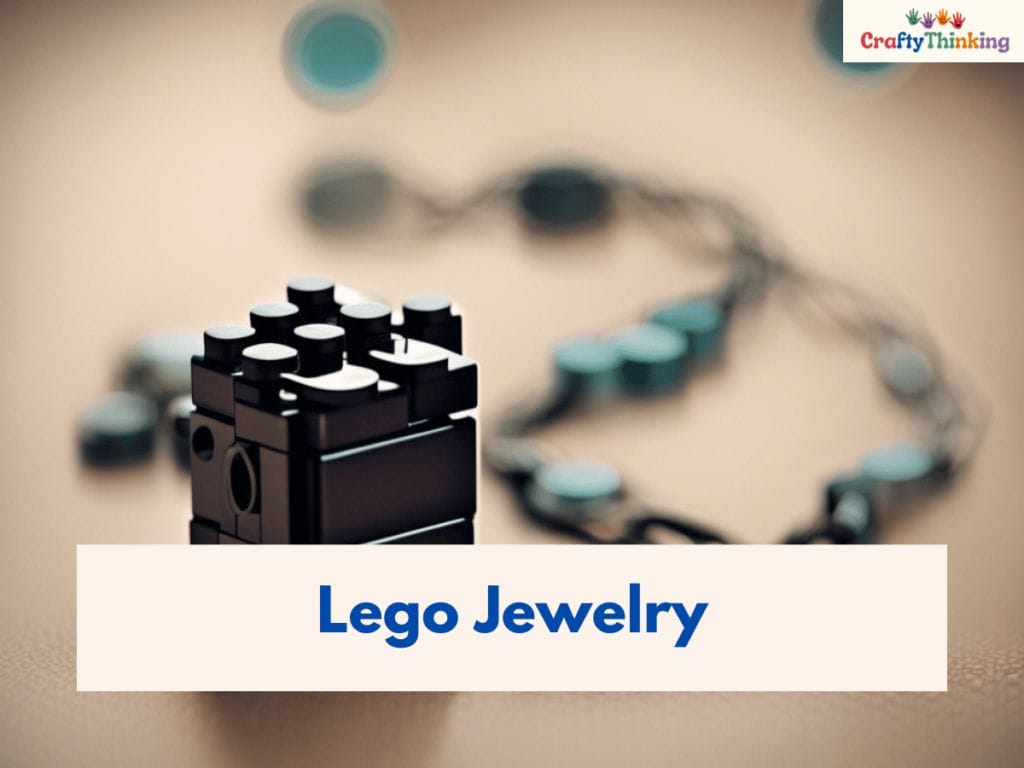
Lego Jewelry: A Fun Craft Idea
You’re going to love this creative activity that lets you make unique and colorful accessories using only Lego blocks!
This craft idea is one of the best ways to tap into your imagination and come up with quirky designs that are sure to impress everyone.
Whether you’re a fan of Star Wars or enjoy creating your own terrarium, these Lego crafts are perfect for kids who want to personalize their creations.
- To get started, all you need is a set of Lego blocks and some recycled materials such as paper clips, buttons, beads, or even old toys.
- You can use these items to add more detail and texture to your creations.
- Follow step-by-step instructions online or in crafting books that will guide you through the process of making jewelry like necklaces, bracelets, and earrings using Legos.
- Apart from making jewelry pieces, there are many other art projects that you can create with Legos.
- For instance, why not try building an origami-inspired piece?
- With just a few folds and twists of Lego pieces together with some creativity on your part; you can come up with something truly amazing.
- These crafts are perfect for 9-year-old boys who love building things from scratch while having fun in the process.
- So go ahead – let your imagination run wild and see what kind of unique designs you can come up with today!
As an avid crafter yourself, mastering origami: fun crafts for tweens may be right up your alley!
It’s another way to explore different creative avenues while honing new skills along the way.

How to Make Lego Jewelry
Materials
- Lego bricks or minifigures
- Jewelry findings (earring hooks, necklace chains, etc.)
Tools
- Craft glue or a hot glue gun
Instructions
Step 1: Choose Your Lego Pieces
Decide which Lego pieces you want to use for your jewelry.
This could be a single brick, a small built structure, or a minifigure.
Step 2: Attach the Jewelry Findings
Use craft glue or a hot glue gun to attach the jewelry findings to your Lego pieces.
For example, you could glue an earring hook to the top of a Lego brick to make a pair of earrings, or attach a necklace chain to a Lego minifigure to make a pendant.
Step 3: Let it Dry
Allow the glue to dry completely before wearing your Lego jewelry.
Notes
Did you create this craft? If so, we would love to hear from you! Please feel free to leave a comment on the blog or share a photo of your creation on Pinterest.
Recommended Products
Thank you for supporting our family-owned business!
Whether it’s learning how to fold intricate shapes or creating three-dimensional objects from paper; there’s always something new waiting for you in this world of crafting!
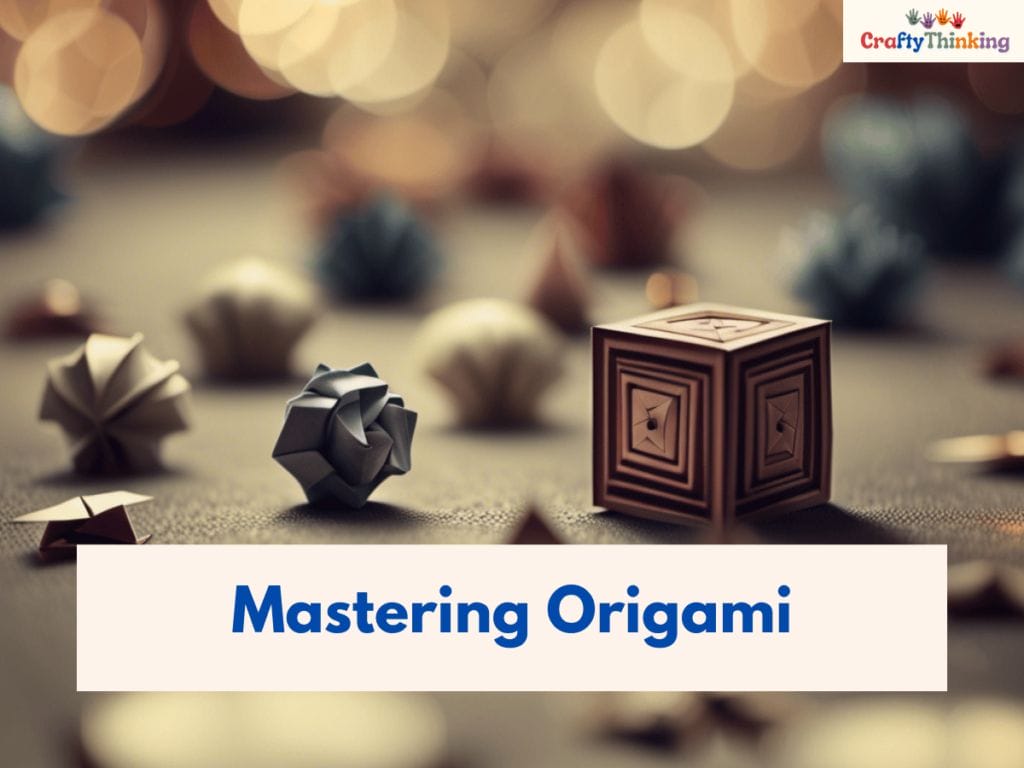
Mastering Origami: Fun Crafts for Tweens
If you’re looking for a fun and challenging craft that will push your creativity to new heights, mastering origami is the perfect activity for tweens like yourself.
With just a piece of paper and some patience, you can create intricate designs such as a snowflake or an animal figurine.
Origami is not only an enjoyable activity but also improves your spatial reasoning skills and boosts your confidence in problem-solving.
- To get started with origami, you’ll need step-by-step instructions that are easily available online or in books.
- You can start with simple designs such as bookmarks or string art before moving on to intermediate ones like Lego-inspired creations or jar decorations with glitter or dye.
- You can even join an origami club where you can meet other tweens and teens who share your interest.
- Origami provides endless opportunities to unleash your creativity and explore new ideas.
- So grab some colorful paper, follow the steps carefully, and watch as each fold transforms into something beautiful right before your eyes!
- And if you want to take it up a notch, combine different origami designs to create your own unique masterpiece!
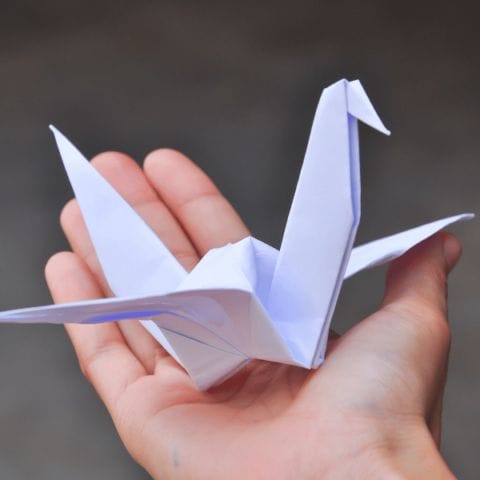
How to Make a Crane Origami
The origami crane is one of the most iconic and well-known origami models. It symbolizes hope, peace, and healing.
The crane is often associated with the story of Sadako Sasaki and the thousand origami cranes.
It's said that anyone who folds a thousand origami cranes will be granted a wish.
Materials
- A square piece of origami paper. If you don't have origami paper, any lightweight paper will do. Just ensure it's a perfect square.
- A flat surface to fold on.
Instructions
1. Starting Point:
- Follow the directions Here: Origami Crane
- You can also follow along below.
- Begin with a square piece of paper, colored side facing up.
2. Initial Folds:
- Fold the top corner of the paper down to the bottom corner.
- Crease and then unfold.
- Next, fold the paper in half sideways.
3. Preparation for Base:
- Turn the paper over to the white side.
- Fold the paper in half, crease well, and open.
- Then fold again in the opposite direction.
4. Creating the Base:
- Using the creases you've made, bring the top three corners of the model down to the bottom corner.
- Flatten the model.
5. Central Creases:
- Fold the top triangular flaps into the center and then unfold.
6. Top Fold:
- Fold the top of the model downwards, crease well, and then unfold.
7. Opening the Flap:
- Open the uppermost flap of the model, lifting it upwards.
- As you do this, press the sides of the model inwards.
- Flatten it down, ensuring you've creased it well.
8. Repeating on the Other Side:
- Turn the model over and repeat steps 4-6.
9. Final Central Folds:
- Fold the top flaps into the center.
10. Leg Folds:
- Fold both 'legs' of the model upwards, crease them very well, and then unfold.
11. Shaping the Legs:
- Perform an inside reverse fold on the "legs" along the creases you've just made.
12. Final Touches:
- Inside, reverse fold one side to form the crane's head.
- Lastly, fold down the wings, and voilà!
- Your origami crane is ready to soar!
Remember, origami is as much about the journey as it is about the final product.
Enjoy each fold, and don't rush.
With practice, you'll find your cranes looking more refined and elegant.
Notes
Did you create this craft? If so, we would love to hear from you! Please feel free to leave a comment on the blog or share a photo of your creation on Pinterest.
Recommended Products
Thank you for supporting our family-owned business!
As much fun as it is mastering origami, sometimes you may crave more interactive crafts that allow for imaginative play. That’s where the craft of making puppets comes in handy!
In the next section, we’ll show you how to craft your own puppet using materials readily found around the house.
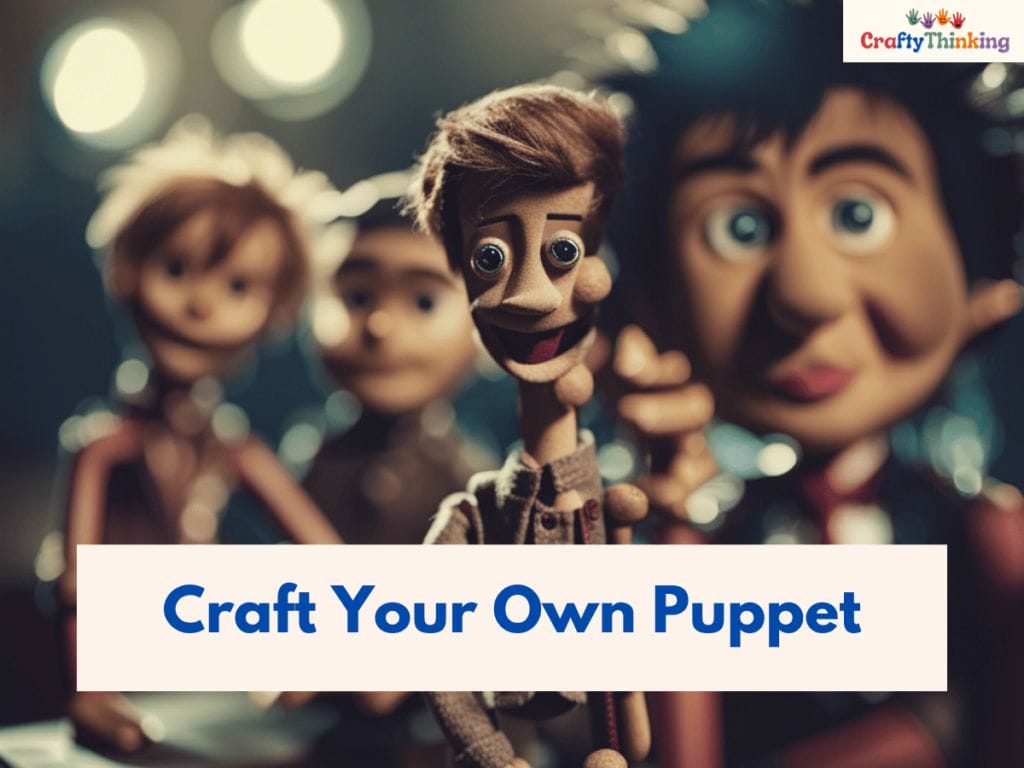
Craft Your Own Puppet: An Interactive Craft Idea for Boys
Crafting has always been a popular pastime for kids, especially those who love making things with their hands.
If your 9 year old boy is looking for a new craft project to try, how about making his own puppet?
This interactive craft idea is perfect for boys who like to use their imagination and create something unique.
- To make a puppet, you’ll need some basic materials like pom-poms, hot glue gun, paracord bracelets, finger puppets, and a bowl.
- You can choose different colors and patterns to customize your puppet’s look.
- Start by gluing two pom-poms together to form the head of your puppet.
- Then attach the body and arms using the hot glue gun. Use paracord or string to tie on the legs.
- Once you’ve finished assembling your puppet, it’s time to bring it to life!
- Use finger puppets or other small objects as props. You can even create a backdrop by drawing scenes on paper or cardboard.
- With your new homemade puppet in hand, you’re sure to have hours of fun entertaining friends and family.
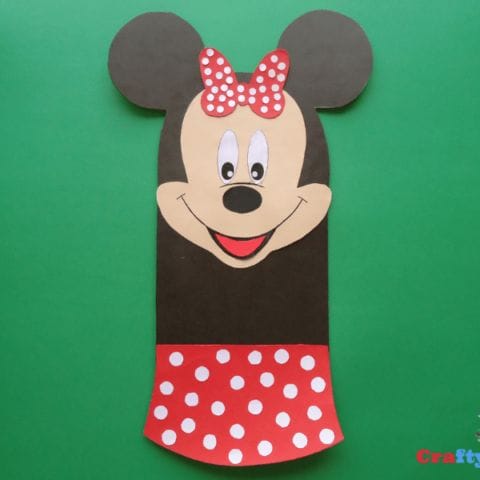
How to Make a Paper Bag Puppet Craft
Materials
- A paper bag
- Construction paper
- Scissors
- Glue
- Optional: googly eyes, yarn for hair, etc.
Tools
- Scissors
- Markers or crayons
Instructions
Step 1: Create the Puppet's Face
On the bottom flap of the paper bag (the side that will be the puppet's face), draw or glue on eyes, a nose, and a mouth. If you have googly eyes or other materials, you can use these to add more detail.
Step 2: Create the Puppet's Body
Use the construction paper to cut out clothing or other accessories for your puppet. Glue these onto the paper bag.
Step 3: Add Hair
If you want your puppet to have hair, cut strands of yarn and glue them to the top of the puppet's head.
Step 4: Let it Dry
Allow the glue to dry completely before using your puppet.
Notes
Did you create this craft? If so, we would love to hear from you! Please feel free to leave a comment on the blog or share a photo of your creation on Pinterest.
Recommended Products
Thank you for supporting our family-owned business!
As much as boys enjoy crafting their own puppets, they also love quirky crafts that reflect their personality, such as spider web bookmarks!
Keep reading below for more ideas about fun crafts that will keep them engaged while honing their creativity skills.

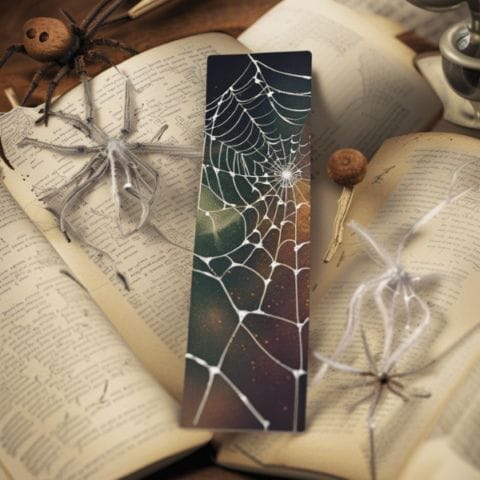
Spider Web Bookmarks: Quirky Crafts for Boys
Spider Web Bookmarks are the perfect quirky craft for boys who want to spin their own personalized web of creativity and adventure.
- With just some yarn, cardboard, and scissors, your child can create something truly unique.
- Adding a bit of food coloring to the yarn will give it an extra pop of color that’s sure to catch anyone’s eye.
- This easy but cool craft is perfect for little hands or kids who are ready for something a bit more challenging.
- To make the bookmarks even more exciting, add in some parachute cord to create a spider web effect.
- Free printables can also be found online to give children a template to work with.
- For an added touch, spray paint the finished bookmarks with metallic paints or glitter sprays.
- Not only will this make them stand out even more, but it will also ensure that they last longer and don’t get damaged easily.
- Creating these spider web bookmarks is not only fun and engaging but also allows children to express their creativity in new ways.
As you finish up creating your spider web bookmarks, you may find yourself wanting to try another fun and easy art project – making snowflakes!
How to Make Spider Web Bookmarks
Materials
- Black construction paper
- White yarn
Tools
- Scissors
- Hole punch
Instructions
Step 1: Cut Out a Bookmark Shape
Cut a rectangle out of the black construction paper to be the size of your bookmark.
Step 2: Punch Holes
Punch holes around the edges of the bookmark.
Step 3: Thread the Yarn
Thread the white yarn through the holes to create a spider web pattern.
Step 4: Secure the Ends
Tie off the ends of the yarn to secure your web.
Notes
Did you create this craft? If so, we would love to hear from you! Please feel free to leave a comment on the blog or share a photo of your creation on Pinterest.
Recommended Products
Thank you for supporting our family-owned business!
This Craft Ideas For 9 Year Old Boys activity is great for all ages and requires nothing more than paper and scissors.
Keep reading to discover how you can add some winter magic into your crafting time!
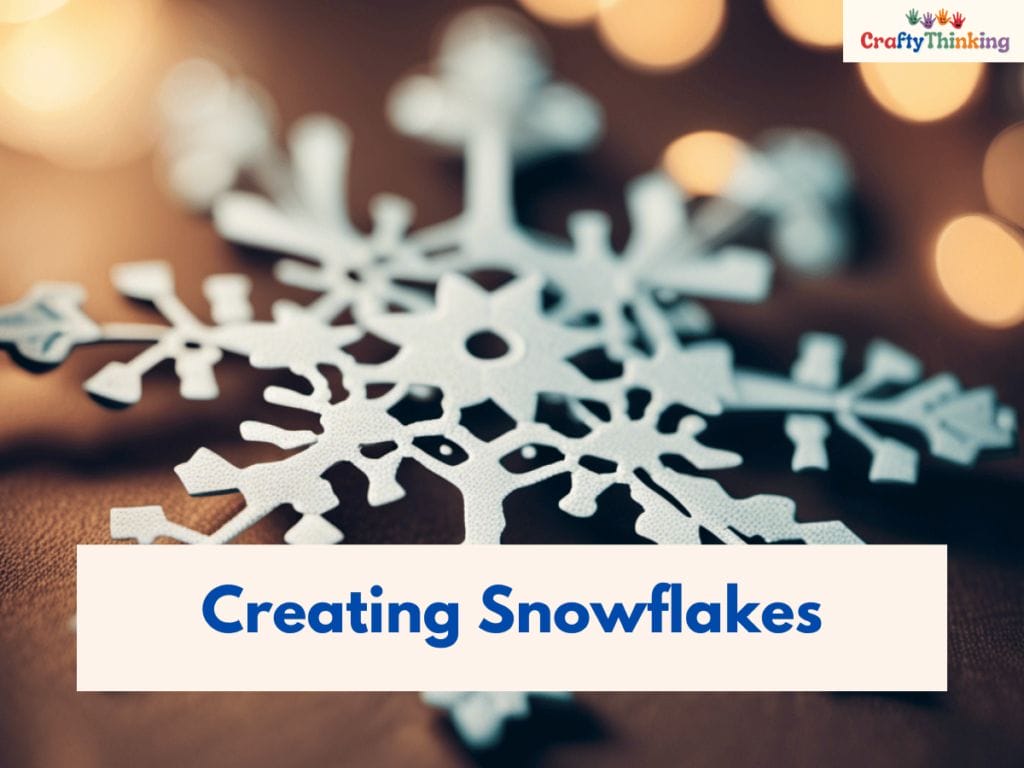
Creating Snowflakes: A Fun and Easy Art Project
You can easily add some winter magic to your crafting time with a fun and easy art project – creating beautiful snowflakes using just paper and scissors!
This craft idea is perfect for a 9 year old boy who loves to create and explore new things.
Snowflakes are not only fun but also educational, as they teach about symmetry, patterns, and shapes.
- To get started on this craft project, all you need is some white or colored paper in your child’s favorite colors, a pair of scissors, and some creativity!
- Cut the paper into squares of equal size, then fold each square into triangles.
- From there, simply cut out different shapes along the edges of the triangle to create unique snowflake designs.
- Once you’re done cutting, carefully unfold the triangle to reveal your beautiful snowflake!
- Creating snowflakes is always great because it allows children to express themselves artistically while getting into the festive spirit of winter.
- Hang them up around the house or use them as decorations for a winter-themed party.
You can even turn them into paper stars by gluing two together back-to-back with string in between!
So grab some paper and scissors and start creating magical snowflakes with your 9 year old boy today!

How to Make a Paper Snowflake
Materials
- A square piece of paper
Tools
- Scissors
Instructions
Step 1: Fold the Paper
Fold the paper in half diagonally to form a triangle. Fold it in half diagonally again to form a smaller triangle.
Step 2: Fold into Thirds
Fold the triangle into thirds.
Step 3: Cut the Excess
Cut off the excess paper at the end of your triangle so you're left with a smaller triangle.
Step 4: Cut Your Design
Cut small shapes out of the edges of the triangle. Be creative! The cuts you make will form the design of your snowflake.
Step 5: Unfold the Paper
Carefully unfold the paper to reveal your snowflake.
Notes
Did you create this craft? If so, we would love to hear from you! Please feel free to leave a comment on the blog or share a photo of your creation on Pinterest.
Recommended Products
Thank you for supporting our family-owned business!
DIY Wreaths: Seasonal Crafts for Tweens
If you’re looking for a fun and festive way to spruce up your home this holiday season, making DIY wreaths is the perfect activity for tweens.
Did you know that wreaths date back to ancient Greece and were originally used as symbols of victory?
Today, they make an easy and perfect craft for kids to use their creativity and get into the holiday spirit.
- Making a wreath is a great way to spend time with your tween while also getting some much-needed fresh air. You can use materials like twine, ribbon, or even branches from your yard. Floral wire is also handy if you plan on adding flowers or other decorations to your wreath.
- Once you’ve gathered all of your materials, it’s time to get creative! You can add pine cones, holly berries, or any other seasonal items that catch your eye.
- A super cute idea is using small flower pots as mini wreaths – simply wrap twine around the pot and add small decorations like mini ornaments or fake snowflakes. The possibilities are endless when it comes to DIY wreaths!
The possibilities are endless when it comes to DIY wreaths!

How to Make a DIY Wreath
Materials
- A wreath form (you can buy these at a craft store or make your own from cardboard)
- Decorative items (ribbon, ornaments, pinecones, etc.)
Tools
- Hot glue gun
Instructions
Step 1: Arrange Your Decorations
Before you start gluing, arrange your decorations on the wreath form to decide where you want everything to go.
Step 2: Glue the Decorations
Use the hot glue gun to attach your decorations to the wreath form.
Step 3: Let it Dry
Allow the glue to dry completely before hanging your wreath.
Notes
Did you create this craft? If so, we would love to hear from you! Please feel free to leave a comment on the blog or share a photo of your creation on Pinterest.
Recommended Products
Thank you for supporting our family-owned business!
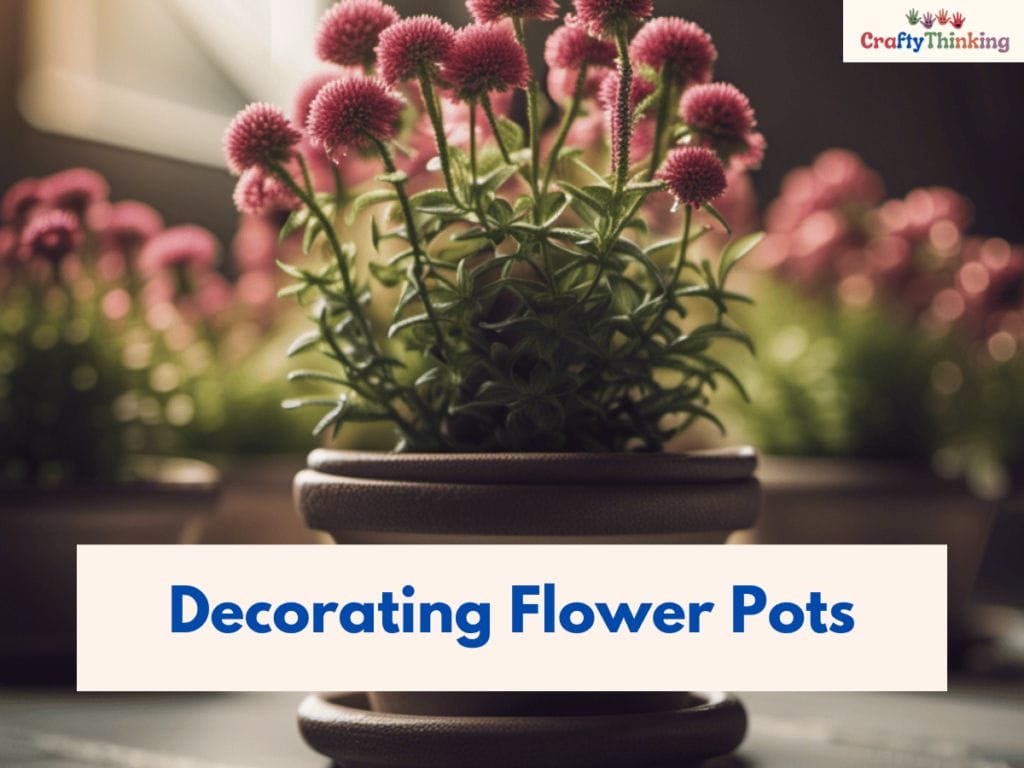
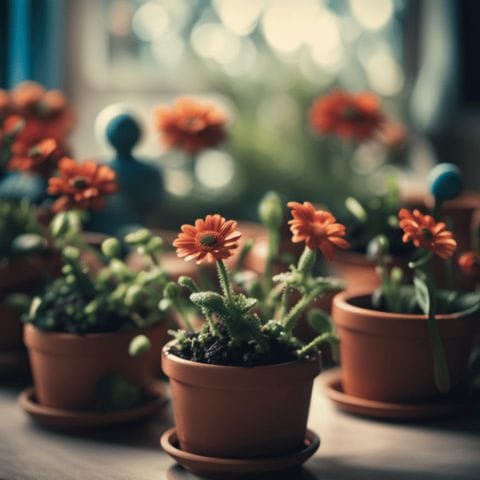
Decorating Flower Pots: A Craft Idea That Blooms
Looking for more craft ideas for your 9-year-old boy? Decorating flower pots is a brilliant idea that will bring out the creative side in your child.
This craft project can be done with just a few materials that are probably already around your home, making it an inexpensive activity to keep your kids busy during those times when they are ready to move on from their usual routine.
- To get started, you’ll need some small clay or plastic flower pots, acrylic paint in different colors, and some brushes.
- You might also want to add some moss and other natural elements like twigs or stones for added texture.
- First, encourage your child to choose a color scheme and then help them create a silhouette by painting the pot in one solid color and adding shapes or patterns with another color.
- Once the paint has dried, use hot glue to attach some moss around the base of each pot before planting a small plant inside.
- Your child will love seeing their creation come to life as the flowers grow and bloom over time!
- This is an easy project that doesn’t require any special skills or tools – perfect for young kids who want to try their hand at crafting something beautiful.
As you watch your little ones decorate flower pots with enthusiasm, it’s clear that there are many wonderful craft ideas out there for this age group! So why not explore more options?
How to Decorate Flower Pots
Materials
- A flower pot
- Acrylic paint
Tools
- Paintbrushes
- Optional: stencils, stickers, or other decorative items
Instructions
Step 1: Clean the Flower Pot
If your flower pot is not new, make sure to clean it thoroughly and let it dry before you begin decorating.
Step 2: Paint the Flower Pot
Paint the outside of the flower pot in your desired color. You might need to apply more than one coat of paint. Let the paint dry completely between each coat.
Step 3: Add Decorations
Once the paint is dry, you can add additional decorations. You could paint a design freehand, use stencils, or stick on stickers or other decorative items.
Step 4: Seal the Flower Pot
If you want your decorated flower pot to be waterproof, you can seal it with a clear acrylic sealer. Follow the instructions on the sealer's packaging.
Step 5: Let it Dry
Allow the sealer to dry completely before you use the flower pot.
Notes
Did you create this craft? If so, we would love to hear from you! Please feel free to leave a comment on the blog or share a photo of your creation on Pinterest.
Recommended Products
Thank you for supporting our family-owned business!
In our next section about tween craft ideas: fun crafts for the 8-12 age group, we’ll showcase even more exciting projects that you can try with your kids at home.
Tween Craft Ideas: Fun Crafts for the 8-12 Age Group
Get ready to unleash your inner creativity and have a blast with these exciting craft ideas that are perfect for 9 year old boys!
These crafts fall under the category of tween craft ideas, which cater to the 8-12 age group.
Little guys at this age love creating something that is both fun and functional, so we’ve put together some great options that they’ll be sure to enjoy.
DIY lantern
First up, let’s talk about making a lantern out of an egg carton.
All you need is an empty egg carton, paint or markers, glue, string or ribbon, and a battery-operated tea light.
- Cut off the top of the egg carton and decorate it however you like.
- Glue a piece of ribbon to each corner on one end of the carton and then tie all four pieces together at the top in a knot.
- Finally, place the tea light inside the bottom section of the carton and hang your lantern up!
How to Make DIY Egg Carton Lantern
Materials
- An egg carton
- Paint
- A small candle or LED light
Tools
- Scissors
- Paintbrushes
Instructions
Step 1: Cut the Egg Carton
Cut out one of the cups from the egg carton.
Step 2: Paint the Egg Carton Cup
Paint the outside of the egg carton cup in your desired color or design. Let the paint dry completely.
Step 3: Add the Light
Place a small candle or LED light inside the egg carton cup. If you're using a candle, make sure to keep an eye on it while it's burning to prevent any fire hazards.
Notes
Did you create this craft? If so, we would love to hear from you! Please feel free to leave a comment on the blog or share a photo of your creation on Pinterest.
Recommended Products
Thank you for supporting our family-owned business!
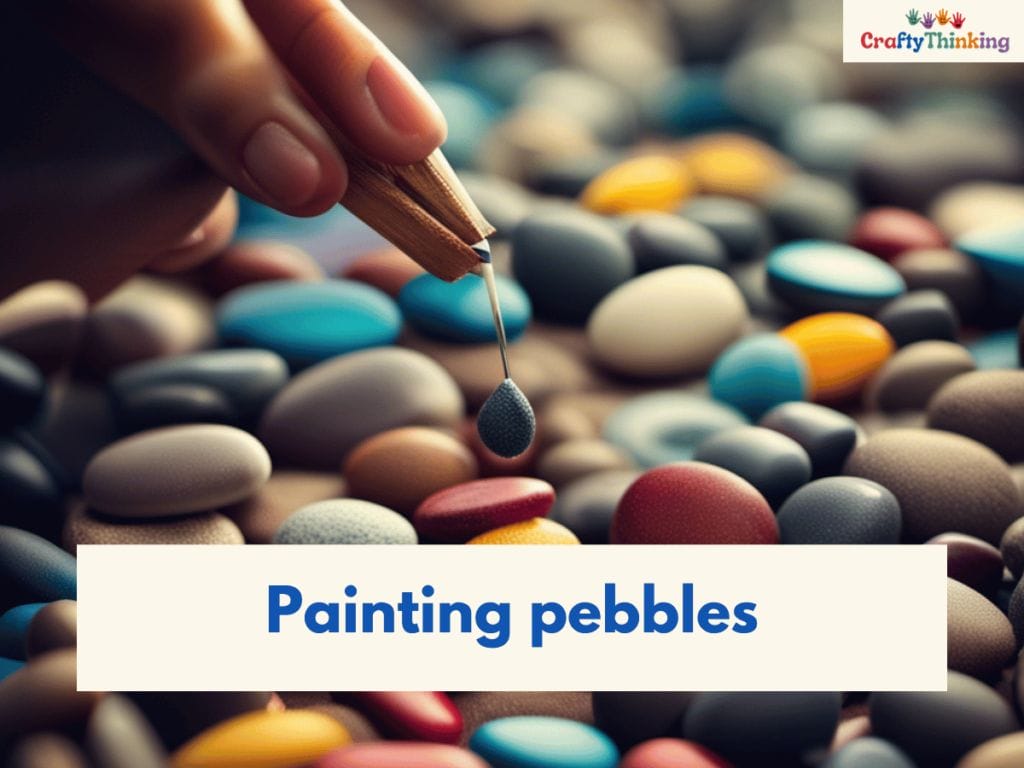
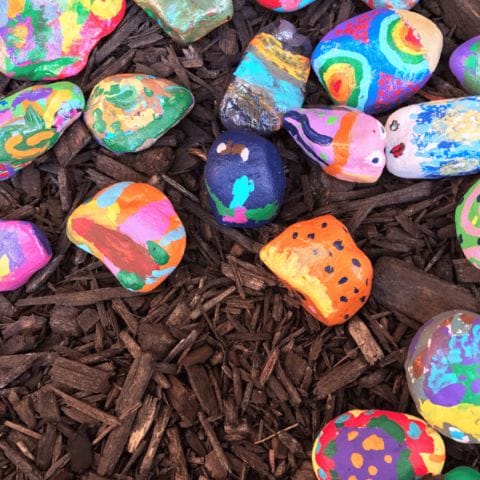
Painting pebbles
Next on our list is painting pebbles. This simple craft idea just requires some smooth rocks or pebbles from outside (or you can buy them at a craft store), acrylic paint, paintbrushes in various sizes, and water-resistant sealant spray (optional).
- Paint different designs or characters onto each rock using bright colors.
- Once they’re dry, arrange them in your garden or use them as paperweights on your desk.
- Finally, let’s make some bubble solution!
- You’ll need dish soap (Dawn works best), corn syrup or glycerin (optional), water, and bubble wands (you can easily find these at most toy stores).
- Combine all ingredients in a large container and mix gently without shaking too much.
- Dip your wand into the solution and blow away!
Encourage your little guy to experiment with different shapes and sizes – it’s sure to provide hours of entertainment!
How to Paint Pebbles
Materials
- Pebbles
- Acrylic paint
- Clear sealant (optional)
Tools
- Paintbrushes
Instructions
Step 1: Clean the Pebbles
Wash the pebbles and let them dry completely before painting.
Step 2: Paint the Pebbles
Paint the pebbles in your desired colors and designs. Allow the paint to dry.
Step 3: Seal the Pebbles
If you want your painted pebbles to be weatherproof, you can spray them with a clear sealant. Let the sealant dry.
Step 4: Display Your Pebbles
Once the paint (and sealant, if used) is dry, your pebbles are ready to display!
Notes
Did you create this craft? If so, we would love to hear from you! Please feel free to leave a comment on the blog or share a photo of your creation on Pinterest.
Recommended Products
Thank you for supporting our family-owned business!
Now that you’ve tried out these exciting tween craft ideas for boys aged 8-12, it’s time to move on to the next section: yarn crafts.
Creating beautiful art projects with yarn is easier than you may think – keep reading to find out how!
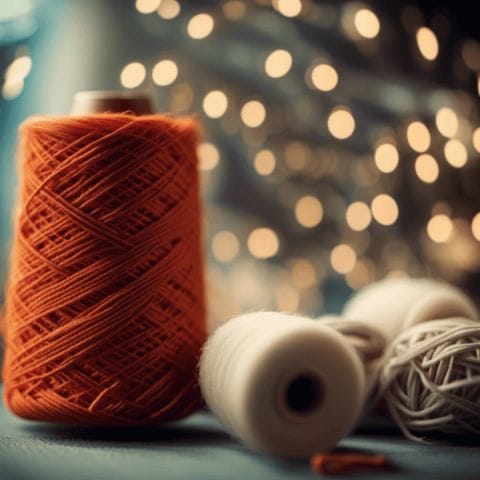
Yarn Crafts: Creating Beautiful Art Projects for Boys
If you’re looking for a way to keep your 9 year old boy entertained, look no further than yarn crafts.
They’ll love the opportunity to create beautiful art projects using this versatile material.
Not only is it a great way to pass the time on rainy days or when they’re feeling bored, but it’s also a way for kids to express their creativity and make something truly unique.
Homemade backpack
One fun project that your child can try is making a whole backpack out of yarn. This might sound like an ambitious goal, but with some patience and practice, it’s definitely achievable!
Your child can start by learning basic knitting or crocheting techniques and then move on to more advanced patterns as they gain confidence.
A homemade backpack is not only functional but also looks great and will give your child a sense of pride in their creation.
Edible yarn crafts
Another option for working with yarn is creating edible crafts. Yes, you read that right – there are actually ways to use yarn in the kitchen!
For example, your child can make colorful candy necklaces by stringing pieces of licorice onto strands of yarn.
It’s a fun activity that combines crafting with snacking – what could be better? Be sure to supervise younger children closely during this activity so they don’t accidentally ingest any bits of yarn.
How to Make Yarn Crafts
Materials
- Yarn
- Optional: cardboard, craft glue
Tools
- Scissors
Instructions
Step 1: Choose Your Craft
Decide what you want to make with your yarn. This could be a pom-pom, a braided bracelet, a yarn painting, or anything else you can think of.
Step 2: Create Your Craft
Follow the instructions for your chosen craft. This might involve cutting, braiding, gluing, or wrapping the yarn.
Step 3: Finish Your Craft
Depending on your craft, you might need to tie off the yarn, let glue dry, or perform some other finishing step.
Notes
Did you create this craft? If so, we would love to hear from you! Please feel free to leave a comment on the blog or share a photo of your creation on Pinterest.
Recommended Products
Thank you for supporting our family-owned business!
When your child has had enough sugar rush from their edible craft project, consider moving on to decorating your own jar.
It’s a simple and fun craft idea that requires minimal supplies but yields impressive results. All you need is an empty glass jar (such as a mason jar), some acrylic paint or markers, and any other decorations you’d like (such as stickers or glitter).
Let your child’s imagination run wild as they come up with designs for their jar – they could create patterns, write inspiring messages, or even draw pictures of their favorite characters.
Once the paint has dried completely, the jars can be used as pencil holders, flower vases, or anything else your child can dream up!
Decorating Your Own Jar: A Simple and Fun Craft Idea
Decorating your own jar is a simple and fun way to unleash creativity – did you know that using colors can enhance one’s mood and promote positive emotions?
Here are three items you’ll need to get started: a clear jar, some paint, and brushes.
- First, clean the jar thoroughly with soap and water.
- Once dry, let your imagination run wild!
- You can paint anything from stripes to polka dots or even create a galaxy-inspired design.
- The best part about decorating your own jar is that it’s an activity that can be enjoyed by both boys and girls alike.
- Not only is it easy to do, but it also allows for individual expression and encourages creative thinking.
- Plus, once you’re finished painting your jar, you can use it for storage or as a decorative piece in your bedroom.
Another great thing about this craft idea is that there are no rules or restrictions when it comes to designing your jar – the possibilities are endless!
Whether you want to create something abstract or realistic, the choice is entirely up to you. So why not grab some supplies and start creating today?

How to Decorate Your Own Jar
Materials
- A glass jar
- Acrylic paint
- Optional: stencils, stickers, or other decorative items
Tools
- Paintbrushes
Instructions
Step 1: Clean the Jar
If your jar is not new, make sure to clean it thoroughly and let it dry before you begin decorating.
Step 2: Paint the Jar
Paint the outside of the jar in your desired color. You might need to apply more than one coat of paint. Let the paint dry completely between each coat.
Step 3: Add Decorations
Once the paint is dry, you can add additional decorations. You could paint a design freehand, use stencils, or stick on stickers or other decorative items.
Step 4: Seal the Jar
If you want your decorated jar to be waterproof, you can seal it with a clear acrylic sealer. Follow the instructions on the sealer's packaging.
Step 5: Let it Dry
Allow the sealer to dry completely before you use the jar.
Notes
Did you create this craft? If so, we would love to hear from you! Please feel free to leave a comment on the blog or share a photo of your creation on Pinterest.
Recommended Products
Thank you for supporting our family-owned business!
Now that you’ve finished decorating your own jar, let’s move on to our next craft idea: designing a necklace! This creative craft for tween boys will allow them to make a unique accessory that they can wear proudly.
With just a few materials such as beads, string, and scissors – anyone can create their very own necklace in no time at all.

Designing a Necklace: A Creative Craft for Tween Boys
Designing a necklace is a great creative craft idea for your 9-year-old boy. It’s perfect for those who are interested in fashion and love to accessorize their outfits.
Necklaces can be made with different materials including beads, strings, leather or even repurposed items like bottle caps.
This craft project will allow your child to express their artistic abilities while creating something that they can wear and showcase.
- To get started, gather all the necessary supplies such as beads (wooden, glass, or plastic), string (nylon cord or leather), scissors, and clasps.
- Encourage your child to think about the design of their necklace and what type of style they want to go for.
- They can choose from simple designs like single-strand necklaces with one central bead, or more intricate designs with multiple strands and varied colors.
- Next, have your child start designing by stringing the beads onto the cord or leather in any order they prefer.
- They can mix and match different shapes, sizes, and colors of beads to create a unique pattern.
- Once they’re happy with the arrangement of their necklace, tie off the ends with clasps or knots that secure everything in place.
Your child now has a stylish accessory that they designed themselves!
How to Design a Necklace
Materials
- String or cord
- Beads or pendants
Tools
- Scissors
Instructions
Step 1: Cut the Cord
Cut a piece of cord long enough to fit over your head when tied.
Step 2: Thread the Beads or Pendants
Thread the beads or pendants onto the cord in your desired pattern.
Step 3: Tie the Ends
Once you've added all your beads or pendants, tie the ends of the cord together to form a necklace.
Notes
Did you create this craft? If so, we would love to hear from you! Please feel free to leave a comment on the blog or share a photo of your creation on Pinterest.
Recommended Products
Thank you for supporting our family-owned business!
Now that you’ve completed this fun necklace-making project with your 9-year-old son, it’s time to move onto another exciting craft activity- tie and dye!
This colorful art project will allow your child to experiment with different color combinations while also learning about color theory. Let’s see how you can get started on this new adventure together!
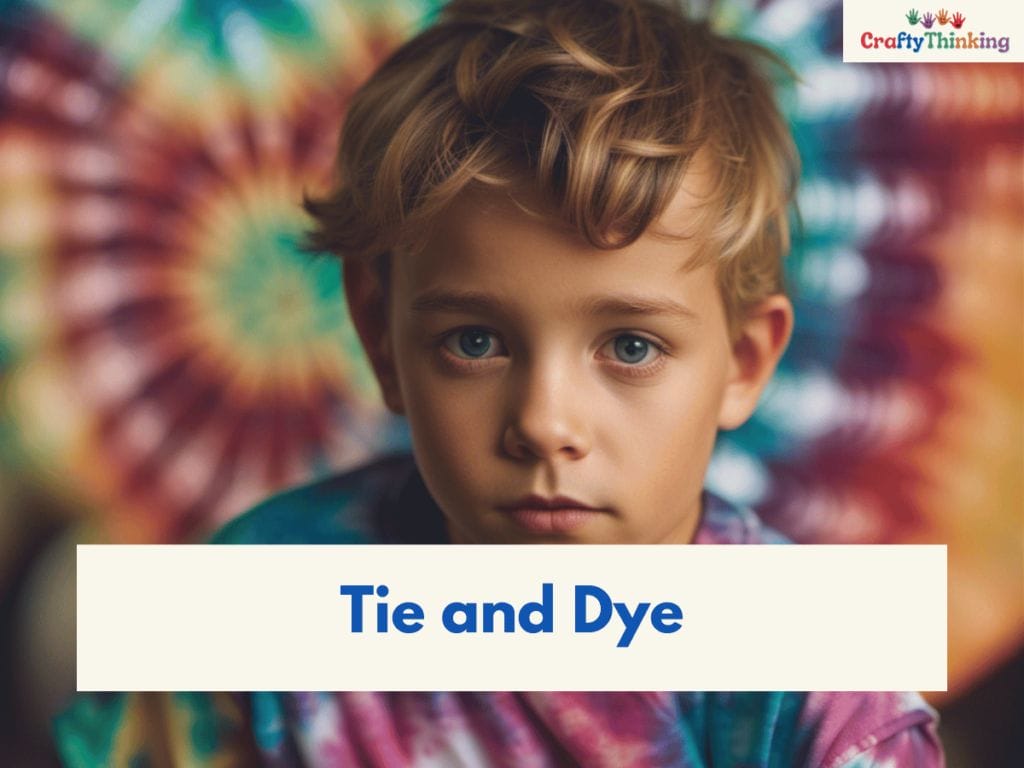
Tie and Dye: A Colorful Art Project for 9 Year Old Boys
Let’s dive into a vibrant art project that allows your 9-year-old son to explore color theory and create beautiful tie-dyed designs.
Tie and dye is not just for girls, but also an exciting craft idea for boys of this age. It encourages creativity, experimentation, and teaches them the importance of patience.
Here are four items to keep in mind when planning a tie-dye session with your child:
Choose the right materials:
You’ll need fabric dye, rubber bands, gloves, white t-shirts or other light-colored clothing items. Make sure you use high-quality dyes that provide rich hues.
Prep the workspace:
Cover the area with newspaper or plastic sheets to avoid staining any surfaces. Set up a table and arrange all the materials needed within reach.
Experiment with different patterns:
There are various techniques to create unique designs such as spiral, bullseye or crumple folds. Encourage your child to try out different styles and mix colors together.
Practice safety measures:
Dying can be messy so it’s important to wear gloves and aprons throughout the process. Also, follow instructions on how to use dyes safely.
Tie and dye is an excellent way for 9-year-old boys to learn about color mixing while having fun creating their own unique designs. It fosters self-expression through art and boosts their confidence in trying something new.

How to Make Tie and Dye
Materials
- A white t-shirt
- Fabric dye in your chosen colors
- Rubber bands
- Plastic squeeze bottles
- Plastic bags
- Rubber gloves
Instructions
Step 1: Prepare the T-Shirt
Wet the t-shirt and wring out any excess water. Lay the t-shirt flat.
Step 2: Bind the T-Shirt
Choose a tie-dye technique and bind the t-shirt with rubber bands according to the technique's instructions.
Step 3: Mix the Dye
Follow the instructions on your fabric dye to mix the dye and water in your squeeze bottles.
Step 4: Apply the Dye
Wearing your rubber gloves, apply the dye to the t-shirt. Make sure to saturate all areas of the t-shirt.
Step 5: Let the Dye Set
Place the dyed t-shirt in a plastic bag and let it sit for 6-8 hours or overnight to allow the dye to set.
Step 6: Rinse and Wash
Rinse the t-shirt under cold water to remove excess dye, then remove the rubber bands. Wash and dry the t-shirt according to the fabric dye's instructions.
Notes
Did you create this craft? If so, we would love to hear from you! Please feel free to leave a comment on the blog or share a photo of your creation on Pinterest.
Recommended Products
Thank you for supporting our family-owned business!
Up next is crafting a lantern – another fun DIY project perfect for tweens who love experimenting with different materials!
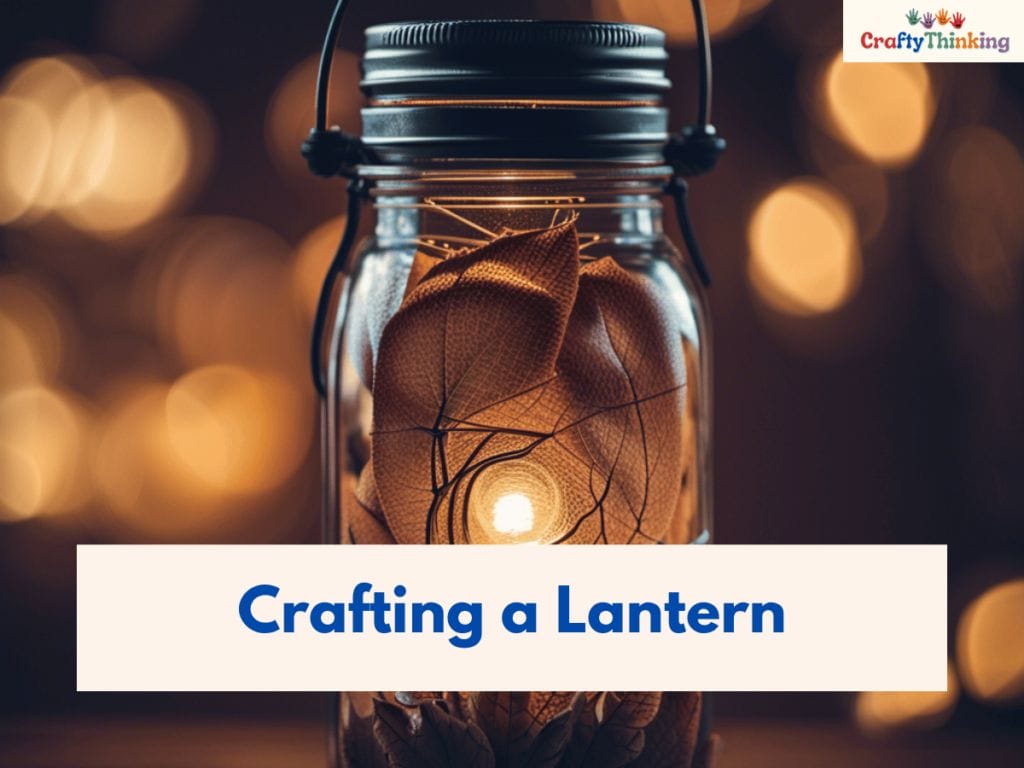
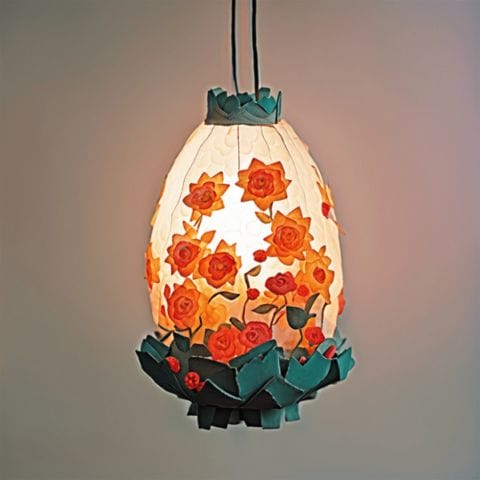
Crafting a Lantern: A Fun DIY Project for Tweens
Crafting a lantern is a fun DIY project that your 9 year old boy will surely enjoy. It offers a way for him to explore his creativity and imagination while learning new skills along the way.
This craft idea is perfect for tweens who are looking for an exciting activity to do during their free time.
To get started, here is a table of materials you will need:
| Materials | Tools |
|---|---|
| Mason jar | Scissors |
| Tissue paper or colored cellophane | Paintbrush |
| PVA glue or Mod Podge | LED tea light or fairy lights |
- First, clean the mason jar and remove any labels or stickers.
- Then, cut the tissue paper or cellophane into different shapes and sizes.
- Next, apply glue all over the outside of the mason jar using a paintbrush.
- Finally, stick the cut-out paper onto the glued surface in your desired pattern.
- Once done, let it dry completely before inserting an LED tea light or fairy lights inside the lantern.
Your kid can now enjoy their handmade creation by displaying it in their room as a night light or taking it outdoors during camping trips.
Crafting a lantern is just one of many creative projects that your 9 year old boy can do on his own.

How to Make a Mason Jar Lantern
Materials
- A mason jar
- Tissue paper
- Mod Podge or other craft glue
- A tea light or LED light
Tools
- A paintbrush
Instructions
Step 1: Prepare the T-Shirt
Wet the t-shirt and wring out any excess water. Lay the t-shirt flat.
Step 2: Bind the T-Shirt
Choose a tie-dye technique and bind the t-shirt with rubber bands according to the technique's instructions.
Step 3: Mix the Dye
Follow the instructions on your fabric dye to mix the dye and water in your squeeze bottles.
Step 4: Apply the Dye
Wearing your rubber gloves, apply the dye to the t-shirt. Make sure to saturate all areas of the t-shirt.
Step 5: Let the Dye Set
Place the dyed t-shirt in a plastic bag and let it sit for 6-8 hours or overnight to allow the dye to set.
Step 6: Rinse and Wash
Rinse the t-shirt under cold water to remove excess dye, then remove the rubber bands. Wash and dry the t-shirt according to the fabric dye's instructions.
Notes
Did you create this craft? If so, we would love to hear from you! Please feel free to leave a comment on the blog or share a photo of your creation on Pinterest.
Recommended Products
Thank you for supporting our family-owned business!
The next section will introduce another craft idea that nature lovers might enjoy – creating their own terrariums!
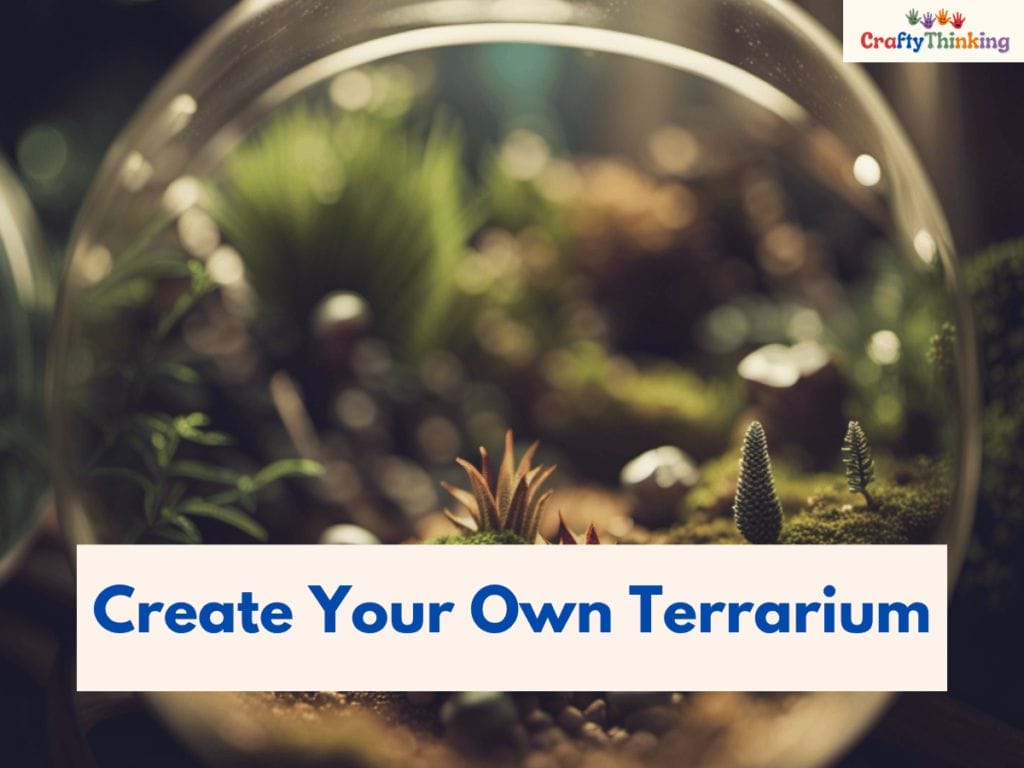
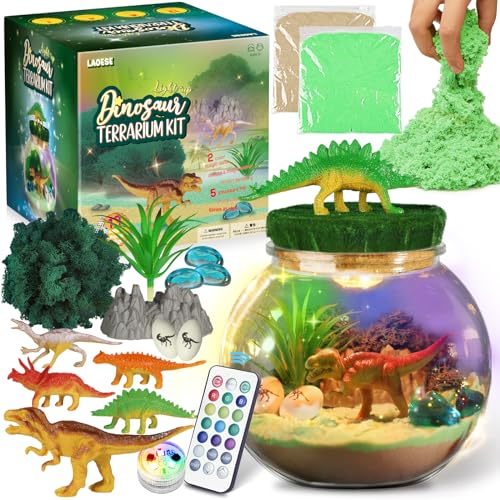
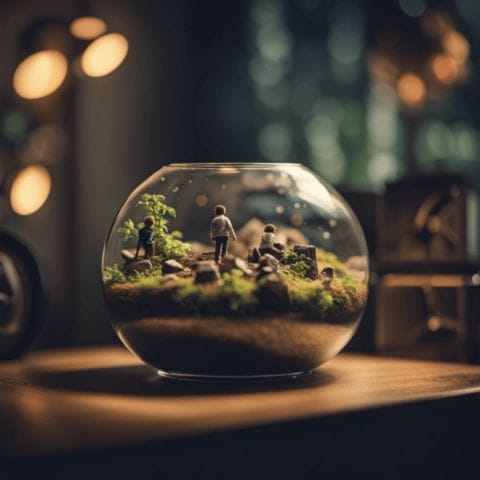
Create Your Own Terrarium: A Craft Idea for Nature Lovers
Creating your own terrarium can be a fun and educational activity for kids who love nature, and it’s been shown that having plants in the home reduces stress levels.
Terrariums are miniature gardens that can be made from any clear container, such as a glass jar or plastic bottle. Here’s how you can create your very own terrarium:
- Choose a container: Find a clear container that’s big enough to fit your plants but small enough to easily fit on a shelf or desk.
- Add rocks: Put some rocks at the bottom of your container to create drainage for water.
- Layer soil: Next, add layers of soil and sand into the container, making sure each layer is level.
Once you have created your base layers, it’s time to add some greenery! There are many types of plants that thrive in terrariums, such as succulents, ferns and mosses.
Be sure to choose plants that don’t require too much light or water so they can survive in their new environment. With care and patience, you’ll soon have a beautiful mini-garden right in your own home!
How to Create Your Own Terrarium
Materials
- A clear glass or plastic container
- Small rocks or pebbles
- Activated charcoal (optional)
- Potting soil
- Small plants or moss
- Decorative items (like small figurines, shells, etc.)
Instructions
Step 1: Create a Drainage Layer
Add a layer of small rocks or pebbles to the bottom of your container. This will help with drainage.
Step 2: Add the Charcoal
If you're using activated charcoal, add a layer on top of the rocks. This can help prevent mold and bad smells.
Step 3: Add the Soil
Add a layer of potting soil on top of the rocks and charcoal.
Step 4: Plant Your Plants
Plant your small plants in the soil. Be sure to leave some space between them for growth.
Step 5: Add Decorations
Add any additional decorations to your terrarium.
Step 6: Care for Your Terrarium
Place your terrarium in a location where it will get indirect sunlight and water it sparingly.
Notes
Did you create this craft? If so, we would love to hear from you! Please feel free to leave a comment on the blog or share a photo of your creation on Pinterest.
Recommended Products
Thank you for supporting our family-owned business!
Now that you’ve gotten the hang of creating something beautiful with nature-inspired crafts, it’s time to take it up another notch with paracord bracelets!
These cool crafts not only look great when worn but also serve as handy tools when out exploring in nature. Parachute cord (paracord) is durable and versatile material used by soldiers during World War II which makes them perfect for outdoor adventures.
So let’s get started on crafting these stylish bracelets!
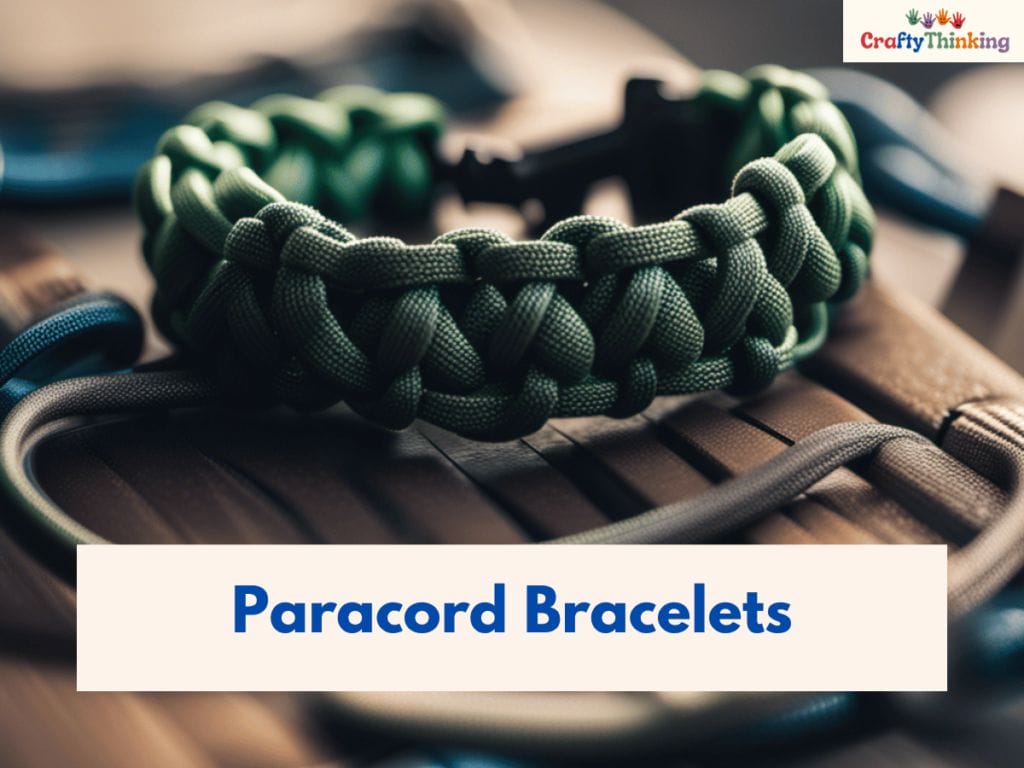
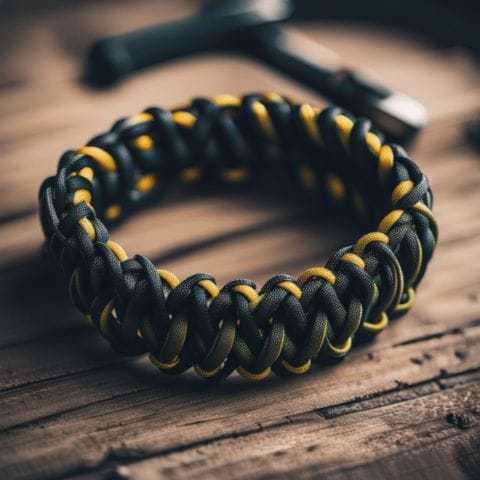
Paracord Bracelets: Cool Crafts for Boys
Boys can show off their adventurous side with paracord bracelets, which not only look great but also serve as useful tools when exploring the outdoors.
Paracord, also known as parachute cord or 550 cord, is a durable and versatile rope that can be used for various purposes such as tying up gear, building shelters, and even making snares for catching small game.
With just a few simple knots and some creativity, boys can make their own paracord bracelets that are both stylish and practical.
- To make a paracord bracelet, you’ll need some basic supplies such as paracord (about 8-10 feet), scissors, and a buckle.
- There are many different types of knots that can be used to create different patterns and designs on the bracelet.
- One popular knot is called the cobra stitch (also known as Solomon bar), which involves weaving two strands of paracord around the core strands in an alternating pattern.
- Boys can experiment with different colors and knot styles to create unique bracelets that reflect their individual style.
Not only is making paracord bracelets a fun craft activity for boys, but it also teaches them valuable skills such as knot-tying and problem-solving.
Plus, they get to wear their creations proudly on their wrist wherever they go! So why not try this cool craft idea with your 9-year-old boy today?
How to Make Paracord Bracelets
Materials
- Paracord
- A paracord buckle
- A lighter
Tools
- Scissors
Instructions
Step 1: Gather Your Materials
Step 2: Measure and Cut the Paracord
Measure your wrist and cut a piece of paracord that is about one foot longer than your wrist measurement.
Step 3: Thread the Paracord Through the Buckle
Thread one end of the paracord through one half of the buckle, then tie a knot to secure it.
Step 4: Weave the Paracord
Weave the paracord into your desired pattern. There are many tutorials available online for different paracord bracelet weaves.
Step 5: Attach the Other Half of the Buckle
Once you've finished weaving, thread the ends of the paracord through the other half of the buckle and tie a knot to secure them.
Step 6: Trim and Seal the Ends
Use the scissors to trim any excess paracord, then use the lighter to melt the ends to prevent fraying.
Notes
Did you create this craft? If so, we would love to hear from you! Please feel free to leave a comment on the blog or share a photo of your creation on Pinterest.
Recommended Products
Thank you for supporting our family-owned business!
And after you’re done crafting your bracelets, don’t forget to check out our next section on recycling an egg carton: a fun and eco-friendly craft.
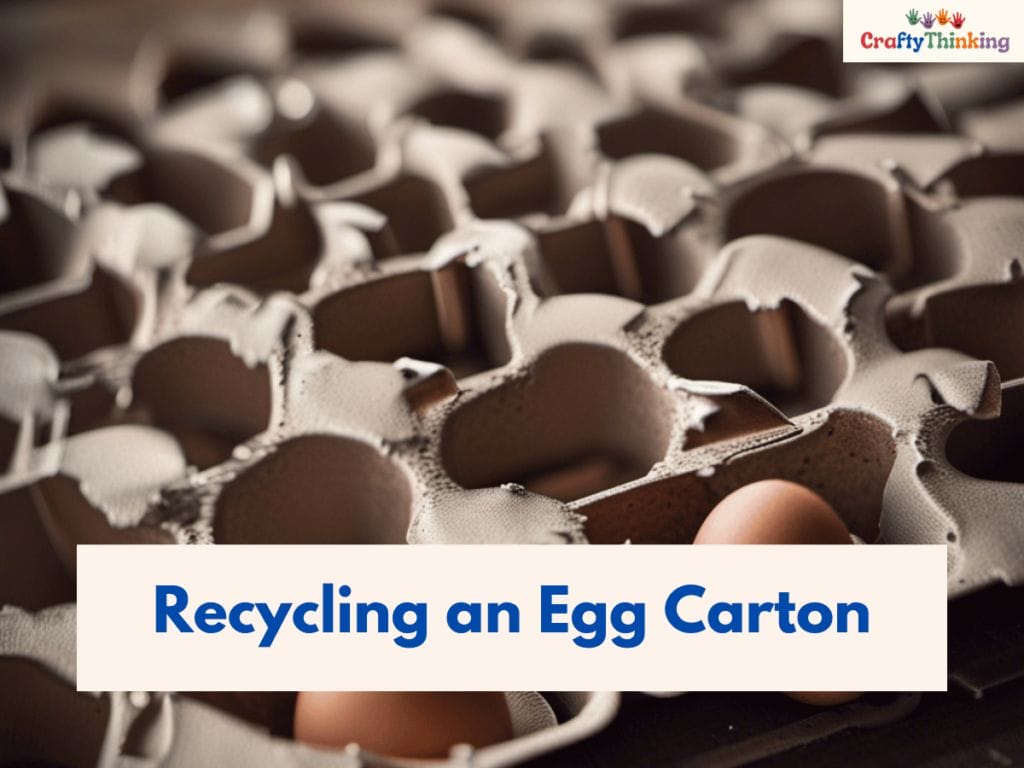
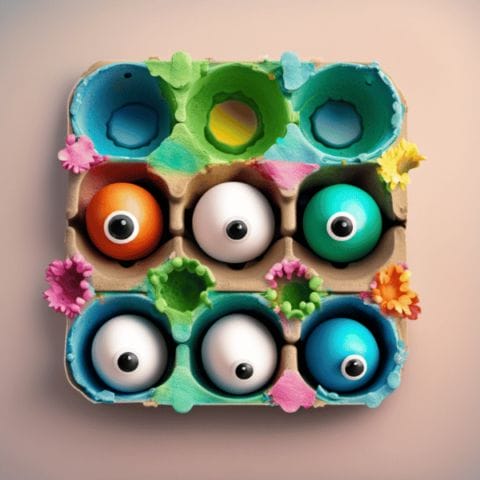
Recycling an Egg Carton: A Fun and Eco-Friendly Craft
Now that you’ve learned how to make cool paracord bracelets, let’s switch gears and talk about a fun and eco-friendly craft: recycling an egg carton.
This is a great way to teach your 9-year-old boy about the importance of sustainability while also encouraging his creativity.
- To start, gather some empty egg cartons from your fridge or local grocery store. Have your child cut out individual compartments using scissors or a box cutter.
- These can be painted with non-toxic paint or decorated with markers, stickers, and other craft supplies.
- Once the compartments are dry, they can be used for all sorts of things!
- They make great planters for small succulents or herbs, as well as mini storage containers for small items like jewelry or office supplies.
How to make an Egg Carton Craft
Materials
- An egg carton
- Paint
- Optional: googly eyes, pipe cleaners, or other decorative items
Tools
- Scissors
- Paintbrushes
Instructions
Step 1: Gather Your Materials
Step 2: Cut the Egg Carton
Cut the egg carton into individual cups. These will be the bodies of your crafts.
Step 3: Paint the Egg Carton Cups
Paint the outside of the egg carton cups in your desired colors. Let the paint dry completely.
Step 4: Add Decorations
Once the paint is dry, you can add additional decorations. For example, you could glue googly eyes onto the cups to make little creatures, or poke holes and insert pipe cleaners to create legs or antennae.
Step 5: Let it Dry
Allow any glue to dry completely before playing with your egg carton crafts.
Notes
Did you create this craft? If so, we would love to hear from you! Please feel free to leave a comment on the blog or share a photo of your creation on Pinterest.
Recommended Products
Thank you for supporting our family-owned business!
This is a simple yet rewarding craft that your child will love doing again and again.
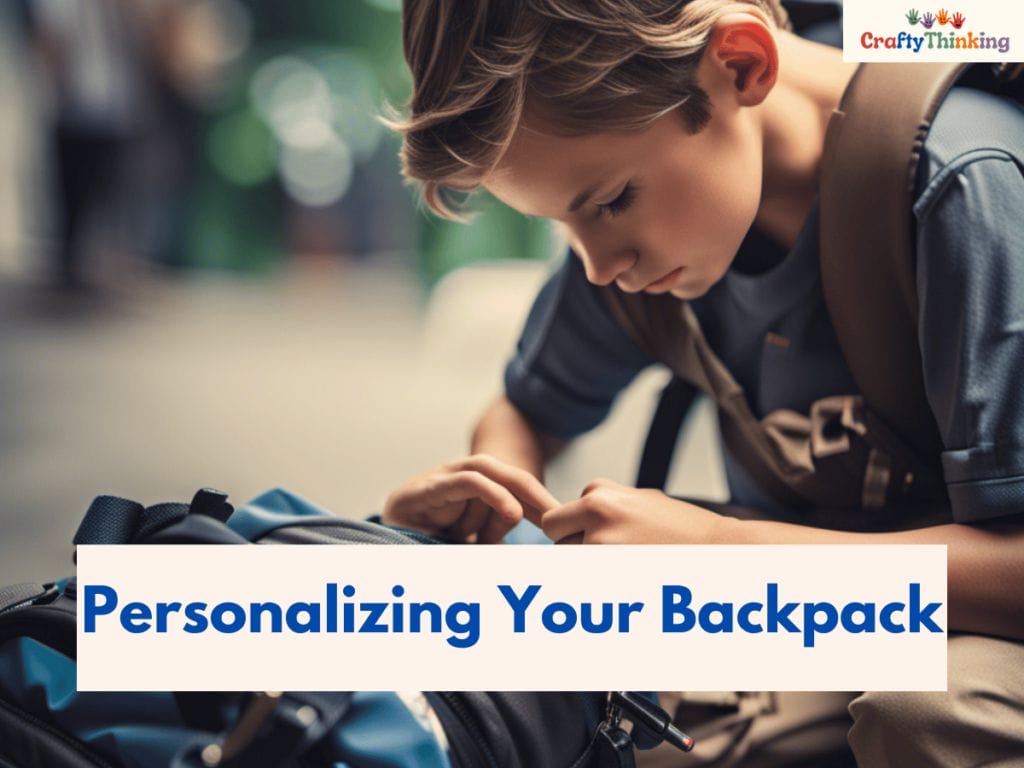
Personalizing Your Backpack: A Craft Idea That Stands Out
Want to make your backpack stand out? Jazz it up with some personal touches, like adding patches or pins that represent your interests, just like how you express yourself through fashion.
Draw designs and patterns on your backpack
You can also use fabric paint or markers to draw designs and patterns on your bag.
Make sure to choose colors that pop and reflect your personality. Don’t be afraid to get creative – the possibilities are endless!
Add iron-ons
Another fun way to personalize your backpack is by using iron-on transfers.
You can find them at craft stores or online, and they come in a variety of designs such as animals, sports logos, and popular characters from TV shows and movies.
Simply follow the instructions on the package and you’ll have a unique backpack in no time! Plus, iron-on transfers are durable and won’t easily peel off.
Attach keychains or charms
Adding keychains or charms is also a great way to make your backpack stand out. Use ones that match your interests or hobbies – for example, if you love soccer, add a soccer ball keychain.
Or if you’re into music, add a guitar charm. Not only do they look cool but they also help identify which bag is yours in crowded places like school hallways or airports.

How to Personalize Your Backpack
Materials
- A backpack
- Fabric paint or markers
- Optional: patches, buttons, or other decorative items
Tools
Instructions
Step 1: Gather Your Materials
Step 2: Plan Your Design
Decide what you want to add to your backpack. This could be a picture, a pattern, your name, etc.
Step 3: Paint or Draw Your Design
Use fabric paint or markers to add your design to your backpack. Allow the paint to dry.
Step 4: Add Decorations
If you want to add patches, buttons, or other items, you can sew or glue them onto your backpack.
Step 5: Let it Dry
Allow any glue to dry completely before using your backpack.
Notes
Did you create this craft? If so, we would love to hear from you! Please feel free to leave a comment on the blog or share a photo of your creation on Pinterest.
Recommended Products
Thank you for supporting our family-owned business!
Now that you know how to jazz up your backpack with personal touches, let’s move on to creating paper stars: a simple yet fascinating art project!

Creating Paper Stars: A Simple Yet Fascinating Art Project
Get ready to add some celestial flair to your life with this easy and captivating paper star art project!
Creating paper stars is a simple yet fascinating craft idea that can keep any 9-year-old boy engaged for hours. All you need is some colorful origami paper, scissors, and glue.
- To begin, cut the origami paper into several squares of equal size.
- Next, fold each square in half diagonally and then unfold it.
- Now fold the same corner to meet the center crease line so that you have a triangle shape.
- Repeat on the other side as well.
- Once done, fold both corners towards each other in a way that they meet at the topmost point of your folded triangle shape.
- Finally, tuck one corner inside the other and voila – you’ve created your first paper star!
- You can make multiple stars using different colored papers and sizes to create an impressive display or even use them as decorations for your child’s bedroom or play area.
This craft idea is not only fun but also helps develop fine motor skills and creativity in children.

How to Make Paper Stars
Materials
- A strip of paper (about 11 inches long and half an inch wide)
Tools
Instructions
Step 1: Gather Your Materials
Step 2: Make a Knot
Make a loop at one end of the strip to form a knot. Flatten the knot and you should have a pentagon shape with a short strip at the top and a long strip at the side.
Step 3: Fold the Paper
Fold the short strip down and tuck it into the pentagon. Then, fold the long strip around the edges of the pentagon, following its shape.
Step 4: Tuck in the Excess
When you reach the end of the strip, tuck the excess paper into the pentagon.
Step 5: Form the Star
To form the star, gently pinch the edges of the pentagon.
Notes
Did you create this craft? If so, we would love to hear from you! Please feel free to leave a comment on the blog or share a photo of your creation on Pinterest.
Recommended Products
Thank you for supporting our family-owned business!
Next up, let’s explore another quirky craft idea: finger puppets!
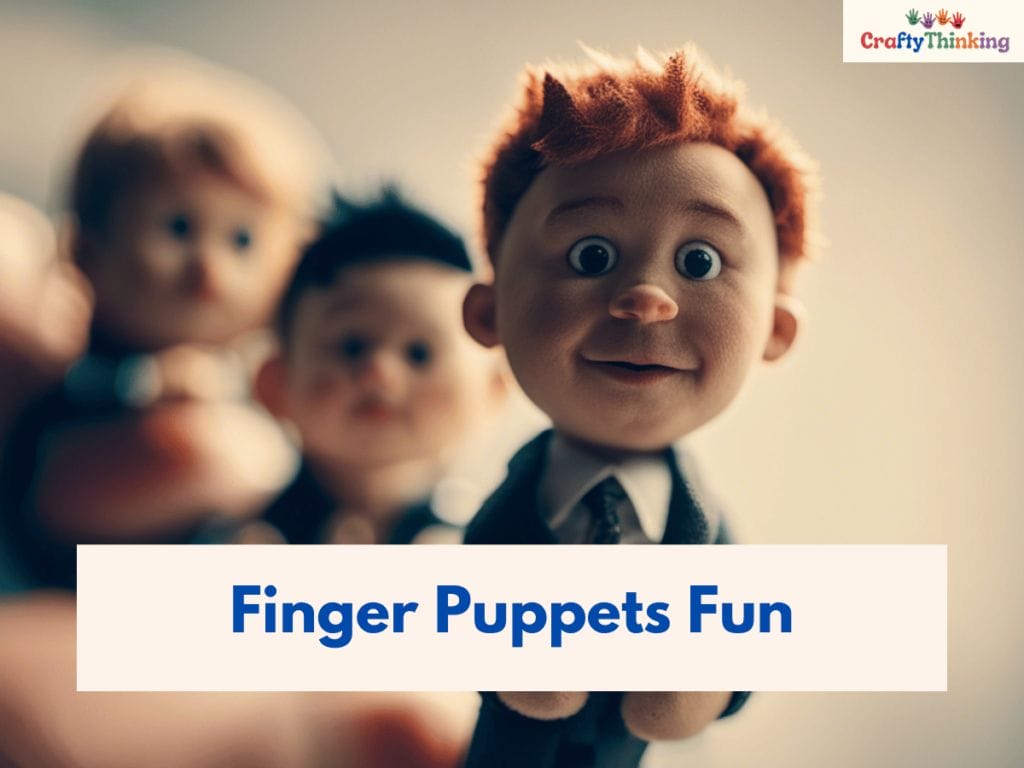
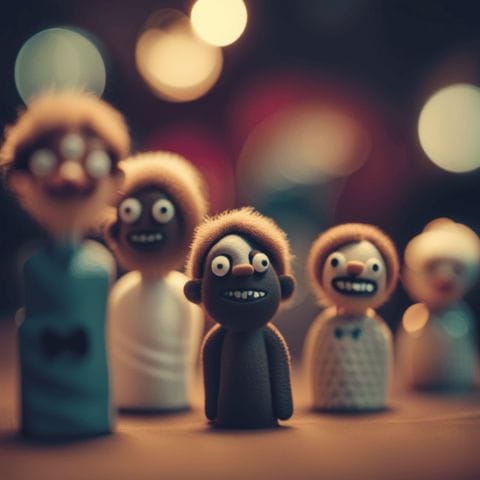
Finger Puppets Fun: Quirky Crafts for 9 Year Old Boys
You’ll love creating adorable finger puppets with your 9-year-old son – just grab some felt, glue, and googly eyes!
For example, Jack and his son made a set of farm animal puppets and had a blast putting on shows for the family.
Finger puppets are perfect because they’re easy to make, require minimal supplies, and can be customized to your child’s interests.
- To get started, choose a theme for your puppet set.
- You could create a cast of characters from your child’s favorite book or movie, or you could stick with classic animals like dogs, cats, and rabbits.
- Once you’ve decided on a theme, gather your supplies:
- felt in various colors (you can purchase pre-cut sheets at any craft store),
- scissors, glue (hot glue works best but white school glue will do),
- googly eyes (optional), and any other embellishments like buttons or yarn for hair.
- Next comes the fun part: cutting out the shapes for your puppets!
- Using templates found online or drawing freehand designs onto the felt sheets before cutting them out is an excellent way to ensure that each character is uniform in size and shape.
- After all pieces have been cut out appropriately then it’s time to assemble them using glue.
- Finally add some googly eyes as well as any other extra touches desired such as whiskers or little hats.
These finger puppets will provide hours of entertainment for both you and your child!
How to Make Finger Puppets
Materials
- Felt or colored paper
- Glue
- Optional: googly eyes, yarn for hair, etc.
Tools
- Scissors
Instructions
Step 1: Gather Your Materials
Step 2: Cut Out the Puppet Shape
Cut out a rectangle from the felt or paper. This will be the body of your puppet.
Step 3: Glue the Edges
Fold the rectangle into a tube and glue the edges together. This will form the body of the puppet.
Step 4: Add Decorations
Use glue to add decorations to your puppet, such as eyes, hair, or clothes.
Step 5: Let it Dry
Allow the glue to dry completely before using your puppet.
Notes
Did you create this craft? If so, we would love to hear from you! Please feel free to leave a comment on the blog or share a photo of your creation on Pinterest.
Recommended Products
Thank you for supporting our family-owned business!
Creating finger puppets is just one of many amazing crafts you can do with your 9-year-old boy – next up we’ll explore friendship bracelets: a craft that connects friends!
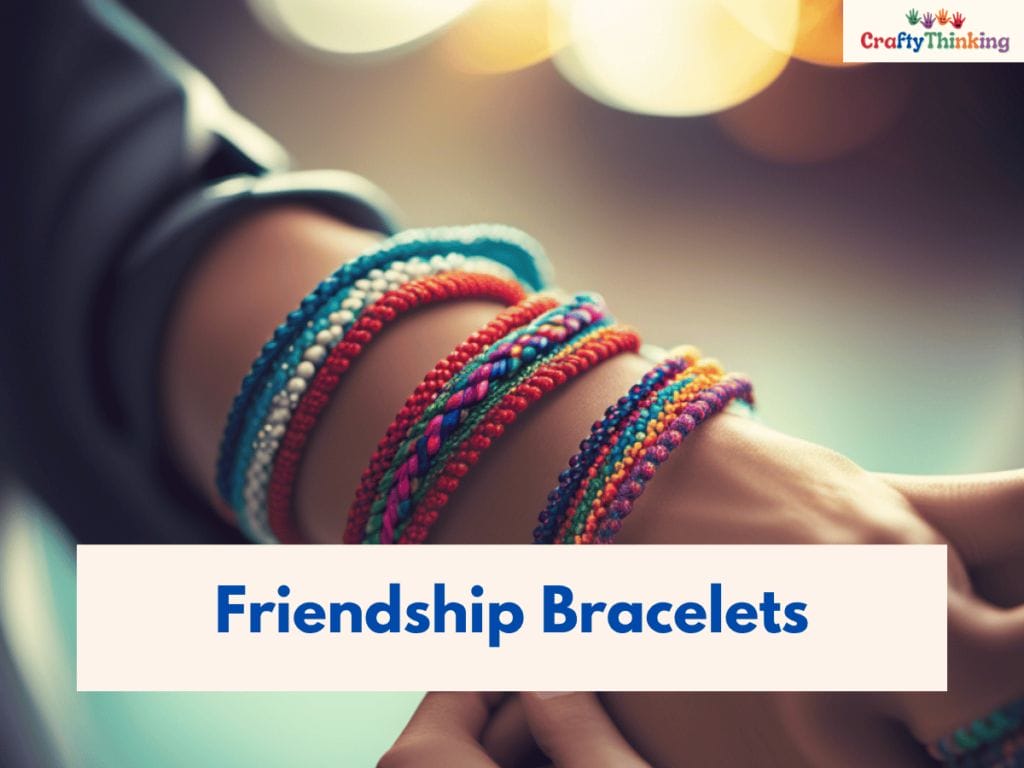
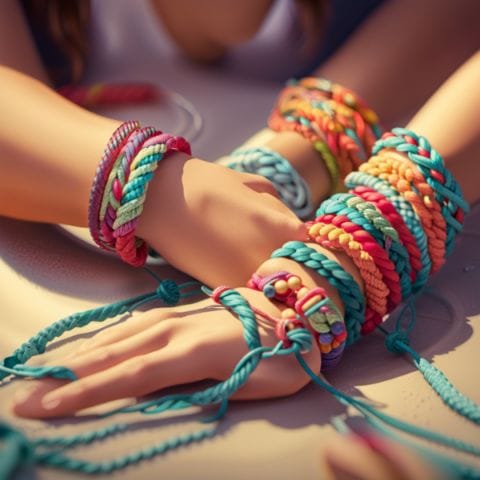
Friendship Bracelets: A Craft That Connects Friends
Hey there, are you looking for a fun way to connect with your child’s friends? Friendship bracelets are a great craft that can bring kids together and create lasting bonds.
Not only are they easy to make, but they’re also customizable, meaning each child can create their own unique bracelet to trade with their friends.
- To get started, all you need is embroidery floss or yarn in different colors.
- You’ll also need scissors and tape to secure the bracelet while it’s being made.
- There are many different patterns and styles of friendship bracelets that kids can learn how to make, from basic braids to more intricate designs like the chevron pattern.
- Making friendship bracelets is not only a fun activity for kids, but it also teaches them about patience, creativity, and problem-solving.
- It’s a great way for them to express themselves through art while connecting with others in a meaningful way.
- So gather some materials and start making some bracelets today!
Nurturing creativity with craft ideas for 9-year-old boys doesn’t have to be difficult or expensive.
Whether it’s finger puppets or friendship bracelets, simple crafts like these can provide hours of entertainment and encourage children to explore their artistic side.
How to Make Friendship Bracelets
Materials
- Embroidery floss in various colors
- Tape or a safety pin
Tools
- Scissors
Instructions
Step 1: Gather Your Materials
Step 2: Cut the Floss
Choose 2-6 colors of floss. Cut each color to a length of about 24 inches.
Step 3: Knot the Floss
Gather all the strands together, then tie a knot at one end, leaving a few inches of loose floss at the end. You'll use this to tie the bracelet around your friend's wrist.
Step 4: Secure the Floss
Use tape or a safety pin to secure the knotted end of the floss to a stable surface.
This will make it easier to weave the bracelet.
Step 5: Start Weaving
Choose one color of floss to start with. Make a "4" shape over the second color, then pull the first color under the second and through the loop.
Pull it up to tighten the knot.
Repeat this process until you've made a few knots of the same color, then switch to a new color.
Step 6: Continue Weaving
Continue weaving the floss, switching colors as desired, until the bracelet is long enough to fit around your friend's wrist.
Step 7: Finish the Bracelet
Once the bracelet is long enough, tie another knot at the end of the woven section.
Then, tie the loose ends of the bracelet together around your friend's wrist.
Notes
Did you create this craft? If so, we would love to hear from you! Please feel free to leave a comment on the blog or share a photo of your creation on Pinterest.
Recommended Products
Thank you for supporting our family-owned business!
So why not try out some new crafting ideas today? Who knows what kind of amazing creations your child will come up with next!
Nurturing Creativity with Craft Ideas for 9 Year Old Boys
Now that you’ve learned how to nurture creativity in your 9-year-old, it’s time to put those skills into action and watch your child’s imagination soar.
Encouraging your child to create something with their own hands can be a fun and rewarding experience for both of you.
Here are some craft ideas that are perfect for a 9-year-old boy:
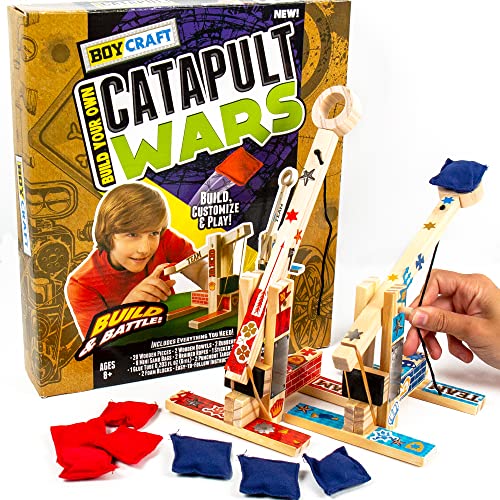
- Create a mini catapult using popsicle sticks, rubber bands, and small pom-poms or balls. This will not only allow him to use his creativity but also teach him about physics.
- Make a homemade birdhouse out of wood scraps or cardboard. Your child will learn about nature conservation while creating something useful for birds.
- Build a Lego maze where he can race marbles or other small objects through the twists and turns.
Crafting with your child is not just about keeping them busy; it’s an opportunity for bonding, learning, and self-expression.
When you encourage their creativity at this age, you’re setting the foundation for their future interests and passions.

Nurture Creativity with Craft Ideas
Materials
- paper
- glue
- paint
- beads
- fabric
- yarn
Tools
- Scissors
Instructions
Step 1: Provide a Variety of Materials
Gather a variety of craft materials such as paper, scissors, glue, paint, beads, fabric, yarn, and more.
The more diverse the materials, the more opportunities there are for creativity.
Step 2: Create a Craft Space
Designate a specific area in your home for crafting.
This could be a corner of a room, a dedicated craft table, or even a portable craft box.
Make sure it's a space where it's okay to make a mess.
Step 3: Encourage Exploration
Allow children to explore the materials on their own.
Resist the urge to direct their projects. Instead, let them decide what they want to create.
Step 4: Provide Inspiration
While it's important to let children create freely, it can also be helpful to provide some inspiration.
This could be craft books, images of different crafts online, or even taking a walk in nature to inspire craft ideas.
Step 5: Celebrate the Process, Not Just the End Product
Make sure to celebrate the creative process as much as the end product.
Show interest in what they're doing and ask them to tell you about their creation.
Step 6: Display Their Crafts
Show that you value their creativity by displaying their crafts.
This could be on the fridge, in a frame, or in a special craft showcase area in your home.
Step 7: Regularly Refresh Craft Supplies
Keep the craft area interesting and inspiring by regularly adding new craft materials.
This could be seasonal items like leaves in the fall or flowers in the spring, or other interesting items you come across.
Remember, the goal is to nurture creativity, not to produce perfect crafts.
Encourage risk-taking, experimentation, and most of all, fun!
Notes
Did you create this craft? If so, we would love to hear from you! Please feel free to leave a comment on the blog or share a photo of your creation on Pinterest.
Recommended Products
Thank you for supporting our family-owned business!
So go ahead and try out these craft ideas with your 9-year-old boy – who knows what amazing things they might create!
Frequently Asked Questions
Find answers to your most pressing questions about craft ideas for 9 year old boys. Get tips, ideas and advice from experienced parents and educators today!
-
What are some other craft ideas for boys?
Other craft ideas for boys could include making paper airplanes, designing a dream car out of cardboard, or creating a comic book from scratch.
They might also enjoy painting model figurines, constructing a birdhouse, or making a DIY catapult.
-
How can parents encourage their 9 year old boys to take an interest in crafting?
Parents can encourage crafting by providing a variety of materials for experimentation, connecting crafts to their child’s interests (like favorite books, movies, or games), and crafting alongside them.
Praise and display their creations to boost their confidence.
-
Are there any safety precautions that need to be taken when doing these crafts?
Yes, depending on the craft, safety precautions may include supervision with sharp tools like scissors or needles, wearing protective clothing or eyewear when working with certain materials, or ensuring good ventilation when using glue or paint.
-
Can crafts be done with a group or is it better to do them individually?
Many crafts can be done either individually or as a group. Group crafting can be a great option for birthday parties or playdates, while individual crafts can be a calming, focused activity for quieter times.
-
How long do crafts typically take to complete?
The completion time can vary greatly depending on the complexity of the craft. Some crafts might take as little as 15 minutes, while others, particularly those with drying or setting times, could take several hours or be spread over multiple days.
-
What crafts can a 9 year old do?
A 9-year-old can do a variety of crafts, including but not limited to, painting, sculpting with clay, making jewelry, constructing with cardboard, and creating origami.
-
What crafts do boys enjoy?
Boys often enjoy crafts that involve building, like constructing models or creating with LEGO. They might also enjoy painting, making comic books, origami, or crafts involving their favorite characters or themes.
-
What are some fun craft ideas for kids?
Fun craft ideas for kids can include making homemade slime, tie-dyeing t-shirts, creating mosaic art with eggshells, or constructing a DIY kite.
-
What can a 9 year old do when bored at home?
When bored at home, a 9-year-old might enjoy crafting, reading, drawing, playing board games, baking with a parent, or setting up a treasure hunt.
-
What do 9 year olds want to do?
At this age, kids often enjoy activities that involve some level of independence, like creating their own crafts, reading, playing with friends, exploring outside, or playing video games.
-
What should a 9 year old draw?
A 9-year-old might enjoy drawing their favorite characters, animals, landscapes, or scenes from their imagination.
Providing drawing prompts can also be a fun way to inspire creativity.
-
What are fun crafts for kids with disabilities?
Crafts that offer sensory experiences, like playdough, sensory bins, or finger painting can be enjoyable for kids with disabilities.
Adapting crafts to suit a child’s individual abilities and needs can make any craft a fun activity.
Wrapping Up Craft Ideas for 9 Year Old Boys
Well done! You’ve successfully armed yourself with craft ideas to keep your 9 year old boy engaged in creative and fun activities.
Who knew that pool noodles, beads, and paper stars could be transformed into masterpieces? And don’t forget about the timeless classic of Lego building – it’s so much more than just a toy.
Finger puppets are another quirky craft idea that can spark laughter and imagination. And if you want to strengthen friendships, why not try making friendship bracelets together?
With these craft ideas, there’s no limit to what your child can create. So go ahead and let their creativity run wild – who knows what amazing things they’ll come up with next!
If you enjoyed this article about the Best DIY Craft Ideas for 9 Year Old Boys and would like to learn more, please leave a comment below.